Table of Contents
Advertisement
Quick Links
Installation
A
Figure 1. Installing the bracket to the KVM.
Figure 2. Fixing the KVM into the rack.
screw A: M3.2 x 4.5 mm
B
screw B: M4 x 10 mm
■
Install each bracket using screws pro-
vided shown in Figure 1.
■
Fix the KVM into the rack
* Hardware for fi xing the mounting bracket
to the rack is not provided
Advertisement
Table of Contents

Subscribe to Our Youtube Channel
Related Manuals for CyberView IP-802


Summary of Contents for CyberView IP-802
- Page 1 Installation screw A: M3.2 x 4.5 mm screw B: M4 x 10 mm ■ Install each bracket using screws pro- vided shown in Figure 1. Figure 1. Installing the bracket to the KVM. ■ Fix the KVM into the rack * Hardware for fi...
-
Page 2: Package Content
IP-802 / IP-1602 Combo DB-15 IP KVM Package Content (only for rackmount KVM) KVM switch x 1 pc Screw M3.2 x 4.5mm x 4 pcs Screw M4 x 10mm x 8 pcs Bracket x 1 set User manual x 2 pcs... - Page 3 IP-802 / IP-1602 Combo DB-15 IP KVM Connection Local USB Console IP-802 IP Console Cascade Power Local USB Console IP-1602 IP Console Power Cascade Connection Rackmount KVM CE cable supports PS/2 or USB interface server Servers DB-15 KVM port Local USB...
- Page 4 IP-802 / IP-1602 Combo DB-15 IP KVM Connection KVM modules CE cable supports PS/2 or USB interface server Servers back DB-15 KVM port Power Cascade Connection CE-6 DB-15 KVM port CE-6 KVM cable KB MS USB server via CE-6 PS/2 server via CE-6...
- Page 5 IP-802 / IP-1602 Combo DB-15 IP KVM Cascade ■ Cascade up to 8 levels, 128 servers ■ Interconnection with Combo Cat6 KVM ■ Cascading multiple KVM by CBC-6 cable. Cascade Rackmount KVM IP-1602 Cascade CBC-6 cable Local USB CV-S1601 Console...
- Page 6 IP-802 / IP-1602 Combo DB-15 IP KVM Cascade ■ Cascade up to 8 levels, 128 servers ■ Interconnection with Combo Cat6 KVM ■ Cascading multiple KVM by CBC-6 cable. Cascade KVM modules back IP-1602 KVM module Cascade CBC-6 cable Local USB...
-
Page 7: Specifications
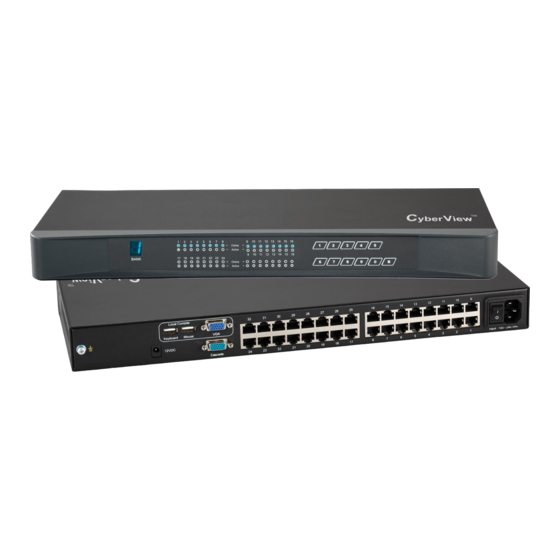
Dimension (W x D x H): 446 x 180 x 44 mm / 17.6 x 7.1 x 1.73 inch Net weight: IP-802: 4.5 kg / 10 lb, IP-1602: 5 kg / 11 lb Packing Information ▀ Dimension (W x D x H): 510 x 400 x 77 mm / 20.1 x 15.7 x 3 inch... - Page 8 KVM Button Combo KVM Usage Power ON ■ Turn off all servers and KVM switches ■ Make sure all cables / connectors are properly connected ■ Recommend Power ON sequence is monitor, KVM switch fi nally computer Front Panel - Port LED Indications 8 ports BANK Bank no.
- Page 9 Password Combo KVM Usage The password is disabled by default ( i.e. There is no password required when you power on the KVM switch for the first time) ■ Enable password Scroll Lock + Scroll Lock + U Press the KVM hotkey Scroll Lock + Scroll Lock + P Logout the KVM by pressing the hotkey In SUPERVISOR level, enter “00000000”...
-
Page 10: Osd Operation
KVM OSD Combo KVM Usage OSD Menu OSD operation next to the system name The PC is powered on next to the system name The PC is selected Access F1 MAIN MENU Logout the OSD menu Previous menu Cancel / Quit Enter Complete / Switch to selected port Switch to previous or next port... - Page 11 KVM Hotkey Combo KVM Usage Local Console Hotkey Hotkey Function Scroll Lock + Scroll Lock + Space Bar Calling OSD menu Right-button mouse + Esc Calling OSD menu Scroll Lock + Scroll Lock + Switch to previous port Scroll Lock + Scroll Lock + Switch to next port Scroll Lock + Scroll Lock + PgUp / PgDn...
- Page 12 IP Setting Combo KVM Usage Quick Installation Guide of IP KVM for remote access Please perform the follow steps 1. Power off all KVM hardware and connected devices. 2. Connect the power supply to IP KVM 3. Connect the monitor, keyboard & mouse to console port of IP KVM (not applicable to integrated LCD drawer version) 4.
- Page 13 IP Setting Combo KVM Usage 4. Remote access the IP-KVM switch via Web Using the HTTP protocol or a secure encrypted connection via HTTPS and entering the confi gured IP address of IP KVM switch into the web browser to remote access the IP KVM switch. With successful connection to IP KVM, the login page will show as below, then key in the default user name &...
-
Page 14: Optional Accessories
Optional Accessories Combo KVM Usage 1. Combo KVM cable 1.1 CE-6 6 feet 1.2 CE-10 10 feet 1.3 CE-15 15 feet 2. Cat5 cable 2.1 CU-3 3 feet 2.2 CU-6 6 feet 2.3 CU-10 10 feet 2.4 CU-15 15 feet 2.5 CU-33 33 feet 2.6 CU-66 66 feet 3. -
Page 15: Dc Power 12V, 24V, 48V Input
DC Power 12V, 24V, 48V Input Combo KVM Usage Model Input rating Input voltage: 12-Volt 24-Volt 48-Volt Input range: 9 ~ 18V 18 ~ 36V 36 ~ 75V Input current - No load 50 mA 50 mA 50 mA - Full load 4950 mA 2450 mA 1220 mA...
Need help?
Do you have a question about the IP-802 and is the answer not in the manual?
Questions and answers