
Related Manuals for Dahua DH-IPC-HF8242FP-FR


Summary of Contents for Dahua DH-IPC-HF8242FP-FR
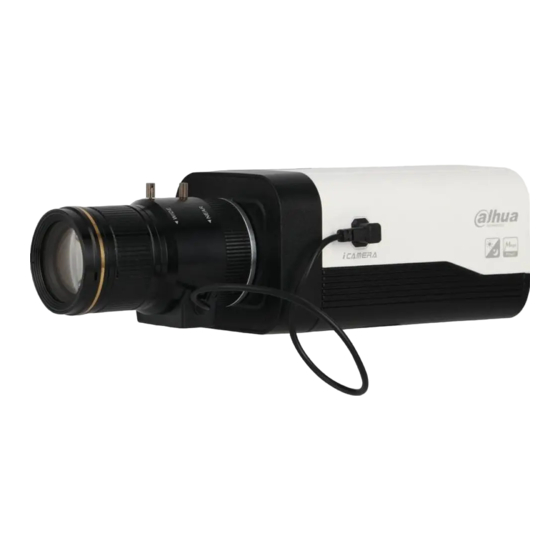
- Page 1 Dahua HD Box Network Camera Quick Start Guide Version 1.0.0 Zhejiang Dahua Vision Technology Co., LTD...
- Page 2 Welcome Thank you for purchasing our network cameras. This user’s manual is designed to be a reference tool for using your product. Please read the following safeguards and warnings carefully before you use this series product. Please keep this user’s manual well for future reference. Important Safeguards and Warnings Electrical safety ...
- Page 3 Do not directly touch the heat dissipation component of the device to avoid scald. Do not dismantle the device because there is no component that can be fixed by users themselves. Otherwise, it might cause water leakage or bad image due to unprofessional dismantling. ...
- Page 4 Disclaimer This manual is for reference only. Please refer to the actual product for more details. Minor differences might be found in user interface, and there might be deviation between the actual value of some data and the value provided in the manual due to the reasons such as the real environment is not stable.
- Page 5 Please refer to the disk for more details, check and download the corresponding user’s manual and tool. Before installation, please open the package and check all the components are included. Contact your local retailer as soon as possible if something is broken in your package. Accessory Name Amount Network Camera Unit...
-
Page 6: Table Of Contents
Table of Contents Device Structure ......................... 1 Rear Panel ........................1 Dimension ........................4 Device Installation ........................6 Install Device ......................... 6 Connect Device Cable ....................8 Connect Alarm Input / Output Port ................8 Adjust Device Angle ....................10 Network Configuration ...................... -
Page 7: Device Structure
1 Device Structure 1.1 Rear Panel Note: The figures are for reference only, which are used to know the functions of the rear panel. Different devices may have different structures of rear panel, please refer to the actual product for more details. - Page 8 Figure 1-3 Please refer to Table 1-1 for detail information. Port Name Port Function VIDEO OUT Video output port Output analog video signal. It can connect to TV monitor to check image. It can preview image via the DVR which supports HDCVI when it outputs HDCVI signal.
- Page 9 RS232 port Sending end of RS232 serial port Receiving end of RS232 serial port RS484 port RS485_B port, control external PTZ etc. RS485_A port, control external PTZ etc. IR light port External IR light signal control port. Alarm input port 1 It is to receive the on-off signal from the external alarm source.
-
Page 10: Dimension
Some devices are only equipped with 1 channel audio input port. /OPT Network port /MB LAN: Connect to standard Ethernet cable and optical fiber port provide PoE power supply function. OPT: Transmit MB Ethernet data. SD card port Connect it to SD card. Please make sure the device is securely earthed to prevent the thunderstorm strike when using the device. - Page 11 Figure 1-5...
-
Page 12: Device Installation
2 Device Installation 2.1 Install Device Note The follow installation figures are for reference only, please refer to the actual product for more details. Lens assembly mode may be different according to different devices, please refer to the actual lens for more details. - Page 13 Figure 2-2 Install auto aperture lens 1. Dismantle the protection cover on the device, align the lens with the lens mounting location of the device, rotate the lens clockwise till it is secured and installed properly. 2. Insert the plug of lens cable into the auto aperture lens connector of the device side panel.
-
Page 14: Connect Device Cable
Figure 2-3 Fix Device Step 1 Mark the mounting hole sites of the bracket on the mounting surface according to actual requirements, and dig mounting holes, then insert the expansion bolts into the mounting holes and lock them firmly. Step 2 Lead in external cable from the cable exit hole of bracket, you can select bottom cabling or side cabling. - Page 15 Note Some models do not support alarm function, which cannot be applied to this chapter. Step 1 Connect alarm input device to the alarm input of I/O port. When the input signal is idle or grounded, the device can collect the different statuses of the alarm input port.
-
Page 16: Adjust Device Angle
Note Please implement the step when it needs to use RS232 port, RS485 port, and alarm input output or power reverse output. Figure 2-6 Step 1 Use the small slotted screwdriver to press the corresponding button of cable groove. Step 2 Insert the cable into the groove. -
Page 17: Network Configuration
3 Network Configuration You can initialize the device and modify IP address via "Quick Configuration Tool"; you can also initialize device and modify IP address on the WEB interface. Please refer to the WEB Operation Manual in the disk for more details. Note ... -
Page 18: Modify Ip Address
Figure 3-1 Step 5 Set new password and confirm password, select Email Address and input email address. Note The password can be set as 8 to 32 characters; it can be a combination of number(s), letter(s) and symbol(s) with at least two kinds of them (excluding “'”,“"”,“;”,“:”,“&”). Please set password with high security according to the password strong and weak prompt. -
Page 19: Login Web Interface
Step 4 Select the devices whose IP addresses need to be modified, and then click The system will display the dialog box of Modify IP Address, which is shown in Figure 3-2. Figure 3-2 Step 5 Set the mode as Static, and enter the planned start IP, subnet mask and gateway. Note Set the mode as DHCP when there is DHCP server in the network, the device will automatically acquire IP address from the DHCP server. - Page 20 Figure 3-3 Zhejiang Dahua Vision Technology Co., Ltd Address:No.1199 Bin’an Road, Binjiang District, Hangzhou, PRC. Postcode: 310053 Tel: +86-571-87688883 Fax: +86-571-87688815 Email:overseas@dahuatech.com Website: www.dahuasecurity.com...
Need help?
Do you have a question about the DH-IPC-HF8242FP-FR and is the answer not in the manual?
Questions and answers