Table of Contents
Advertisement
Quick Links
GB
OPERATING INSTRUCTIONS
GB
OPERATING INSTRUCTIONS
Congratulations on your purchase of this high-quality ESYLUX product. To ensure correct device operation,
please read these installation/operating instructions carefully and keep them in a safe place for future
reference.
1 • SAFETY INSTRUCTIONS
WARNING! Work on electrical systems must be carried out by authorised personnel only, with
due regard to the applicable installation regulations. Switch off the power supply before installing
the system. Please observe the installation regulations laid out in the safety measure for
separated extra-low voltage (SELV).
Use this product only as intended (as described in the user instructions). Do not make any
changes or alterations as this will render any warrantees null and void. You should check the
device for damage immediately after unpacking it. If there is any damage, you should not
install the device under any circumstances.
If you suspect that safe operation of the device cannot be guaranteed, you should turn the
device off immediately and make sure that it cannot be operated unintentionally.
For correct use of the device, ensure that the UC network (or KNX/EIB) to be connected is
designed for protection class 3.
NOTE: this device must not be disposed of as unsorted household waste. Used devices must be
disposed of correctly. Contact your local town council for more information.
2 • DESCRIPTION
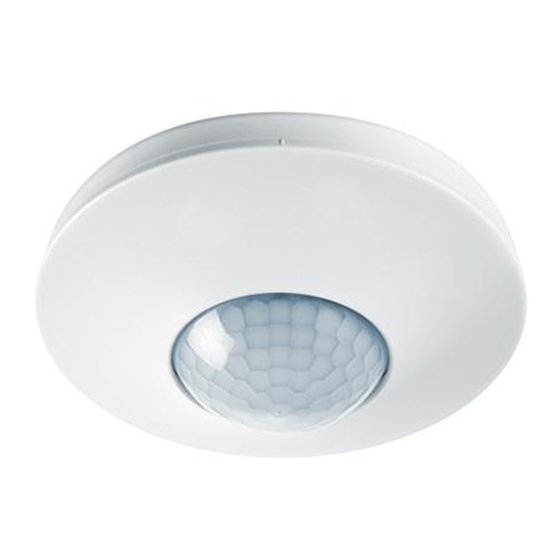
The ESYLUX PD-C360i/8 KNX UP is a presence detector with a 360° field of detection and
integrated bus coupler for ceiling mounting. Follow the installation instructions provided
when installing the device. The detector is able to control lighting ("switching" or "constant
light control" features).
For additional features, please refer to the "Description of applications" section of the operating
instructions. With a range of up to 8 m in diameter, the presence detector is suitable for use
in offices, classrooms, conference facilities and halls with natural lighting.
The PD-C360i/8 KNX UP is intended to be used in a KNX (EIB), TP bus system in conjunction
with other KNX components.
If the PD-C360i/8 KNX UP detects that persons are present in its field of detection, it
transmits controlling telegrams for light outputs, depending on ambient brightness, and for
HVAC (heating, ventilation and air conditioning) objects.
• Mixed light measurement is suitable for FL, PL, halogen and incandescent lamps.
Certified KNX/EIB training centres provide specialist training on how to plan, install,
activate, document and use the ETS (Engineering Tool Software) that is required for
parameter setting.
3 • INSTALLATION / ASSEMBLY / CONNECTION
See separate installation instructions.
•
•
PD-C360i/8 KNX UP
www.esylux.com
PD-C360i/8 KNX UP
(EP10427404)
4 • START-UP
All parameter settings are carried out via the ETS
(Engineering Tool Software). Pressing the programming
button activates the programming status for the physical
address on the PD-C360i/8 KNX UP. This is indicated by the
blue LED.
The product database and application description are
available to download at www.esylux.com.
5 • SWITCH-ON BEHAVIOUR / LED DISPLAY
• Connect the bus supply
This initiates a warm-up phase that lasts approx. 10 seconds.
The red LED and green LED will slowly flash alternately (f = 1 Hz).
• LED display after warm-up
Each time motion is detected, this is indicated by 2 flashes of the preset LED colour.
• In the "Master" function, the remote control entries will be acknowledged
by 3 flashes from the blue LED.
• In the "Slave" function, each detection is acknowledged by 2 flashes of the green LED.
NOTE: The green LED will only light up when motion is detected if it has been enabled by the ETS
(Engineering Tool Software).
6 • TEST MODE
Parameters can be set via the ETS (Engineering Tool Software).
Test mode switches to the RUN status after "storing", or 10 minutes after activating the test
mode. The blue LED flashes to indicate movement.
7 • REMOTE CONTROL
The optional user remote control Mobil-PDi/User (EM10425547) can be used to regulate/
control the lighting.
The Mobil-PDi/User remote control adjusts the lighting value for the period that persons are
present plus the switch-off delay time. Thereafter, the values set via the ETS (Engineering Tool
Software) will apply.
NOTE: In the "Slave" function the detector does not respond to the remote control!
The Mobil-PDi/User can be used to control the lighting as follows:
• switching on or off
• dimming (only with "controlling" feature)
• storing and calling up of 2 scenes
• pressing the "Reset" button resets the KNX presence detector to the
values set via ETS (Engineering Tool Software). The stored light
scenes 1 + 2 are kept.
For further information, please refer to the operating instructions for
the Mobil-PDi/User remote control.
8 • ESYLUX MANUFACTURER'S GUARANTEE
ESYLUX products are tested in accordance with applicable regulations and manufactured
with the utmost care. The guarantor, ESYLUX Deutschland GmbH, Postfach 1840, D-22908
Ahrensburg, Germany (for Germany) or the relevant ESYLUX distributor in your country (visit
www.esylux.com for a complete overview) provides a guarantee against manufacturing/
material defects in ESYLUX devices for a period of three years from the date of manufacture.
This guarantee is independent of your legal rights with respect to the seller of the device.
The guarantee does not apply to natural wear and tear, changes/interference caused by
environmental factors or damage in transit, nor to damage caused as a result of failure to
follow the user or maintenance instructions and/or as a result of improper installation. Any
illuminants or batteries supplied with the device are not covered by the guarantee.
The guarantee can only be honoured if the device is sent back with the invoice/receipt,
unchanged, packed and with sufficient postage to the guarantor, along with a brief
description of the fault, as soon as a defect has been identified.
If the guarantee claim proves justified, the guarantor will, within a reasonable period, either
repair the device or replace it. The guarantee does not cover further claims; in particular,
the guarantor will not be liable for damages resulting from the device's defectiveness. If the
claim is unfounded (e.g. because the guarantee has expired or the fault is not covered by the
guarantee), then the guarantor may attempt to repair the device for you for a fee, keeping
costs to a minimum.
Mobil-PDi/User
www.esylux.com 1/13
Advertisement
Table of Contents

Related Manuals for ESYLUX EP10427404


Summary of Contents for ESYLUX EP10427404
- Page 1 ESYLUX devices for a period of three years from the date of manufacture. The PD-C360i/8 KNX UP is intended to be used in a KNX (EIB), TP bus system in conjunction This guarantee is independent of your legal rights with respect to the seller of the device.
- Page 2 OPERATING INSTRUCTIONS PD-C360i/8 KNX UP (EP10427404) LIGHT CHANNEL OBJECTS Object 0: “Input: Lock light channel” (length = 1 bit) Object 12: “Output: Light channel dim value 1” (length = 1 byte) The switching/dimming outputs for the light channel are locked with an ON Function: constant light control/regulation telegram and unlocked with an OFF telegram.
- Page 3 OPERATING INSTRUCTIONS PD-C360i/8 KNX UP (EP10427404) Object 19: “Input: Light channel orientation light ON/OFF” (length = 1 bit) MOTION OBJECTS Function: constant light control/regulation An OFF telegram is used to switch off the orientation light function, while an Object 31: “Input: Slave/Master motion” (length = 1 bit) ON telegram switches it on.
- Page 4 OPERATING INSTRUCTIONS PD-C360i/8 KNX UP (EP10427404) ALARM OBJECTS OBJECTS FOR CONTROLLING/REGULATING FUNCTION Object 43: “Input: Lock alarm” (length = 1 bit) “1” locks the alarm function, while “0” unlocks the alarm function. Object 44: “Input: Alarm ON/OFF manually” (length = 1 bit) This object can be used to manually override the alarm, irrespective of motion detection. Note: If “Alarm must be acknowledged” is set in the parameters,...
-
Page 5: Test Mode
OPERATING INSTRUCTIONS PD-C360i/8 KNX UP (EP10427404) DESCRIPTION OF APPLICATIONS 1. MASTER/SLAVE The Master detects presence and evaluates it according to set parameters. “Lighting ON/OFF” or ”lighting light value higher/lower” The Slave is used exclusively to extend the field of detection. Presence is transmitted to the Master (object 31) for evaluation according to the set parameters. • Master/Master selection Two Masters can work in parallel to extend the field of detection. Each Master evaluates the presence (object 33) according to its parameters set via the ETS (Engineering Tool Software) and regulates/controls the lighting appropriately. Default setting: Master 2. TEST MODE (only for Master device configuration) When test mode is “ON”... -
Page 6: Motion Detection
OPERATING INSTRUCTIONS PD-C360i/8 KNX UP (EP10427404) DESCRIPTION OF APPLICATIONS 5. LEDS IN SENSOR Options: choose between one of the LED brightness levels or “OFF” If the LED is not switched off, you can specify its colour when motion is detected (2 x flashes) and when motion detection is locked via object 32. You can... -
Page 7: Light Channel
OPERATING INSTRUCTIONS PD-C360i/8 KNX UP (EP10427404) DESCRIPTION OF APPLICATIONS 9. LIGHT CHANNEL 9.1 Light channel operating mode • “Fully automatic” operating mode Lighting is automatically switched on if the detector detects presence and the ambient lighting level has fallen below the preset brightness threshold or set value. - Page 8 OPERATING INSTRUCTIONS PD-C360i/8 KNX UP (EP10427404) DESCRIPTION OF APPLICATIONS 9.2 Light channel function Options: Switching: ON/OFF to a defined threshold. Controlling: ON/light control to a defined set value/(OFF) constant light control. Regulating: Light is regulated via linear correlation between the dim value and the light value.
- Page 9 OPERATING INSTRUCTIONS PD-C360i/8 KNX UP (EP10427404) DESCRIPTION OF APPLICATIONS 10. LIGHT CHANNEL FUNCTION 10.1 Switching Threshold 0 = disabled, motion detection only Threshold 1 – 2,000 lux (using the up/down menu) or directly enter a value between 0 and 2,000 lux Default setting: 500 lux There is an option of determining an offset (can also be assigned using objects 14 and 15) between “switching threshold ON/OFF 1” and “switching threshold ON/OFF 2”...
- Page 10 OPERATING INSTRUCTIONS PD-C360i/8 KNX UP (EP10427404) DESCRIPTION OF APPLICATIONS 10.3 Regulating Lower light value: 0 - 2,000 lux Upper light value: 0 - 2,000 lux Lower minimal dim value: 0 - 100% Upper maximal dim value: 0 - 100% Caution: Always ensure that the maximal value selected is higher than the chosen minimal value. Step time: Options: 0.5 - 10 seconds (up/down menu) If the snooze function is enabled and presence is detected, the detector sends a value specified in the parameters instead of controlling/regulating the light.
- Page 11 OPERATING INSTRUCTIONS PD-C360i/8 KNX UP (EP10427404) DESCRIPTION OF APPLICATIONS 10.4 Orientation light value • Orientation light value 1 Options: 0/5 - 50% (up/down menu) in 5% steps Note: only active for “Controlling” and “Regulating”! The orientation light value 1 is active as standard. Via object 18, an ON telegram changes the setting to orientation light value 2 and an OFF telegram changes the setting to orientation light value 1.
- Page 12 OPERATING INSTRUCTIONS PD-C360i/8 KNX UP (EP10427404) DESCRIPTION OF APPLICATIONS 11. HVAC CHANNEL Note: the presence output is independent of the set light values. Option of selecting input delay of 0 minutes or 2 minutes – 30 minutes. Default setting: 0 minutes Option of selecting a switch-off delay time of 0, 1 - 60 minutes or up to 12 hours. Default setting: 60 minutes 11.1 Cyclic sending The HVAC channel sends its current status in cycles according to specified time intervals.
- Page 13 OPERATING INSTRUCTIONS PD-C360i/8 KNX UP (EP10427404) 13. LIGHT VALUE 13.1 Current light value The current light value can be transmitted either in cycles or from a specified offset to the last actual value sent. This value is calculated as follows: Value = [light value from sensor x modifier x multiplier] + offset Object 21 can be used to lock sending of the current light value. This allows you to send either the current value or a value specified in the parameters.
Need help?
Do you have a question about the EP10427404 and is the answer not in the manual?
Questions and answers