Advertisement
Quick Links
Overview
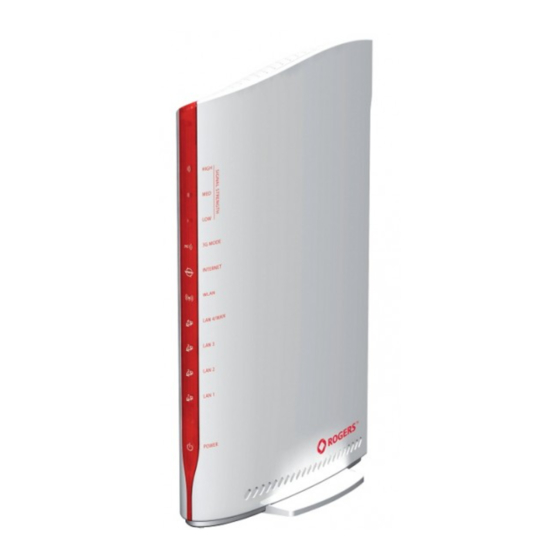
The NetComm 3G25W-R integrates a Wireless LAN and 3G WAN into
one unit. Connection to the Internet is achieved through either a 3G
service or via a fixed line xDSL/Cable/Satellite connection to the
3G25W-R's WAN port, providing you with the flexibility to choose how
you access the Internet. The 3G25W-R's automatic failover ensures
you are always connected by activating the 3G connection should the
xDSL/Cable/Satellite connection drop out.
Users are able to share a single 3G connection via both a wired and
wireless connection to the 3G25W-R. With a built in 802.11n wireless
access point, this router provides wireless speeds of up to 150Mbps,
150% faster than 11g technology¹. On top of this, the 3G25W-R has
four LAN ports for wired connections to multiple devices. Rather than
being restricted to certain USB modems, the 3G25W-R allows the
user to simply insert an active SIM and utilise 3G Mobile Broadband
for internet connectivity.
The 3G25W-R includes advanced security features such as VPN
pass-through, a full complement of wireless security options and a
built in firewall.
1 Maximum wireless signal rate and coverage values are derived from IEEE Standard 802.11g and
802.11n Draft 2.0 specifications. Actual wireless speed and coverage are dependent on network and
environmental conditions included but not limited to volume of network traffic, building materials and
construction/layout.
Advertisement

Subscribe to Our Youtube Channel
Related Manuals for NetComm 3G25W-R


Summary of Contents for NetComm 3G25W-R
- Page 1 3G25W-R. With a built in 802.11n wireless access point, this router provides wireless speeds of up to 150Mbps, 150% faster than 11g technology¹. On top of this, the 3G25W-R has four LAN ports for wired connections to multiple devices. Rather than...
-
Page 2: Package Contents
Full Wireless security - WEP, WPA, WPA2 Browser based interface for configuration and management: OS independent and easy to use Package Contents Your 3G25W-R Wireless Router with voice Package contains the following items: 3G25W-R Wireless Router Quick Installation Guide ... -
Page 3: Minimum System Requirements
Minimum System Requirements Before continuing with the installation of your 3G25W-R Wireless Router, please confirm that you comply with the minimum system requirements. Active SIM card for 3G Broadband access if you want to use a 3G Broadband service. -
Page 4: Restoring Factory Defaults
three (middle) Amber in quick flash Roaming alert, and 3G signal is middle Green Connected. Signal strength in level four or five (strong) Green in quick flash Roaming alert, and 3G signal is strong 2G/2.5G LED Green EDGE or GPRS connection is established Green in flash Data packet transferred via... - Page 5 You have purchased the router from someone else and need to reconfigure the device. You are asked to perform a factory reset by a member of the excellent NetComm Support Staff. In order to restore your router to its factory default settings, please follow these steps: ...
- Page 6 Step 3: Insert the Ethernet cable into the LAN Port: Insert the Ethernet cable into LAN port on the back panel of the 3G25W-R, and an available Ethernet port on the network adapter on the computer you will use to configure the 3G25W-R.
-
Page 7: For Windows 98Se/Me/2000/Xp
Setting up your PC Having physically connected your 3G25W-R, the next step is to configure the router to establish a broadband connection. Depending on your computers current settings you may first need to reconfigure the TCP/IP (Network Settings) to access your Wireless Router. - Page 8 Check “Obtain an IP address automatically” and “Obtain DNS server address automatically” then click on “OK” to continue 5. Click “Show icon in notification area when connected” (see screen image in 3. above) then click on “OK” to complete the setup procedures.
- Page 9 For Windows Vista32/64 Click on “Start” -> “Control Panel” -> “Network and Sharing Center”. In the Manage network connections, click on “Manage network connections” to continue. Single RIGHT click on “Local Area connection”, then click “Properties”.
- Page 10 4. The screen will display the information “User Account Control” and click “Continue” to continue. 5. Double click on “Internet Protocol Version 4 (TCP/IPv4)”. Check “Obtain an IP address automatically” and “Obtain DNS server address automatically” then click on “OK” to continue.
- Page 11 For Windows 732/64 Click on “Start” -> “Control Panel” (in Category View) -> “View network status and tasks”. 2. In the Control Panel Home, click on “Change adapter settings” to continue. 3. Single RIGHT click on “Local Area Connection”, then click “Properties”. 4.
- Page 12 Check “Obtain an IP address automatically” and “Obtain DNS server address automatically” then click on “OK” to continue.
- Page 13 For Mac OSX 10.6 1. Click the Apple icon and choose System Preferences. 2. Click on Network icon. 3. Set Location to Automatic and Show to Built-In Ethernet. 4. In the Configure option, choose Using DHCP. 5. Click on Apply Now.
-
Page 14: Web Configuration Wizard
2. At the login screen, type in “admin” (without quotes) in the System Password field. Then click on Login. Notes: admin is the default login password for the unit. 3. Click on Wizard and then on Enter. 4. This page shows you the steps needed to configure your 3G25W-R unit. Click Next to continue. - Page 15 3G broadband service provider. Click Apply Setting once you finished. . After several minutes the 3G25W-R will save all the settings and the wizard is complete. Click Finish to go back to the Status page and the unit will now use the new settings.
-
Page 16: Advanced Setup
Advanced Setup To access the Advanced Setup option of your 3G25W-R, you need to access the 3G25W-R’s web configuration outlined in the Web configuration section and click on the Advanced Setup menu at the top of the page. For first time installation, you will be presented with the following page. Choose Advanced to access the Advanced Setup page. - Page 18 Wireless router and the WAN (Wide Area Network) connection. 1. LAN IP Address: the local IP address of the 3G25W-R. The computers on your network must use this IP address as their Default Gateway. You can change it if necessary.
- Page 19 - Static IP Address Enter the WAN IP Address, Subnet Mask, Gateway, Primary and Secondary DNS as supplied by your ISP.
- Page 20 Auto Reconnect (Always-on): The 3G25W-R will automatically reconnect to the internet until the connection is manually disconnected. Manually: The 3G25W-R will not connect to the internet until someone clicks the connect button in the Status-page. NAT disable: This option disables "Network Address Translation" for this connection type.
- Page 21 Auto Reconnect (Always-on): The 3G25W-R will automatically reconnect to the internet until the connection is manually disconnected. Manually: The 3G25W-R will not connect to the internet until someone clicks the connect button in the Status-page. Maximum Idle Time: The amount of inactivity on the internet connection before it is disconnected.
- Page 22 Assigned IP address: Enter the IP address assigned to your service. This is usually left blank. Maximum Transmission Unit (MTU): The default MTU value is 0(auto). It is set automatically when you connect. NAT disable: This option disables "Network Address Translation" for this connection type. - PPTP Please verify your connection type and select the appropriate IP Mode - Static IP Address or Dynamic IP Address.
- Page 23 Auto Reconnect (Always-on): The 3G25W-R will automatically reconnect to the internet until the connection is manually disconnected. Manually: The 3G25W-R will not connect to the internet until someone clicks the connect button in the Status-page. Maximum Transmission Unit (MTU): The default MTU value is 0(auto). It is set automatically when you connect.
- Page 24 Auto Reconnect (Always-on): The 3G25W-R will automatically reconnect to the internet until the connection is manually disconnected. Manually: The 3G25W-R will not connect to the internet until someone clicks the connect button in the Status-page. Maximum Transmission Unit (MTU): The default MTU value is 0(auto). It is set automatically...
- Page 25 - 3G Please note: The WAN fields may not be necessary for your 3G connection. The information on this page will only be used when required by your 3G service provider. Please contact your 3G provider to obtain this information if needed. ...
- Page 26 Connect-on-demand: The 3G25W-R will connect to the internet when a client sends outgoing packets. Auto Reconnect (Always-on): The 3G25W-R will automatically reconnect to the internet until the connection is manually disconnected. Manually: The 3G25W-R will not connect to the internet until someone clicks the connect button in the Status-page. ...
- Page 27 Basic Setting > DHCP Server DHCP Server: Enable or disable the DHCP server. Lease Time: Length of the DHCP lease time IP Pool Starting/Ending Address: Whenever there is a request, the DHCP server will automatically allocate an unused IP address from the IP address pool to the requesting computer. You must specify the starting / ending address of the IP address pool Domain Name: Optional, this information will be passed to the client Click “Save”...
-
Page 28: Dhcp Clients List
DHCP Clients List The list of DHCP clients is shown here. DHCP Fixed Mapping The DHCP Server will reserve a specific IP for a specific MAC address, shown below. - Page 29 Network ID (SSID): Network ID is used for identifying the Wireless LAN (WLAN). Client stations can roam freely over this product and other Access Points that have the same Network ID. (The factory default setting is “3G25W-R”) SSID Broadcast: The router will broadcast the SSID so that wireless clients can find the wireless network.
- Page 30 Notes: After configuring wireless security, you also need to configure your wireless adapter to use the same security settings before you can connect wirelessly. Not all wireless adapter supports WPA-PSK/WPA2- PSK/WPA/WPA2 security, please refer to your wireless adapter user guide for more details. It is strongly recommended to set up wireless security such as WPA-PSK (when the wireless client supports WPA) in order to secure your network.
- Page 31 Wireless Client List The list of wireless clients is shown here.
- Page 32 Basic Setting > Change Password On this page you can change the 3G25W-R web configuration password. Please type in your old password (the factory default password is admin) and then type in the new password. Type the same new password in the Reconfirm field.
-
Page 33: Forwarding Rules
Forwarding Rules The Forwarding Rules page allows you to configure the port forwarding management on the router. Click on any of the menu items on the left to access the respective settings page. Forwarding rules are a necessary feature as by default NAT (Network Address Translation) will automatically block incoming traffic from the Internet to the LAN unless a specific port mapping exists in the NAT translation table. - Page 34 Forwarding Rules > Virtual Server A virtual server is defined as a Service Port, and all requests to this port will be redirected to the computer specified by the Server IP. Virtual Servers can also work with Scheduling Rules, and give you more flexibility on Access control.
- Page 35 Some applications like On-line games, Video conferencing and Internet telephony require multiple connections to the internet. Because of that, these applications cannot work with a pure NAT router such as the 3G25W-R. The Special Applications feature allows some of these applications to work with this router. If this fails to make the application work, try to set up that computer as the DMZ host instead.
- Page 36 Forwarding Rules > Miscellaneous DMZ (Demilitarized Zone) Host is a computer without the protection of firewall. It allows that particular computer to be exposed to unrestricted 2-way communication to the internet. It is mostly used for Internet games, Video conferencing, Internet telephony and other special applications. To enable DMZ, enter the IP address of the PC and tick on Enable.
- Page 37 3GT2WN Security Setting The Security Setting page allows you to configure the security management on the router such as Packet filters and MAC Control. Click on any of the menu items on the left to access the respective setting page.
- Page 38 Security Setting > Packet Filters The Packet Filter enables you to control what packets are allowed to pass through the router. There are two types of packet filter, Outbound Packet Filter which applies to all outbound packets and Inbound Packet Filter which only applies to packets that are destined for a Virtual Server or DMZ host only. To enable an Outbound Filter, please make sure to tick the Enable tick box on the top of the page.
- Page 39 To access the Inbound Packet Filter page, click on the “Inbound Filter” button on the bottom of the Outbound Filter page. All the settings on this page are similar to the one for the Outbound Filter. Click “Save” to save the settings or “Undo” to cancel.
- Page 40 Security Setting > Domain Filters Domain Filters enable you to prevent users from accessing specific domain addresses. To enable the Domain Filter please make sure to tick the Enable tick box on the top of the page. Log DNS Query. Please tick the Enable tick box if you want to log when someone accesses specific URLs.
- Page 41 Security Setting > URL Blocking URL Blocking will block LAN computers from connecting to a pre-defined website. The major difference between Domain Filter and URL Blocking is that Domain Filter require users to input a suffix (e.g. xxx.com, yyy.net) while URL Blocking only requires you to input a keyword. To enable URL Blocking please make sure to tick on Enable tick box on the top of the page.
- Page 42 Security Setting > MAC Control MAC Control allows you to assign different access rights for different users and to assign a specific IP address to a specific MAC address. To enable MAC Address Control please make sure to tick the Enable tick box on the top of the page. Two types of control are available: •...
- Page 43 Security Setting > Miscellaneous This page allows you to change various miscellaneous security settings on the unit. Administrator Time-out The period of time with no activity in the web configuration page to logout automatically, you may set it to zero to disable this feature. Remote Administrator Host/Port In general, only Intranet users can browse the built-in web pages to perform administration task.
- Page 44 Advanced Setting The Advanced Setting page allows you to configure the advanced settings on the router such as the System log, Dynamic DNS and SNMP opt i o ns. Click on any of the menu items on the left to configure the access the respective setting page.
- Page 45 Advanced Setting > System Log This enables you to set up the system log features of the router. You can also choose to export the system log via email (SMTP) or send it to a remote syslog server (UDP). IP Address for Syslogd Host IP of destination where sys log will be sent to. Check Enable to enable this function. Setting of Email alert Check if you want to enable Email alert (send syslog via email).
- Page 46 Advanced Setting > Dynamic DNS The Dynamic DNS feature enables users to have a static domain name for their internet connection even when their internet connection IP address is dynamic. By mapping the host name to the current public IP address of the router, users who want to connect to the router or any services behind the router from the internet can just use the Dynamic DNS hostname instead of the IP Address which might change every time the router connects to the Internet.
- Page 47 Bandwidth of Upstream: Set the limitation of upstream speed. Local IP: Ports Define the Local IP address and port to apply QoS to. Remote IP: Ports Define the Remote IP address and port to apply QoS to. QoS Priority: This defines the priority level of the current Policy Configuration. Packets associated with this policy will be serviced based upon the priority level set.
- Page 48 Routing tables allow you to determine which physical interface address to use for outgoing IP data. If you have more than one router and subnet, you will need to configure the routing table to allow packets to find the proper routing path and allow different subnets to communicate with each other. These settings are used to setup the static and dynamic routing features of the 3G25W-R.
- Page 49 Dynamic Routing: Routing Information Protocol (RIP) will exchange information about different host destinations for working out routes throughout the network. Please only select RIPv2 if you have a different subnet in your network. Otherwise, please select RIPv1. Static Routing: For static routing, you can specify up to 8 routing rules. You need to enter the destination IP address, subnet mask, gateway, hop for each routing rule, and then enable the rule by clicking the Enable checkbox.
- Page 50 Advanced Setting > System Time This page allows you to change the System time setting on the 3G25W-R. Time Zone Select the time zone where this device is located. Auto-Synchronization Select the “Enable” checkbox to enable this function. Time Server Select a NTP time server to obtain the current UTC time from Sync with Time Server Select if you want to set Date and Time by NTP Protocol.
- Page 51 Advanced Setting > Scheduling You can use scheduling to enable or disable a service at a specific time or on a specific day. Select “Enable” and then click the “New Add” button. Select a name for the rule and enter the details such as the day, start time or end time. Click “Save”...
- Page 52 Tool Box The Tool Box page consists of various tools for the unit. Click on any of the menu items on the left to access the respective page.
- Page 53 Tool Box > System Info From this page you can view the System log and the Routing Table information for the router. Tool Box > Firmware Upgrade You can upgrade the routers firmware by clicking the “Upgrade” button...
- Page 54 Tool Box > Backup Setting You can backup your current settings by clicking the “Backup Setting” button then and save it as a bin file. When you want to restore these settings, click the “Firmware Upgrade” button and use the bin file you saved. Tool Box > Reset to Default ...
- Page 55 Appendix A: WAN Failover The WAN failover feature of the 3G25W-R is designed to provide a backup WAN connection in case your primary connection should fail. To use this feature, you will require both a regular WAN connection and a 3G WAN connection.
- Page 56 3. Right-click on "Wireless Network Connection" and select "Connect / Disconnect". 4. You should see a network listed with the SSID of your 3G25W-R. Select your wireless network and click “Connect”. 5. Type the following into the “Security key” section: a1b2c3d4e5 and click "OK".
- Page 57 The Power LED does not light up. Step Correct Action Make sure that the 3G25W-R power adaptor is connected to the device and plugged in to an appropriate power 1 source. Use only the supplied power adaptor. ...
- Page 58 It is highly recommended to change the default username and password. Make sure you store the username and password in a save place. S CORRECTIVE ACTION WLAN Interface I cannot access the 3G25W-R from the WLAN or ping any computer on the WLAN. Step Correct Action Check the WiFi LEDs on top of the unit Make sure that the IP address and the subnet mask of the NB14WN and your computer(s) are on the same subnet.
- Page 59 Legal and Regulatory Information FCC Statement: This equipment has been tested and found to comply with the limits for a Class B digital device, pursuant to Part 15 of the FCC Rules. These limits are designed to provide reasonable protection against harmful interference in a residential installation. This equipment generates, uses and can radiate radio frequency energy and, if not installed and used in accordance with the instructions, may cause harmful interference to radio or television reception, which can be determined by turning the equipment off and on, the user is encouraged to try to correct the interference by one of the following measures:...
- Page 60 Industry Canada RF exposure requirements In order to ensure compliance with the RF exposure requirements specified in Health Canada Safety Code 6, this device may be operated while held in the hand, but not when held close to the body, carried in a pocket or holster, or similar configuration that allows close proximity to the body.”...
- Page 61 ...
- Page 62 This product includes copyrighted third-party software licensed under the terms of the GNU General Public License. Please refer to the GNU General Public License below to check the detailed terms of this license. The following parts of this product are subject to the GNU GPL, and those software packages are copyright by their respective authors.
- Page 63 GNU GENERAL PUBLIC LICENSE Version 2, June 1991 Copyright (C) 1989, 1991 Free Software Foundation, Inc. 59 Temple Place, Suite 330, Boston, MA 02111-1307 USA Everyone is permitted to copy and distribute verbatim copies of this license document, but changing it is not allowed. Preamble The licenses for most software are designed to take away your freedom to share and change it.
- Page 64 GNU GENERAL PUBLIC LICENSE TERMS AND CONDITIONS FOR COPYING, DISTRIBUTION AND MODIFICATION 0. This License applies to any program or other work which contains a notice placed by the copyright holder saying it may be distributed under the terms of this General Public License. The "Program", below, refers to any such program or work, and a "work based on the Program"...
- Page 65 on the terms of this License, whose permissions for other licensees extend to the entire whole, and thus to each and every part regardless of who wrote it. Thus, it is not the intent of this section to claim rights or contest your rights to work written entirely by you; rather, the intent is to exercise the right to control the distribution of derivative or collective works based on the Program.
- Page 66 3. You may copy and distribute the Program (or a work based on it, under Section 2) in object code or executable form under the terms of Sections 1 and 2 above provided that you also do one of the following: Accompany it with the complete corresponding machine-readable source code, which must be distributed under the terms of Sections 1 and 2 above on a medium customarily used for software interchange;...
- Page 67 consequence you may not distribute the Program at all. For example, if a patent license would not permit royalty- free redistribution of the Program by all those who receive copies directly or indirectly through you, then the only way you could satisfy both it and this License would be to refrain entirely from distribution of the Program. If any portion of this section is held invalid or unenforceable under any particular circumstance, the balance of the section is intended to apply and the section as a whole is intended to apply...
- Page 68 in other circumstances. It is not the purpose of this section to induce you to infringe any patents or other property right claims or to contest validity of any such claims; this section has the sole purpose of protecting the integrity of the free software distribution system, which is implemented by public license practices.
- Page 69 INCLUDING ANY GENERAL, SPECIAL, INCIDENTAL OR CONSEQUENTIAL DAMAGES ARISING OUT OF THE USE OR INABILITY TO USE THE PROGRAM (INCLUDING BUT NOT LIMITED TO LOSS OF DATA OR DATA BEING RENDERED INACCURATE OR LOSSES SUSTAINED BY YOU OR THIRD PARTIES OR A FAILURE OF THE PROGRAM TO OPERATE WITH ANY OTHER PROGRAMS), EVEN IF SUCH HOLDER OR OTHER PARTY HAS BEEN ADVISED OF THE POSSIBILITY OF SUCH DAMAGES.
Need help?
Do you have a question about the 3G25W-R and is the answer not in the manual?
Questions and answers