Table of Contents
Advertisement
Advertisement
Table of Contents

Related Manuals for SYSMEX SP Series


Summary of Contents for SYSMEX SP Series
- Page 1 Routine Use Training Workbook SP-1000 Date: 19/07/2021 Document Ref: SUKBMS-24-601 Version: Sysmex House, Garamonde Drive, Wymbush, Milton Keynes, MK8 8DF, United Kingdom · Phone +44 333 320 3460 · Fax +44 1908 267 901 academy.training@sysmex.co.uk· www.sysmex.co.uk...
-
Page 2: Table Of Contents
Contents Disclaimer ................................3 Overview of SP-Series .............................. 4 Analyser Components ............................... 5 Outside the Analyser ..........................5 Inside the Smear Table .......................... 6 Inside the Stain Table ..........................8 Reagent on board the SP-series ..........................9 Task 1: SP-Series Reagents ........................10 Smear Production and Staining Principles ....................... - Page 3 Parts History ............................ 37 Reagent History ..........................38 Contact Us ................................39 Document Ref: SUKBMS-24- Version: 2.0 Date: 19/07/2021 Classification Unrestricted Page | 2...
-
Page 4: Disclaimer
Disclaimer Please note, the information contained in training resources provided by Sysmex should not be used as an alternative to your sites Standard Operating Procedure (SOP)/Contract. If you have any particular questions regarding any site specific use of reagents, consumables and/or equipment please contact your Management Team. -
Page 5: Overview Of Sp-Series
Overview of SP-Series Facts and figures SP-series analysers SP-10 SP-1000i Throughput Maximum 120 samples per hr. Sample Types Whole blood Modes Sampler mode Manual (Closed) mode Manual (Micro) mode Aspiration Volumes Sampler mode 200µl Manual (Closed) mode 200µl Manual (Micro) mode 60µl Staining protocols Wright single stain May-Giemsa stain... -
Page 6: Analyser Components
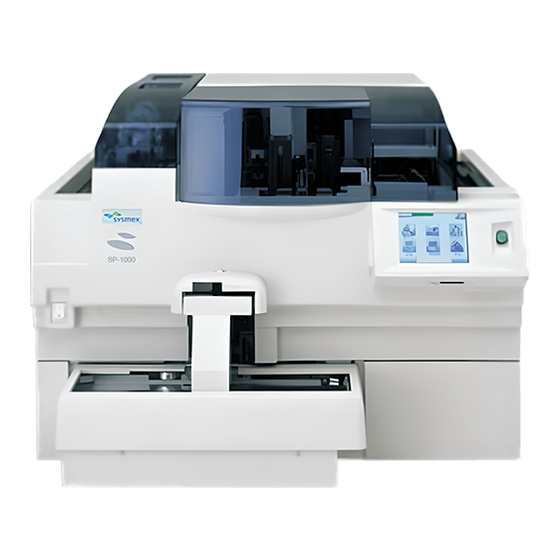
Analyser Components Outside the Analyser 1. Stain table – Cover provides access to stain table and internal components. Cover is LOCKED while analyzer in use. 2. Smear Table – Cover provides access to stain table and internal components. Cover is LOCKED while analyzer in use. -
Page 7: Inside The Smear Table
Inside the Smear Table 1. Micro tube holder – Samples requiring Manual (micro) sampling are place in here for aspiration 2. Smear drier unit – Dries smear following spreading process 3. Slide glass shift unit - Responsible for moving the slide to the dispensing/smear position and then on to the smear drier unit 4. - Page 8 9. Slide storage and cassette rotator – Cassette rotator rotates single cassette supplied by the supply table to the horizontal position to allow smeared and printed slides are placed into the single cassette. Cassette is then rotated vertically to allow delivery to cassette and slide to stain table.
-
Page 9: Inside The Stain Table
Inside the Stain Table 1. Methanol pipette – Slide is lifted from cassette and methanol is dispensed into the single cassette following which the slide is returned to the cassette. 2. Stain pipette 1 - Slide is lifted from cassette and stain 1 is dispensed into the single cassette following which the slide is returned to the cassette. -
Page 10: Reagent On Board The Sp-Series
Reagent on board the SP-series The number of on-board reagents on the SP-10 depends on the staining protocol used. The table below summarizes the reagents recommended for use on the SP-series. On board Reagent Name Function Stability (Days) Rinse solution used for rinsing the Cell Pack whole blood aspiration line May-Grunwald... -
Page 11: Task 1: Sp-Series Reagents
Task 1: SP-Series Reagents According to your staining protocol what reagents are stored on board your SP-10 analyzer? Complete the table below. Reagent What does it do? Staining protocol Document Ref: SUKBMS-24- Version: 2.0 Date: 19/07/2021 Classification Unrestricted Page | 10... -
Page 12: Smear Production And Staining Principles
Smear Production and Staining Principles Production of stained smears is a two-step process. 1. Smear production 2. Staining smears Smear Production Once barcode has been read or smear request manually entered the first step in smear production is for a slide to be removed from either slide tower (A) or (B) to the slide removal position (1). The slide is then transferred from the slide removal position (1) to the slide glass shift unit (D) by the slide glass supply unit (C). - Page 13 Default smear settings Level HCT % Sample Angle Speed Standby Smear (degrees) (mm/sec) time start Lower Upper (pulse) (sec) pos. Limit limit (pulse) 27.0 27.0 27.0 27.0 27.0 27.0 27.0 27.0 Once smear is complete slide is moved back by the slide glass shift unit (D) to the smear drier unit (4) where they are dried.
-
Page 14: Staining Principles
Staining Principles Romanowsky stains, such as Giemsa, Leishman and May-Grunwald, are used widely for the routine staining of peripheral blood films. Whichever combination of stains is used the distinction in staining achieved due to the balance of basic and acidic components within the stains. The colour a particular cellular component stains, is dependent on the binding that occurs between the staining compounds and chemical structures within the cell as well as interaction between dye molecules, pH and time. -
Page 15: Stain Trouble Shooting
Whichever combination of stains are used the process must be carried out at the correct pH. If the pH is too acidic the basophilic components appear too pink. If the pH is too alkaline conversely there is over staining as too much basic stain is taken up. These reaction are also dependent on time as DNA binds to staining compounds more rapidly than RNA and Haemoglobin is even slower and as a results incorrect concentration of stains and/or timings will result in poor stains. -
Page 16: Quick Guides To Using Sp-Series
Quick Guides to Using SP-Series Introduction to LCD Screen 1. Menu name - Displays name of menu currently selected 2. Status – Displays current status of analyzer. [Ready] Analyzer ready and not currently in use. [Asp. Ready] Analyzer currently in use and ready to aspirate next sample. [Running] Analyzer currently making a smear. - Page 17 [Worklist] Used for entering samples if no host connection is available [Sampler] Standalone analyzers ONLY. Used to start sample analysis [Con.Int] Tracked analyzers ONLY. Used to interrupt conveyer. [Manual] Used for processing samples manually for stain or smear. [SmearList] Database of last 1000 samples processed. Used to perform search and provide information on time remaining.
-
Page 18: Maintenance
Maintenance There are two types of shutdown that need to be performed on the SP-series analyzer, • Shutdown 1 should be performed at least every 24hrs if analyzer continuously in use, six days a week. • Shutdown 2 Should be performed once a week on the day that shutdown 1 is not performed. - Page 19 Press [OK]. The shutdown progress screen will appear and once shutdown is complete analyzer will turn off. Turn SP-series analyzer [OFF] at mains power switch. Perform analyzer start-up procedure (see page 22) Check Trap Chamber The trap chamber prevents fluid flowing back into the analyzer if a blockage should occur and therefore should be checked on a daily basis.
- Page 20 Once smear unit has moved forward open smear unit cover and clean spreader glass using moistened gauze with deionized water. NOTE: if spreader glass moves during cleaning simply lightly push spreader back into place. Once spreader has been clean return press [OK] to return smear unit to home position.
-
Page 21: Weekly Maintenance
Weekly Maintenance Shutdown 2 (Weekly) Ensure analyzer status is READY. From main menu select the [Shutdown] to open the shutdown menu. Select the [Shutdown2 (Weekly)] to open confirmation screen. Ensure that all cassette and methanol requirements are fulfilled. • 8 Slide cassettes in supply table •... -
Page 22: Start Up Procedure
Start Up Procedure Turn mains power switch [ON] and press ‘Start-up’ button on front of analyzer. The ‘Start-up’ screen will appear and the SP- 1000 will execute rinse procedures. Document Ref: SUKBMS-24- Version: 2.0 Date: 19/07/2021 Classification Unrestricted Page | 21... -
Page 23: As Required Maintenance
As Required Maintenance Replacing Spreader Glass From main menu select [Maint.] and [Spreader glass] to open ‘Spreader glass replacement’ menu. Press [OK] to move smear unit forward. Once prompted open smear unit cover and gently remove spreader glass by pulling spreader gently forward. -
Page 24: Replacing Printer Ribbon
When prompted to ‘Reset the counter of the spreader glass’ press [OK]. NOTE: Spreader glass counter should only be reset if spreader glass has been changed. Replacing Printer Ribbon Ribbon needs replacing when ‘replace ink ribbon’ or ‘No ink ribbon’ error messages are displayed. Press [OK] to cancel error. - Page 25 Inset the cores into the new ribbon. Place the new ribbon in the feed out core [1] and the empty core in the winding position [2]. First install the feed-out core [1] in the ink cartridge then route the ribbon as shown below and set the empty core in the winding position [2].
-
Page 26: Running Patient Samples
On standalone systems the sampler can hold up to 5 racks at a time. On tracked analyzers racks will be automatically sent to the SP series analyzers in smear preparation is required. Mode Aspiration volume... -
Page 27: Manual (Closed) Mode
Complete manual screen information by selecting relevant area choosing appropriate option. For ‘Sample ID’ use keypad to enter required ID. NOTE: Key pad can be changed from numeric to capital letters using the [ALPH] key. Capital letter can be changed to lower case using the [alph] key. Lower case can be changed back to numeric using the [Num] key. -
Page 28: Stain Only
Stain Only To perform stain only place manually prepared place the manually prepared slides in the single cassettes on the cassette supply table. Auto Sampler Mode (Standalone) Place a maximum of 5 racks on the right hand side of the sampler unit and from the main menu select [Sampler]. -
Page 29: Smearlist
SmearList The smear list contains a database of the last 1000 slides to have been processed and are currently being processed on the SP-series analyzer. Smears in black have been completed; Blue currently being prepared and an error has occurred during preparation. 1. - Page 30 TIME ‘ ‘ Blank during smear preparation Black Time smear is complete Time when error occurred STATE Done Smear complete Cancel Order received from conveyor but no order in host system Smear not possible due to insufficient blood volume Ready Two slides being prepared.
-
Page 31: Finding A Smear
Overwritten by host RACK ‘ ‘ Manual preparation mode 000001 to 999999 Rack number TUBE ‘ ‘ Manual preparation mode 1 to 10 Sample position in rack Remain (min) Approx. time until smear is completed PRINT 1 Content printed on slide PRINT 2 Content printed on slide PRINT 3... - Page 32 TIP: To view time remaining once smear is located in the smear list press [←], this will take you to the screen in the smear list relating to the sample highlighted. Document Ref: SUKBMS-24- Version: 2.0 Date: 19/07/2021 Classification Unrestricted Page | 31...
-
Page 33: Status
Status Status menu shows you the real time status of the analyzer including temperatures, pressures and the location of slides within the analyzer. There are 4 status displays which can be navigated through using the [«] or [»] keys. Document Ref: SUKBMS-24- Version: 2.0 Date: 19/07/2021 Classification... - Page 34 Replacing Reagents If a reagent runs out during analysis one of the following message will appear indicating the reagent to be changed. Error Message Reagent to be replaced DCL not filled CELLPACK DCL Stain 1 not filled in chamber 1 Stain 1 Stain 1 not filled in chamber 2 Stain 2 not filled...
- Page 35 NOTE: Key pad can be changed from numeric to capital letters using the [ALPH] key. Capital letter can be changed to lower case using the [alph] key. Lower case can be changed back to numeric using the [Num] key. Document Ref: SUKBMS-24- Version: 2.0 Date: 19/07/2021 Classification...
-
Page 36: Responding To Alarms
Responding to Alarms When an error occurs an audible alarm will be heard and a dialog box will be displayed on the LCD screen. The colour of the dialog box and the audible alarm will vary depending on the level of error that has occurred. - Page 37 The error list can be viewed by pressing the [Help] icon. Errors are list in order of priority and are removed from the list once they have been resolved. To view the details of an error use the [↑] and [↓] to select the error to be dealt with and press [Detail].
-
Page 38: Audit Logs
Audit logs The SP-series analyzer has 3 audit logs • Error History • Parts history • Reagent history • Error History The ‘error history’ screen holds 1000 errors. To view error history from the main menu press [Maint.], then [history} and [Error history]. The error history screen displays Date Date which error occurred... -
Page 39: Document Ref: Sukbms-24- Version
Reagent History The ‘Reagent history’ screen displays the last 100 reagent replacements preformed. Reagent replacement history can be seen by selecting [Maint.], the [History] and then [Reagent history]. The ‘Reagent history’ screen displays the name of the reagent replaced along with the date and time it was replaced. - Page 40 Contact Us Mail Training Academy Sysmex UK Ltd Garamonde Drive Wymbush Milton Keynes MK8 8DF Phone Product Hotline For urgent application support 0333 320 3466 (UK) Service Hotline For technical support and service team 0333 320 3467 (UK) Reagent ordering...
Need help?
Do you have a question about the SP Series and is the answer not in the manual?
Questions and answers
Methanol not filled in chamber 1
Methanol may not be filled in chamber 1 of the SYSMEX SP Series if the methanol reagent has run out. This condition triggers the error message "Methanol not filled in chamber 1."
This answer is automatically generated