
Subscribe to Our Youtube Channel
Related Manuals for Konica Minolta bizhub C3851


Summary of Contents for Konica Minolta bizhub C3851
- Page 1 Quick Start Guide INDEX 1. Introduction 2. User’s Guides 3. Overview of This Machine 4. Loading Paper 5. Initial Settings of This Machine 6. Basic Usage 7. Index...
-
Page 2: Table Of Contents
Table of contents Introduction Introduction ............................. 1-2 Environmental initiatives ........................1-2 ® ENERGY STAR ..........................1-2 ® What is an ENERGY STAR Product? ....................1-3 Environmental benefits of power management ..................1-3 Recycled Paper...........................1-3 Duplex printing............................1-3 Safety information........................... 1-4 Warning and precaution symbols .......................1-4 These are some of major exemplary graphical symbols. - Page 3 User's Guides Intended use of office MFP devices ....................2-2 Intended use ............................2-2 Impermissible operating conditions....................2-2 Exclusion of liability..........................2-2 Introduction to user's guide......................2-3 2.2.1 User's Guide CD ..........................2-3 Layout of top page..........................2-4 Operating environment ........................2-4 Viewing the top page ..........................2-4 2.2.2 Target groups............................2-5 2.2.3...
- Page 4 Loading Paper in Bypass Tray ....................... 4-5 How to load paper into the Bypass Tray ....................4-5 Loading paper into Tray 1 ......................4-7 Initial Settings of This Machine Preparation for network connection (for administrators) ............5-2 Checking a LAN cable for connection ....................5-2 Assigning an IP address ........................5-2 Preparation for fax (for administrators) ..................
- Page 5 Registering a destination ......................6-20 6.6.1 Address book............................6-20 6.6.2 Registering address books .......................6-20 Registering from the Utility .......................6-20 Registering from Address Book......................6-24 Registering from the Fax/Scan basic screen ..................6-24 Index Contents-4 bizhub C3851FS/C3851/C3351...
-
Page 6: Introduction
Introduction... -
Page 7: Environmental Initiatives
Introduction Introduction Introduction This [Quick Start Guide] uses illustrations to describe operating procedures for the most commonly used functions in an easy-to-understand way. Start by using this manual to become proficient with the useful functions that this machine offers. For details on the various functions, refer to the User’s Guides on the User’s Guide CD included with this machine. -
Page 8: What Is An Energy Star ® Product
Introduction ® What is an ENERGY STAR Product? ® An ENERGY STAR product has a special feature that allows it to automatically switch to a "low-power ® mode" after a period of inactivity. An ENERGY STAR product uses energy more efficiently, saves you money on utility bills and helps protect the environment. -
Page 9: Safety Information
Safety information Safety information This section contains detailed instructions on the operation and maintenance of this machine. To achieve op- timum utility of this device, all operators should carefully read and follow the instructions in this manual. Please read the following section before connecting the machine to the supply. It contains important infor- mation related to user safety and preventing equipment problems. -
Page 10: Power Source Connection
Safety information <Power source connection> Descriptions Graphic symbols Do not use any power cord other than the one supplied in the package or attached on the products. If a power cord is not supplied, use only the power cord and plug that are specified in the user documentation. Failure to use this cord could result in a fire or electrical shock. -
Page 11: Installation
Safety information Descriptions Graphic symbols The outlet must be near the equipment and easily accessible. Otherwise you can not pull out the power plug when an emergency occurs. Do not place any objects around the power plug, as the power plug may be difficult to pull out when an emergency occurs. -
Page 12: Using The Product
Safety information Descriptions Graphic symbols <If instructed to use fixing legs> When the product has been installed, fix the product using the fixing legs. Not using the fixing legs could cause the product to move or topple over. Do not place the product in a dusty place, or a site exposed to soot or steam, near a kitchen table, bath, or a humidifier. - Page 13 Safety information Descriptions Graphic symbols Do not use flammable sprays, liquids, or gases inside or near this ma- chine. Do not clean the inside of this machine using a flammable gas duster. A fire or explosion could result. <If an RFID module (limited only to 13.56 MHz) for use in inside-the-ma- chine proximity communication or electromagnetic induction heating (IH) technology (limited only to 20.05 kHz to 100 kHz) is being used>...
-
Page 14: Consumables
Safety information <Consumables> Descriptions Graphic symbols Do not throw toner or a container that contains toner (e.g., toner car- tridge, developing unit and Waste Toner Box) into an open flame. The hot toner may scatter and cause burns or other damage. Descriptions Graphic symbols Do not leave toner-related parts (e.g., toner cartridge, developing unit... - Page 15 Safety information Descriptions Graphic symbols <If instructed to replace the fusing unit> The fusing section is extremely hot. Before replacing the fusing unit, be sure to open doors and covers of the machine. Then, leave the machine to stand idle for a specified period of time and make sure that the fusing section has cooled down to room temperature.
-
Page 16: Regulation Notices
Regulation notices CE Marking (Declaration of Conformity) for users of the European Union (EU) Hereby, Konica Minolta declares that the radio equipment types mentioned on the front cover of this manual or/and in clause 1.2 are in compliance with Directive 2014/53/EU. -
Page 17: Interference-Causing Equipment Standard (Ices-003 Issue 5) (For Canada Users)
Regulation notices NOTE: This equipment has been tested and found to comply with the limits for a Class B digital device, pursuant to Part 15 of the FCC Rules. These limits are designed to provide reasonable protection against harmful inter- ference in a residential installation. -
Page 18: Internal Laser Radiation
Regulation notices Internal Laser Radiation Maximum average radiation power: 11.2 μW at the laser aperture of the print head unit. Wavelength: 770-800 nm This product employs a Class 3B laser diode that emits an invisible laser beam. The laser diode and the scanning polygon mirror are incorporated in the print head unit. The print head unit is NOT A FIELD SERVICE ITEM: Therefore, the print head unit should not be opened under any circumstances. -
Page 19: Laser Safety Label
Regulation notices Laser safety label A laser safety label is attached to the outside of the machine, as shown below. Ozone Release Locate the Machine in a Well-Ventilated Room A negligible amount of ozone is generated during normal operation of this machine. An unpleasant odor may, however, be created in poorly ventilated rooms during extensive machine operations. -
Page 20: Recycling Batteries (For Taiwan Users Only)
Regulation notices Recycling batteries (for Taiwan users only) This symbol means: Do not dispose of this product together with your household waste! Please refer to the information of your local community or contact our dealers re- grading the proper handling of end-of-life electric and electronic equipments. Re- cycling of this product will help to conserve natural resources and prevent potential negative consequences for the environment and human health caused by inappropriate waste handling. -
Page 21: Caution Notations And Labels
Caution notations and labels Caution notations and labels Safety precaution notations and labels appear on this machine at the following positions. Be very careful that an accident does not occur when operations such as removing paper jams and staple jams are performed. 7CAUTION Do not remove caution labels or notations. -
Page 22: Special Notice To User
Special Notice to User Special Notice to User For Canada This product meets the applicable Innovation, Science and Economic Development Canada technical spec- ifications. Le présent produit est conforme aux spécifications techniques applicables d’Innovation, Sciences et Dével- oppement économique Canada. The Ringer Equivalence Number (REN) indicates the maximum number of devices allowed to be connected to a telephone interface. -
Page 23: For Europe
Special Notice to User Connection to party line service is subject to state tariffs. Contact the state public utility commission, public service commission or corporation commission for information. If your home has specially wired alarm equip- ment connected to the telephone line, ensure the installation of this equipment does not disable you alarm equipment. -
Page 24: Space Requirements
Space requirements To ensure that machine operation, consumables replenishing, part replacement, and regular maintenance can easily be performed, adhere to the recommended space requirements detailed below. Unit: inch (mm) Front view bizhub C3851/bizhub C3351 30-11/16 (779) 21-7/8 (555) 8-13/16 (224) -
Page 25: Right View (With Optional Devices Installed)
Space requirements Right view (with optional devices installed) The hatched parts indicate optional devices in this figure. 23 (584) 36-11/16 (932) 1-20 bizhub C3851FS/C3851/C3351... -
Page 26: Operation Precautions
Operation precautions Operation precautions To ensure the optimum performance of this machine, observe the precautions described below. Power source The power source requirements are as follows. Use a power source with as little voltage or frequency fluctuations as possible. Voltage fluctuation: Maximum + 6%/- 10% (at 110V to 127V AC), ^ 10% (at 220V to 240V AC) Frequency fluctuation: Maximum ^ 3 Hz (at 50 Hz/60 Hz) Operating environment The environmental requirements for correct operation of the machine are as follows. - Page 27 Operation precautions bizhub C3851FS 53.1 kg 117 lbs bizhub C3851/bizhub C3351 49.2 kg 108 lbs 1-22 bizhub C3851FS/C3851/C3351...
-
Page 28: Do Not Place The Machine Where Air Or Wind Will Blow On It
Operation precautions Do not place the machine where air or wind will blow on it The machine may not operate properly. bizhub C3851FS/C3851/C3351 1-23... -
Page 29: Legal Restrictions On Reproduction
Legal restrictions on reproduction Legal restrictions on reproduction Certain types of originals must never be reproduced with the purpose or intent to pass reproductions of such originals off as the originals. The following is not a complete list, but is meant to be used as a guide to responsible reproduction. <Financial Instruments>... -
Page 30: Trademark Acknowledgements
Trademark acknowledgements Trademark acknowledgements KONICA MINOLTA, the KONICA MINOLTA logo, Giving Shape to Ideas, PageScope, and bizhub are regis- tered trademarks or trademarks of KONICA MINOLTA, INC. Mozilla and Firefox are trademarks of the Mozilla Foundation. Microsoft, Windows, Windows 7, Windows 8.1, and Windows 10 are either registered trademarks or trade- marks of Microsoft Corporation in the United States and/or other countries. -
Page 31: Copyright
Note User's Guide may not be reproduced in part or in full without permission. KONICA MINOLTA, INC. will not be held liable for any incidents caused by using this printing system or Us- er's Guide. Information included in User's Guide is subject to change without notice. -
Page 32: Software License Agreement
1.10 SOFTWARE LICENSE AGREEMENT This package contains the following materials provided by KONICA MINOLTA, INC. (KM): software included as part of the printing system ("Printing Software"), the digitally-encoded machine-readable outline data en- coded in the special format and in the encrypted form ("Font Programs"), other software which runs on a computer system for use in conjunction with the Printing Software ("Host Software"), and related explanatory... -
Page 33: I-Option Lk-105 V4 (Searchable Pdfs) End User License Agreement
i-Option LK-105 v4 (Searchable PDFs) End User License Agreement 1.11 1.11 i-Option LK-105 v4 (Searchable PDFs) End User License Agree- ment Subject to your purchase of a license key of i-Option LK-105 v4 (searchable PDFs, or "Program"), KONICA MINOLTA, INC. (KM) grants you a non-exclusive and non-transferable sublicense to use the Program provid- ed that you comply with all terms and conditions stated in this Agreement. -
Page 34: User's Guides
User's Guides... -
Page 35: Intended Use Of Office Mfp Devices
Intended use of office MFP devices User's Guides Intended use of office MFP devices Intended use This Multi Function Product incorporates the functionality of multiple office devices in one. It is designed to be used as an office system for the following purposes: Print, copy, scan and fax documents. -
Page 36: Introduction To User's Guide
Introduction to user's guide Introduction to user's guide The user's guide of this product consists of this manual and the User's Guide CD. This guide describes basic procedures required to use this machine and how to configure initial settings. If you want to learn about more detailed functions or operation methods, refer to the User's Guide included in the User's Guide CD. -
Page 37: Layout Of Top Page
Introduction to user's guide Layout of top page Name Description [Search by Function] Searches for desired information using functions such as printing or scanning and on buttons displayed on the Touch Panel. [Search] Enter one or multiple keywords to search within the User's Guide. If necessary, you can distinguish between upper and lower case alpha- bet characters to carry out a search. -
Page 38: Target Groups
Introduction to user's guide 2.2.2 Target groups The user's guides (see page 2-3) are intended for the following users of the system: Target group Description User Persons using the system for its intended use (see page 2-2) as well as man- aging system functions and consumables according to the assigned user rights. -
Page 39: Names And Notations Of Applications
Introduction to user's guide Symbols/Notations Description This shows the settings related to a topic only for administrators. This check mark symbol shows a precondition of a procedure. This symbol indicates a supplementary explanation of a procedural instruction. An item enclosed by brackets [ ] indicates a key name on the Touch Panel or computer screen, or the name of a user's guide. -
Page 40: Overview Of This Machine
Overview of This Machine... -
Page 41: About This Machine
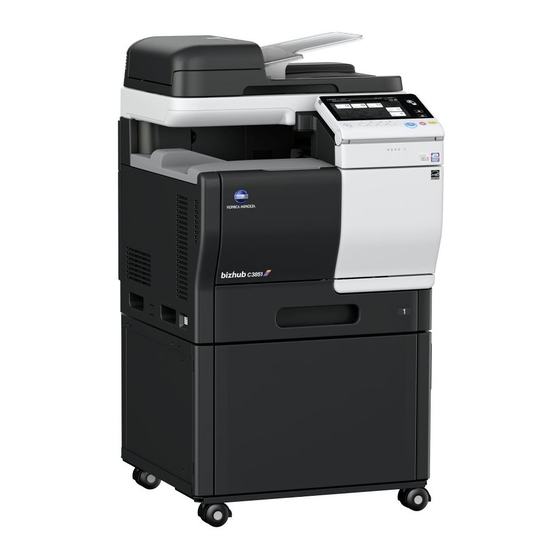
About this machine Overview of This Machine About this machine 3.1.1 Name of parts Front Name Description Control Panel Used to configure various settings in this machine. Automatic Document Automatically feeds and scans originals by page. This unit also revers- Feeder es and automatically scans 2-sided originals. -
Page 42: Front: Status With Automatic Document Feeder Opened
About this machine Front: Status with Automatic Document Feeder opened Name Description Scanner Lock Lever Used to lock or unlock the scanner. To use this machine, unlock the scanner. Original Glass Used to load the original. Slit Scan Glass Used to scan an original image when using the ADF. This unit is referred to as a Slit Scan Glass or Original Scan Glass in the manual. -
Page 43: Side/Rear
About this machine Side/rear The figure shows the main unit that is equipped with the optional Fax Kit FK-517. In some area, bizhub C3851FS/C3851 provides the Fax Kit FK-517 as standard. Name Description Power Switch Press this switch to turn the machine on or off. Power Connection Connect the power cord to this inlet to supply power to this machine. -
Page 44: Finisher (Bizhub C3851Fs)
About this machine Finisher (bizhub C3851FS) Name Description Main Tray Outputs printed pages. Processing Tray Used to conduct stapling. Also, this tray is used to output the printed sheets to the Main Tray. bizhub C3851FS/C3851/C3351... -
Page 45: Option Configuration
About this machine 3.1.2 Option configuration List of optional components Name Description Main unit Scans the original in the scanner section, and prints a scanned image in the printer section. Authentication Unit Performs user authentication by scanning vein patterns in the finger. AU-102 To install the Authentication Unit AU-102, the Local Interface Kit EK-P05 or Local Interface Kit EK-P06 is required in addition to the... -
Page 46: List Of Other Optional Components
About this machine Name Description Clean Unit CU-202 Collects small particles (UFP) generated in this machine to prevent them from escaping this machine. Clean Unit CU-202 may not be available in some areas. List of other optional components The following options are built into this machine and are not shown in the figure. Name Description Fax Kit FK-517... - Page 47 About this machine Name Description Mount Kit MK-P02 Required to have Authentication Unit AU-201S built in to the main unit. Staple Kit SK-602 Used in the Finisher of bizhub C3851FS. bizhub C3851FS/C3851/C3351...
-
Page 48: Power Supply
Power Supply Power Supply 3.2.1 Power Switch and Power key locations This machine has two power switches: Power Switch outside the machine and Power key on the Control Panel. Name Description Power Switch Press this switch when turning on or off the main power of this machine or restarting this machine. -
Page 49: Turning The Power Switch On Or Off
Power Supply 3.2.2 Turning the Power Switch ON or OFF When turning the main power on, press n of the Power Switch. The Start key lights up orange, and a screen appears to show that this machine is in the process of start-up. -
Page 50: When Using The Power Key As A Sub Power Off Key
Power Supply Power key Status of Status of Description this ma- chine Hold down Sub Power Light up: The power saving effect is the same as that of the sleep Orange mode. While the sub power is turned off, this machine can re- ceive data or faxes, however, it cannot scan or print an original. -
Page 51: Control Panel
Control Panel Control Panel Tips This figure shows an optional Keypad KP-101 installed. Name Description Touch Panel Displays setting screens and messages. Directly press this panel to carry out operations. Mobile touch area Used to associate this machine with an NFC-compatible Android ter- minal. - Page 52 Control Panel Name Description Access Press this key to perform authentication in the Login screen if user au- thentication or account track is installed on this machine. Pressing the Access key while logged in will log you out of this ma- chine.
-
Page 53: Operating The Touch Panel
Operating the Touch Panel Operating the Touch Panel Lightly touch the screen with your finger, then remove your finger from the screen immediately. This action is available when selecting or determining a menu. Double-tap Lightly touch the screen with your finger twice in succession. Used to retrieve detailed information, to enlarge a thumbnail or preview image, and to open a User Box. -
Page 54: Drag
Operating the Touch Panel Drag To move the scroll bar or document, place your finger on it and move your finger. Used to move the scroll bar or document. Slide your finger parallel in a front-to-back and side-to-side direction on the screen. Used to move to the intended display location if data spans multiple screens. -
Page 55: Drag & Drop
Operating the Touch Panel Drag & Drop Slide your finger to the intended place and release it while a document is selected. Used to move the document to the intended place. Pinch-in / Pinch-out Place two fingers on the screen and then open or close them. Used to enlarge or reduce a preview image. -
Page 56: Rotation
Operating the Touch Panel Rotation Place two fingers on the screen and then rotate them. Used to rotate a preview image. Displaying the Keypad Tap a number or input area on the screen to display the Keypad. Used to enter numerals. Moving the Keypad Touch the top of the Keypad with your finger and move it as desired. -
Page 57: Switching To The Entry Or Selection Screen
Operating the Touch Panel Switching to the entry or selection screen Tap a target input area or icon to switch to the entry or selection screen. Used to switch into the Select screen to enter text or select a registered item. Precautions on using the Touch Panel This machine features a capacitance-base touch panel. -
Page 58: Main Menu
Main Menu Main Menu Press the Menu key on the Control Panel to display the main menu. You can customize the keys to be dis- played on the main menu freely to suit your requirements. The main menu can be extended to three screens as necessary. It can show 12 shortcut keys in each screen, and up to 25 shortcut keys in three screens. - Page 59 Main Menu Name Description Page switching key Tap this key to switch pages when main menu keys are assigned to multiple pages. Pages can also be switched by dragging or flicking the screen. [Utility] Tap this button to configure settings of this machine or check the use status of this machine.
-
Page 60: Entering Characters
Entering characters Entering characters When entering characters to register an address or program, use the keyboard screen displayed on the Touch Panel. Item Description Keyboard Tap the keys of characters you want to enter. Tap this key to delete a character or value you entered. [ ]/[ ] Tap this key to move the cursor. - Page 61 Entering characters 3-22 bizhub C3851FS/C3851/C3351...
-
Page 62: Loading Paper
Loading Paper... -
Page 63: Paper
Paper Loading Paper Paper 4.1.1 Confirm the available paper types Paper type Paper weight Paper capacity Plain paper 15-15/16 lb to 23-15/16 lb (60 Bypass Tray: 100 sheets Recycled paper to 90 g/m Tray 1: 550 sheets Single Side Only Special Paper Colored Paper User Paper 1... -
Page 64: Confirm The Available Paper Sizes
Paper Tips For paper weight and media adjustment settings, contact your service representative. When printing on the reverse side of a sheet printed on one side, load paper into the Bypass Tray, and select [Duplex 2nd Side] in the paper setting, improving a reduction of the printing image quality. [Du- plex 2nd Side] is available when plain paper, Thick 1, Thick 1+, or Thick 2 is selected to be printed from the Bypass Tray. -
Page 65: Storing Paper
Paper Paper with ribbons, hooks, buttons, etc., attached Envelopes that have glue or release paper on the flaps or the flap-covered part of the body Paper with different paper quality (roughness) on the front and back sides Paper that is too thin or too thick Paper containing static electricity Acidic paper Other types of unavailable paper... -
Page 66: Loading Paper In Bypass Tray
Loading Paper in Bypass Tray Loading Paper in Bypass Tray How to load paper into the Bypass Tray When selecting a paper size other than for paper trays, use the Bypass Tray. NOTICE To use the Bypass Tray, load paper and specify the paper size and paper type. Do not load the following paper into the Bypass Tray. - Page 67 Loading Paper in Bypass Tray Load paper into the tray with the print side facing down. % Insert paper into the tray until their edges are pressed against the back. % For details on the available paper sizes, refer to page 4-3. % For details on how to load postcards, envelopes, and letterhead paper, refer to [Introduction] in the User's Guide CD.
- Page 68 Loading paper into Tray 1 Loading paper into Tray 1 Tray2/Tray3 is available when the optional Paper Feed Unit is installed on this machine. For details on how to load Tray 2/Tray 3, refer to [Introduction] in the User's Guide CD. Pull out Tray1.
- Page 69 Loading paper into Tray 1 Slide the Lateral Guide to fit the size of the loaded paper. NOTICE Exercise care to ensure that there is no clearance between the Lateral Guide and paper. Close Tray1. Change the paper type and paper size on the Control Panel. % To configure settings: [Copy] - [Paper] bizhub C3851FS/C3851/C3351...
-
Page 70: Initial Settings Of This Machine
Initial Settings of This Machine... -
Page 71: Preparation For Network Connection (For Administrators)
Preparation for network connection (for administrators) Initial Settings of This Machine Preparation for network connection (for administrators) Checking a LAN cable for connection Check that a LAN cable connected to the network is connected to the LAN port of this machine. For details on the cable connection port, refer to page 3-4. -
Page 72: Preparation For Fax (For Administrators)
Preparation for fax (for administrators) Preparation for fax (for administrators) Tips To use the fax functions, the optional Fax Kit is required. In some areas, bizhub C3851FS/C3851 pro- vides the Fax Kit as standard. Checking the modular cable connection Check that a modular cable is connected between the LINE port and the appropriate telephone line. For details on the cable connection port, refer to page 3-4. -
Page 73: Security Settings (For Administrators)
Security settings (for administrators) Security settings (for administrators) 5.3.1 Hard Disk setting To encrypt the data saved on the hard disk of this machine to protect it, specify the hard disk encryption set- ting. Because the hard disk will be formatted when the hard disk encryption setting is specified, the data saved on the hard disk will be deleted. -
Page 74: Basic Usage
Basic Usage... -
Page 75: Using The Print Function (Windows Environment)
Using the print function (Windows environment) Basic Usage Using the print function (Windows environment) This section describes how to configure print settings in Windows environment. Reference For details on how to configure print settings in Mac OS environment, refer to [Print] in the User's Guide CD. 6.1.1 Printer driver Before using this machine as a printer, you need to install the printer driver on your computer. - Page 76 Using the print function (Windows environment) Select [Install printers/MFPs] in [Select menu to setup], and click [Next]. Connected printers are detected. Select this machine from the list of detected printers. % If this machine is not detected, restart it. % Among the connected printers, only the target model is automatically detected and displayed. If multiple target models are displayed, check the IP addresses.
-
Page 77: Preparation For Printing (Usb Connection)
Using the print function (Windows environment) 6.1.3 Preparation for printing (USB connection) Changing the installation settings (Windows 7/8.1/10/Server 2008 R2/Server 2012/Server 2012 R2/Server 2016) In Windows 7/8.1/10/Server 2008 R2/Server 2012/Server 2012 R2/Server 2016, change the PC settings be- fore installing the printer driver. Open the [Control Panel] window. -
Page 78: Installing The Printer Driver
Using the print function (Windows environment) Installing the printer driver Use the installer to install the printer driver on your computer. Administrator privileges are required to perform this task. Connect a USB cable to the USB port of this machine. % For details on the cable connection port, refer to page 3-4. -
Page 79: Initial Settings Of The Printer Driver
Using the print function (Windows environment) Change the printer name or print a test page if necessary, then click [Finish]. This completes the installation process of the printer driver. Settings Description [Review] Displays the installed components for checking. [Rename Printer] Changes this machine name if necessary. -
Page 80: How To Print
Using the print function (Windows environment) 6.1.5 How to print Open data of the original using the application software. From the [File] menu, select [Print]. In [Printer Name] (or [Select Printer]) make sure that the desired printer has been selected. % The [Print] dialog box varies depending on the application software. -
Page 81: Using The Scan Function
Using the scan function Using the scan function 6.2.1 Available operations in the scan function The scanned original data can be sent to a computer or server, and saved on the hard disk (User Box) of this machine. The Scan-to-Send Function provides the following sub-functions. Function Description Scan to E-mail... - Page 82 Using the scan function Tap [Scan] or [Scan/Fax]. Specify the destination. % You can select the desired destination from the pre-registered destination list, or directly enter des- tination information. For details on how to register a destination, refer to page 6-20. % Specifying multiple destinations carries out computer sending and fax transmission simultaneously.
-
Page 83: Using The Fax Function
Using the fax function Using the fax function 6.3.1 Fax function The Fax is a communication function that uses a telephone line to send scanned originals (paper) or to receive data sent from remote machines. This machine has various features for fax operations, including those ena- bling the user to change scan settings according to the original and to save incoming faxes in a User Box. -
Page 84: Introduction Of Fax Transmission Function
Using the fax function Enter a fax number. % You can select the desired destination from the pre-registered destination list, or directly enter des- tination information. For details on how to register a destination, refer to page 6-20. % Specifying multiple destinations carries out computer sending and fax transmission simultaneously. Specify the size of the original to be scanned. -
Page 85: Introduction Of Fax Receiving Function
Using the fax function Function Overview F-Code TX F-Code TX specifies the F code (SUB address and sending ID) to send a fax. Confidential communication and relay distribution are available. • The confidential communication function is designed to communicate with specific people using a Confidential RX User Box that requires a registered number and a password. -
Page 86: Introduction Of Ip Address Fax Function
Using the fax function 6.3.6 Introduction of IP address fax function IP Address Fax is a function used to send and receive faxes within a limited network such as an enterprise network. Specify an IP address for the destination. The same network as the one used by the computers is used to transmit faxes. -
Page 87: Using The Copy Function
Using the copy function Using the copy function 6.4.1 How to copy Load the original. Tap [Copy]. Specify the size of the original to be scanned. % The size of the original can be specified in [Original Settings] (default: [8-1/2 e 11] (inch area)/[A4] (centimeter area)). -
Page 88: Introduction Of Copy Function
Using the copy function If necessary, specify the number of copies using the Keypad. % Tapping [No. of Sets] displays the Keypad. % Pressing the 10 Keypad key (default: Register key 3) displays the Keypad on the Touch Panel, en- abling you to enter numeric values. - Page 89 Using the copy function Function Overview [Separate Scan] If the number of original sheets is so large that they cannot be loaded into the ADF at the same time, you can load them in several batches and handle them as one job. [Bkgd.
- Page 90 Using the copy function Function Overview [Non-Image Area Erase] When making copies with the ADF open and the original placed on the Origi- nal Glass, the machine detects the outline of the original and erases shadows outside the original. [Save in User Box] Save original images in the hard disk (user box) of this machine.
-
Page 91: Printing A File Stored On Usb Memory
Printing a file stored on USB memory Printing a file stored on USB memory Supported USB memory devices USB memory devices that have the following specifications can be connected to this machine. Item Requirement Interface Compatible with USB Version 2.0/1.1 interface Format type Formatted in FAT32 Security... - Page 92 Printing a file stored on USB memory Tap [Print a document from External Memory.]. % You can also print files by selecting the User Box mode and by tapping [System] - [External Mem- ory]. Select a file to print, then tap [Print]. % You can directly enter the path to the file folder in the [File Path] field.
-
Page 93: Registering A Destination
Registering a destination Registering a destination 6.6.1 Address book Registering a frequently used destination on this machine will save you the trouble of having to enter it each time you send data. A destination registered on this machine is called an Address Book. You can register up to 2000 one-touch destinations in the address book. - Page 94 Registering a destination Settings Description [Line Settings] If necessary, specify how to send a fax to a destination you want to register. You may change the settings you made here before sending a fax. • [Overseas TX]: Used to send a fax to areas where communication condi- tions are poor.
- Page 95 Registering a destination Settings Description [Reference] On the Touch Panel, search for a computer to send a file to, and select a target shared folder. When the authentication screen appears, enter the name and password of a user who has privileges to access the selected folder. After authentication, [Host Address] or [File Path] is entered automatically.
- Page 96 Registering a destination Settings Description [SSL Settings] When SSL is used in your environment, select [ON]. [OFF] is specified by default. [Port No.] If necessary, change the port number. In normal circumstances, you can use the original port number. [80] is specified by default. The registered content of [IP Address Fax] Settings Description...
-
Page 97: Registering From Address Book
Registering a destination Registering from Address Book Tap [Address book] on the main menu. Tap [New]. Select the type of the destination you want to register from [Address Type]. Enter destination information, then tap [Register]. % The registered information is the same as that to be registered from the Utility. For details, refer to page 6-20. - Page 98 Registering a destination Tap [Address Reg.]. Tap [New], then tap the type of the destination you want to register. Enter destination information, then tap [Register]. % The registered information is the same as that to be registered from the Utility. For details, refer to page 6-20.
- Page 99 Registering a destination 6-26 bizhub C3851FS/C3851/C3351...
- Page 100 Index...
- Page 101 Index Address Book ............6-20 Paper Available Paper Sizes ..........4-3 Available Paper Types ........... 4-2 Storing Paper ............4-4 Bypass Tray ..............4-5 Unavailable Paper ..........4-3 Power Supply .............. 3-9 Control Panel .............3-12 Power Key ............3-10 Power Switch ............3-10 Copy Function ............6-14 How to Copy ............6-14 Preparation...
- Page 102 http://konicaminolta.com Printed in Thailand A92E-9612-22 2017.10 © 2016...
Need help?
Do you have a question about the bizhub C3851 and is the answer not in the manual?
Questions and answers