Table of Contents
Advertisement
Quick Links
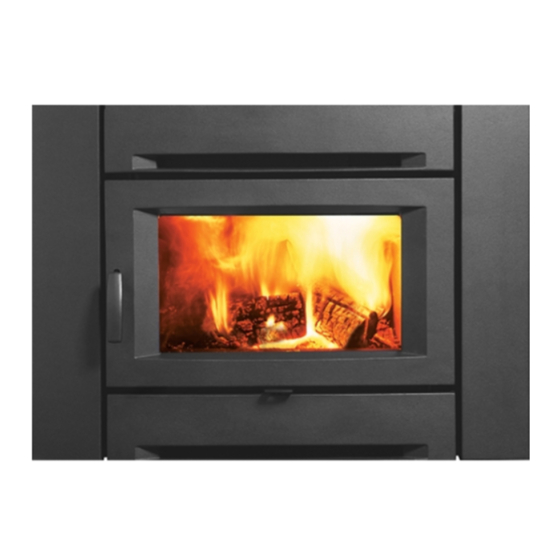
CI1203 / CI1253
Alterra
®
Wood Inserts
Owner's & Installation Manual
Tested by:
Installer: Please complete the details on the back cover
and leave this manual with the homeowner.
Homeowner: Please keep these instructions for future reference.
FPI FIREPLACE PRODUCTS INTERNATIONAL LTD. 6988 Venture St., Delta, BC Canada, V4G 1H4
919-047d
01.30.18
Advertisement
Table of Contents

Related Manuals for Regency Alterra CI1203


Summary of Contents for Regency Alterra CI1203
- Page 1 CI1203 / CI1253 Alterra ® Wood Inserts Owner's & Installation Manual Tested by: Installer: Please complete the details on the back cover and leave this manual with the homeowner. Homeowner: Please keep these instructions for future reference. FPI FIREPLACE PRODUCTS INTERNATIONAL LTD. 6988 Venture St., Delta, BC Canada, V4G 1H4 919-047d 01.30.18...
- Page 2 The following statements are required by the Environmental Protection Agency: “This manual describes the installation and operation of the Regency CI1203and CI1253 wood heater. This heater meets the 2015 U.S. Environmental Pro- tection Agency’s crib wood emission limits for wood heaters. Under specific test conditions this heater has been shown to deliver heat at rates ranging from 10,600 BTU/hr to 34,700 BTU/hr.”...
-
Page 3: Table Of Contents
Brick Flue Baffle & Secondary Air Tube Installation ..20 Firebrick ...............29 Firebrick Assembly ............20 Draft Control ..............20 WARRANTY Warranty ..............30 ALL PICTURES / DIAGRAMS SHOWN THROUGHOUT THIS MANUAL ARE FOR ILLUSTRATION PURPOSES ONLY. ACTUAL PRODUCT MAY VARY DUE TO PRODUCT ENHANCEMENTS. Regency CI1203 / CI1253 Wood Cast Insert... -
Page 4: Copy Of Safety Label
9.1" W x 5.1" H (File at 100%) Nov. 25/14: Rev. B - Updated ETL logo Jan. 15/13: Rev.A Updated years of manufacture June 15/10: WN# issued - ITS Jan. 20/10: Created draft Regency CI1203 / CI1253 Wood Cast Insert... - Page 5 QUELS LE POÊLE EST UTILISÉ DE FAÇON RÉGULIÈRE PEUT AFFECTER CETTE ACCUMULATION DE CRÉOSOTE. NE PAS SURCHAUFFER. Serial No./ No de série 2017 2018 2019 2020 2021 MAR APR SEPT OCT DATE OF MANUFACTURE Regency CI1203 / CI1253 Wood Cast Insert...
-
Page 6: Dimensions
(refer to Masonry and Factory Built Fireplace Clearances sec- tion). 35-15/16” (912mm) 9-9/16” 17-1/8” (436mm) (244mm) 15” (381mm) 25” (635mm) 6" (152mm) Diameter 6" (152mm) Diameter OFFSET FLUE ADAPTOR (171-936) STANDARD FLUE ADAPTOR (171-932) Regency CI1203 / CI1253 Wood Cast Insert... -
Page 7: Unit Dimensions Ci1253
(refer to Masonry and Factory Built Fireplace Clearances sec- tion). 35-15/16” (912mm) 9-9/16” 17-1/8” (436mm) (244mm) 15” (381mm) 25” (635mm) 6" (152mm) Diameter 6" (152mm) Diameter OFFSET FLUE ADAPTOR (171-936) STANDARD FLUE ADAPTOR (171-932) Regency CI1203 / CI1253 Wood Cast Insert... -
Page 8: Optional Backing Plate Dimensions
OPTIONAL BACKING PLATE DIMENSIONS CI1203 Standard CI1253 Standard 40” (1016mm) 40” (1016mm) CI1203 Custom - Minimum Dimensions CI1253 Custom - Minimum Dimensions 37” (940mm) 37” (914mm) Regency CI1203 / CI1253 Wood Cast Insert... -
Page 9: Before Installing Your Insert
9) Inserts that project in front of the fireplace must one cannot be added to this appliance. If a blower Regency Inserts are designed to use either a 5.5" be supplied with appropriate supporting means. is required, you must purchase the CI1253 which (140mm) or 6"... -
Page 10: Masonry And Factory Built Fireplace Clearances
R = 1/k x T = 1/0.84 x .75 = 0.893. fied R of 0.893. Since proposed system R is greater than required, the system is acceptable. Thermal Resistance: R = (ft )(hr)( )(K) Regency CI1203 / CI1253 Wood Cast Insert... -
Page 11: Installing Your Insert
1/2 to 1 inch of the levelling bolt. Diagram 2 Flue Adaptor Secure adaptor using 3 screws - 1 in the front and 1 each on the left and right side. Regency CI1203 / CI1253 Wood Cast Insert... - Page 12 NOTE: The pull rod should not be thrown away. It should be kept if the stove is ever needed to be removed from the fireplace. Pull Rod Diagram 4 Diagram 5: Pull Rod In Place Regency CI1203 / CI1253 Wood Cast Insert...
-
Page 13: Installation Into Amasonry Fireplace
When a connected flue or liner is in use, the insert is able to “breathe” better by allowing a greater Regency highly recommends the use of a full liner draft to be created. The greater draft can decrease as the safest installation and provides the most problems such as, difficult start-ups, smoking out optimum performance. -
Page 14: Stainless Steel Smoke Deflector Installation
To replace the deflector, loosen off both bolts and slide defector upward and out. Install new defector and hand tighten bolts. Ensure positive location of the defector prior to hand tightening. WARNING: Operation of the unit with out proper installation of smoke deflector will void warranty. Regency CI1203 / CI1253 Wood Cast Insert... -
Page 15: Cast Faceplate Installation
Line up the left side casting bracket with the left side bracket on the unit. Note: the CI1200 right/left sides are reversible. 5) Repeat Steps 2 and 4 to install right cast surround. Regency CI1203 / CI1253 Wood Cast Insert 08/30/10 918-895... - Page 16 9) Slide the upper cast surround down over the screws until it is level and in line with the side cast pieces. CI1250 10) Tighten both screws once all three cast pieces are level. CI1200 Regency CI1203 / CI1253 Wood Cast Insert 918-895 08/30/10...
- Page 17 Then run the cord along the lower part of the lower cast surround and out in between the right cast and the unit. 17) With the cord re-routed, follow steps 13-15 to complete the installa- tion. Regency CI1203 / CI1253 Wood Cast Insert 08/30/10 918-895...
-
Page 18: Piece Backing Plate Installation
Diagram 4 5) Slide stove back into position after backing plate is installed. Diagram 2 Flush front face of backing plate Standard backing plate shown on the Diagram 5 CI1250 Regency CI1203 / CI1253 Wood Cast Insert 06/29/10 918-930... -
Page 19: Door Reversal
4) Flip the door hinge 180° - install on the left side of the unit with 2 bolts. 5) Reattach the door catch assembly on the right side with 2 bolts from step Door 9) Reattach the door to the door hinge. Hinge Door Catch Regency CI1203 / CI1253 Wood Cast Insert... -
Page 20: Brick Flue Baffle & Secondary Air Tube Installation
Firebrick is included to extend the life of your insert and radiate heat more evenly. Check to see that all firebricks are in their correct positions and have not become misaligned during shipping. Regency CI1203 / CI1253 Wood Cast Insert... -
Page 21: Operating Instructions
9) During the first few hours it may be more difficult to start the fire. As you dry out your fire brick and your masonry flue (if applicable), your draft will increase. Regency CI1203 / CI1253 Wood Cast Insert... -
Page 22: Fan Operation (Ci1253 Only)
AUTO MANUAL Neutral Green Manual/ Live Ground Auto Fan Plug 120V AC Switch Switch 60 Hz Fan Thermodisc (normally open) White White Black Ground Fan Wiring Diagram Regency CI1203 / CI1253 Wood Cast Insert... -
Page 23: Ash Disposal
As a result, creosote residue accumulates on the flue lining. When ignited, this DO NOT ALLOW ASHES TO BUILD UP TO THE 9) Your Regency Insert can be very hot. You creosote can make an extremely hot fire. LOADING DOORS. -
Page 24: Maintenance
GLASS CLEANING breakage. Your Regency Insert is supplied with 5mm Neoceram ceramic glass that will Only clean your glass window when it is cool. Your local retailer can supply withstand the highest heat that your unit will produce. In the event that you... -
Page 25: Handle Replacement
Removal of the spacer washer, shown in the diagram below, will allow the catch to be moved closer to the door frame, causing a tighter seal. Remove and replace the nuts, washer and spacer as shown. Spacer washers Regency CI1203 / CI1253 Wood Cast Insert... -
Page 26: Fan Removal
4) Lift fan housing up off pins on floor of unit. 8) Disconnect the ground wire located on the left side of the fan housing. Ground wire 9) To install fan - reverse Steps 8-1. Fan Housing Pins on unit floor Regency CI1203 / CI1253 Wood Cast Insert... -
Page 27: Parts List
Air Tube - 3/4" (Qty: 1) 16) 073-955 Baffle (2/set) 17) 171-932 Standard Flue Adaptor 171-936 Offset Flue Adaptor 18) 156-060N Draft plate arm 19) 820-483 Stainless smoke deflector *Not available as a replacement part. Regency CI1203 / CI1253 Wood Cast Insert... -
Page 28: Main Assembly Ci1253
Air Tube - 1" (Qty: 1) 15) 033-953 Air Tube - 3/4" (Qty: 1) 16) 073-955 Baffle (2/set) 17) 171-932 Standard Flue Adaptor 171-936 Offset Flue Adaptor 919-047 Manual *Not available as a replacement part. Regency CI1203 / CI1253 Wood Cast Insert... -
Page 29: Cast Faceplate
4) * Brick Partial: 1-1/4" x 4-1/2" x 8" 5) * Brick Partial: 1-1/4" x 4-1/4" x 8" 6) * Brick Partial: 1-1/4" x 4-1/2" x 4-1/2" *Not available as a replacement part. Regency CI1203 / CI1253 Wood Cast Insert... -
Page 30: Warranty
At all times FPI reserves the right to inspect reported complaints on location in the field claimed to be defective prior to processing or authorizing of any claim. Failure to allow this upon request will void the warranty. Revision Date: December 2016 Regency Wood Products Warranty Regency CI1203 / CI1253 Wood Cast Insert... - Page 31 Freight damages for products or parts are not covered under the terms of the warranty. Products made or provided by other manufacturers and used in conjunction with the FPI appliance without prior authorization from FPI may void this warranty. Revision Date: December 2016 Regency Wood Products Warranty Regency CI1203 / CI1253 Wood Cast Insert...
- Page 32 Product Registration and Customer Support: Thank you for choosing a Regency Fireplace. Regency strives to be a world leader in the design, manufacture, and marketing of hearth products. To provide the best support for your product, we request that you complete a product registration form at http://www.regency-fire.com/Customer-Care/Warranty-Registration.aspx...
- Page 33 Product Registration and Customer Support: Thank you for choosing a Regency Fireplace. Regency strives to be a world leader in the design, manufacture, and marketing of hearth products. To provide the best support for your product, we request that you complete a product registration form found on our Web Site under Customer Care within ninety (90) days of purchase.
- Page 36 Dealer Name & Address: ______________________________________________ ___________________________________________________________________ Installer: ___________________________________________________________ Phone #: ___________________________________________________________ Date Installed: ______________________________________________________ Serial No.: __________________________________________________________ Printed in Canada Regency, Alterra are trademarks of FPI Fireplace Products International Ltd ® © Copyright 2018, FPI Fireplace Products International Ltd. All rights reserved.
Need help?
Do you have a question about the Alterra CI1203 and is the answer not in the manual?
Questions and answers