Table of Contents
Troubleshooting

Related Manuals for Leica BIOSYSTEMS ASP300S


Summary of Contents for Leica BIOSYSTEMS ASP300S
- Page 1 Instructions for Use Leica ASP300 S - Advanced Smart Processor Vacuum Tissue Processor Leica ASP300 S, English Order No.: 14 0476 80101 RevN Always keep this manual with the instrument. Read carefully before working with the instrument.
- Page 3 All copyrights to this documentation are For erroneous statements, drawings, technical held by Leica Biosystems Nussloch GmbH. illustrations etc. contained in this manual we Any reproduction of text and illustrations (or exclude liability as far as permissible accord-...
-
Page 4: Table Of Contents
Table of Contents Important Information ....................... 6 Symbols and their meanings....................... 6 Qualification of personnel ......................12 Intended purpose........................12 Instrument type ........................... 13 Microsoft software license terms.................... 13 Safety ............................14 Safety notes ..........................14 Warnings ............................15 Safety features on the instrument ................... 19 Instrument Components and Specifications ............... - Page 5 Table of Contents 5.1.3 INSTALLATION menu......................... 47 5.1.4 Editing the reagent list ....................... 50 5.1.5 Viewing the program list......................53 5.1.6 Adding and/or modifying programs ..................54 5.1.7 Favorites ............................57 5.1.8 Configuring the stations......................59 5.1.9 Reagent groups ........................... 60 Reagent handling ........................
-
Page 6: Important Information
Important Information 1.1 Symbols and their meanings Leica Biosystems GmbH assumes no liability for consequential loss or damage due to failure to observe the following instructions, particularly in relation to transportation and package han- dling, and failure to observe the instructions for handling the instrument carefully. - Page 7 Important Information 1.1 Symbols and their meanings (continued) Symbol: Title of symbol: Item numbers Numbers and parentheses refer to item numbers in Description: the illustrations. Function keys Symbol: Title of symbol: Description: Function keys that must be pushed on the touch- screen or activated in the software are shown in BOLD.
- Page 8 Important Information Symbol: Title of symbol: CSA Statement (Canada/USA) Description: The CSA test mark means that a product has been tested and fulfills the applicable safety and/or perfor- mance standards, including the relevant standards defined or administered by the American National Standards Institute (ANSI), Underwriters Laborato- ries (UL), the Canadian Standards Association (CSA), the National Sanitation Foundation International...
- Page 9 Important Information Symbol: Title of symbol: ON / STOP (Power) Description: ON: The electronic power supply is connected upon pushing the power switch. STOP: The electronic power supply is disconnected upon pushing the power switch. Label is attached close to the electronic power supply switch.
- Page 10 Important Information Symbol: Title of symbol: Caution: danger of crushing Inflammable Symbol: Title of symbol: Description: Inflammable reagents, solvents and cleaning agents are marked with this symbol. Symbol: Title of symbol: IPPC symbol The IPPC symbol includes Description: • IPPC symbol • Country code to ISO 3166, e.g.
- Page 11 Important Information Symbol: Title of symbol: This way up Description: Indicates correct upright position of the transport package. Symbol: Title of symbol: Temperature limit for transport Indicates the temperature limits for transport to Description: which the medical device can be safely exposed. Temperature limit for storage Symbol: Title of symbol:...
-
Page 12: Qualification Of Personnel
Important Information When delivering the instrument, the recipient must check that the ShockWatch impact indica- tor and tilt indicator are intact. The responsible Leica representative must be notified in the case that one or all indicators have been triggered. 1.2 Qualification of personnel • The Leica ASP300 S may be operated by trained laboratory personnel only. -
Page 13: Instrument Type
Important Information 1.4 Instrument type All information provided in these Instructions for Use applies only to the instrument type in- dicated on the cover page. The precise data for the various versions is specified in Chap. 3.4 "Technical Data". A nameplate indicating the instrument serial number is attached to the rear side of the instru- ment. -
Page 14: Safety
Safety 2.1 Safety notes • The safety and caution notes in this chapter must be observed at all times. • Be sure to read these notes even if you are already familiar with the operation and use of other Leica products. • The protective devices located on the instrument and the accessories must not be removed or modified. -
Page 15: Warnings
Safety 2.2 Warnings The safety devices installed in this instrument by the manufacturer only constitute the basis for accident prevention. Operating the instrument safely is, above all, the responsibility of the owner, as well as the designated personnel who operate, service or repair the instrument. To ensure trouble-free operation of the instrument, be sure to comply with the following instruc- tions and warnings. - Page 16 Safety 2.2 Warnings (continued) Transport and Installation • Only qualified personnel may install the instrument. • At least 2 qualified persons are required when lifting and transporting the instrument. Caution! The instrument weighs approximately 160 kg when empty. Once unpacked, the instrument may be transported only in an upright position.
- Page 17 Safety 2.2 Warnings (continued) Warnings – Operating the instrument • The instrument may only be operated by trained laboratory personnel. It must only be operat- ed for the purpose of its designated use and according to the instructions contained in these Instructions for Use.
- Page 18 Safety 2.2 Warnings (continued) Material safety data sheets can be obtained from the supplier of the chemicals. Alternatively, they can be downloaded from the following website: http://www.msdsonline.com Warnings – Handling reagents • Take care when handling solvents! • Always wear rubber gloves and safety goggles when handling the chemicals used in this instrument.
-
Page 19: Safety Features On The Instrument
Safety 2.3 Safety features on the instrument In the case of power failures or other processing problems the Leica ASP300 S incorporates specimen protection features such as a fluid level sensor and sophisticated software controls which ensure that processing can be completed successfully without damage to the tissue specimens. Overpressure protection • When power is off the air pump and air valves default to a safe condition (retort vented, no pressure generation). -
Page 20: Instrument Components And Specifications
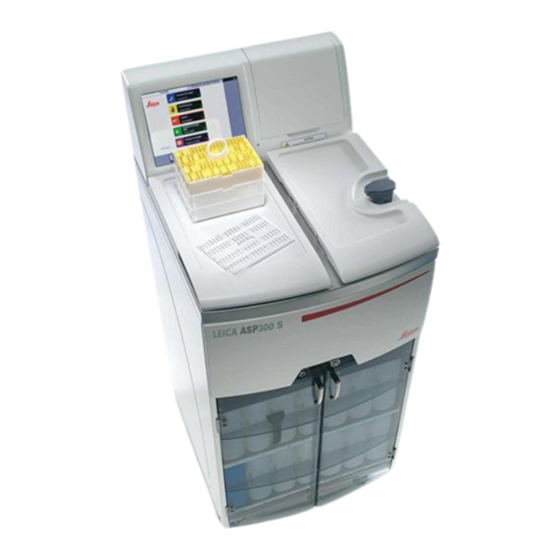
Instrument Components and Specifications 3.1 Overview – instrument components Fig. 2 Instructions for Use, V 2.1 RevN – 06.2021... - Page 21 Instrument Components and Specifications Overview – instrument components Instrument Components and Accessories Three wax baths and the retort comprise the 1 – Basic instrument – processor module infiltration module. 2 – Basic instrument – reagent module The touchscreen and the electronic components 3 –...
-
Page 22: Specific Instrument Options
Instrument Components and Specifications 3.2 Specific instrument options • Optionally usable Reagent Management System (RMS), displays service life and usage fre- quency of the individual reagents and enables automatic definition of the reagent sequence – there is no more need to rearrange reagent containers. If one or more reagents within a sequence are replaced, the RMS automatically uses the reagents in the correct sequence, organized in ascending order of cleanliness. - Page 23 Instrument Components and Specifications 3.3 Standard delivery – packing list (continued) Accessory kit, consisting of: 14 0476 43727 Basket handle 14 0476 34713 Specimen basket assemblies (lid, handle, separating walls and spiral inserts) 14 0476 34193 Stirrer 14 0476 43630 Reagent bottle, plastic 14 0476 34274 Set of adhesive bottle labels, 24 pcs.
-
Page 24: Technical Data
Instrument Components and Specifications 3.4 Technical Data Models: Leica ASP300 S - 230-240V: Model no. 14 0476 43514 Leica ASP300 S - 100-120V: Model no. 14 0476 43515 Leica ASP300 S - China: Model no. 14 04764 3057 Nominal supply voltages: Two factory-preset voltages (not user-adjustable): 100 to 120 V or 230 to 240 V Power supply voltage fluctuations:... - Page 25 Instrument Components and Specifications Paraffin reservoirs Number of containers: 3 Capacity: 4.3 l per container Melting time: approx. 10 h Temperature: 40 to 65 °C Temperature accuracy: + 1 K Retort Capacity: max. 300 cassettes Reagent volume: 4.3 l Temperature (paraffin): 40 to 65 °C Temperature (processing reagents): Ambient temperature or 35 to 55 °C...
-
Page 26: Compatible Reagents
Instrument Components and Specifications 3.4 Technical data (continued) Software interlock: ON/OFF Hardware and Software: Large color LCD touchscreen. User-friendly, intelligent software. USB port. Alarm system with two remote alarm sockets. Password-protected instrument supervisor mode. Built-in multiple specimen protection system. Capacities: 15 programs (consist of up to 10 reagent and 3 paraffin processing steps each. -
Page 27: Recommended Reagent Handling
Instrument Components and Specifications 3.5 Compatible reagents (continued) The following reagents may be used in the Leica ASP300 S: Fixatives Dehydration Clearing Paraffinizing Formalin Ethanol 1st Xylene (buffered or 2nd Isopropanol 2nd Toluene* unbuffered) Methanol Chloroform* 2nd Formalin re- Butyl alcohol placement Industrial methyl- ated spirits... -
Page 28: Cycle For Changing Reagents
Instrument Components and Specifications 3.6.1 Cycle for changing reagents Reagent Week 1 Week 2 Week 3 Week 4 At least 3 times a At least 3 times a At least 3 times a At least 3 times a Formalin week week week week... -
Page 29: Initial Operation
Initial Operation 4.1 Installation site requirements • The instrument requires an installation area of approx. 650 x 700 mm with vibration-free floor. • Room temperature consistently between +15 °C and +35 °C. • Relative air humidity maximum 80 %, non-condensing. • Avoid vibrations, direct sunlight and heavy variations in temperature. -
Page 30: Electrical Connection
Initial Operation 4.2 Electrical connection Severe damage may occur if the instrument is connected to a power Notice! supply voltage other than that to which Observe the following instructions it was originally set. carefully to prevent damage to the in- The power supply voltage for the strument (refer also to Chap. -
Page 31: Connecting An Uninterruptible Power Supply (Ups)
Initial Operation 4.2.2 Connecting an uninterruptible power supply (UPS) An uninterruptible power supply (UPS) protects machines and instruments against malfunctions in the power supply. Leica recommends using an active tracking UPS (with an output power of 1000-1500 VA) to protect the instrument and the specimens from temporary power failure, voltage spikes, under- voltages and excess voltages. -
Page 32: Installing Accessories
Initial Operation 4.3 Installing accessories • Move the instrument to its final setup location. Active carbon filter • Unpack the active carbon filter (13) and insert it (see Fig. When doing so, make sure that the filter is inserted with the correct side up. Note the direction of the label (29) on the front of the filter –... - Page 33 Initial Operation 4.3 Installing accessories (continued) Magnetic stirrer • Unpack the magnetic stirrer (30, Fig. 7) and insert it into the retort. • Important! The magnetic stirrer must be inserted such that the outer curvature (32) of the two stir- rer blades (31) faces downwards! (Fig.
-
Page 34: Making The Data Connections
Initial Operation 4.4 Making the data connections For data transfer and storage, the instrument console is equipped with an USB port (11). An USB memory stick is part of the standard deliv- ery. For information on alarm connections, see Chap. 3.1. Fig. -
Page 35: Anti-Reflection Clip - Function
Initial Operation 4.5 Anti-reflection clip – Function The anti-reflection clip (Order no. 14 0476 44135) prevents any reflections that might otherwise be emitted from the specimen basket (3, order no. 14 0476 34193) and that could affect the level sensor in the retort, thus causing malfunctions. -
Page 36: Alarm Functions
Initial Operation 4.6 Alarm functions Local alarm This alarm is external to the Leica ASP300 S, e.g. The Leica ASP300 S is equipped with 3 different in the office of the instrument operator. alarm functions: The local alarm is used when the instrument Instrument alarm cannot continue with the current program or This instrument alarm is generated from within... -
Page 37: Switching The Instrument On
Initial Operation 4.7 Switching the instrument on The instrument MUST be connected to a grounded power socket. For additional electrical fuse protection, we recommend connecting the Leica ASP300 S to a socket with a residual current circuit breaker. • C onnect the power cable to the power socket. If applicable, switch on the switch for the power socket. - Page 38 Initial Operation SYSTEM DIAGNOSTICS menu If TOUCH HERE ... is touched dur- ing initialization (Fig. 13) and the password for supervisor mode is en- tered, the SYSTEM DIAGNOSTICS menu (Fig. 15) opens. This menu provides access to basic instrument settings. Notice! Only experienced operators may adjust the settings, since incorrect...
-
Page 39: Touchscreen Functions
Initial Operation 4.8 Touchscreen functions The Leica ASP300 S is programmed and operated via a color LCD touchscreen. The instrument's control software contains an online help. It contains a reference to the Instruction for Use. Help can be accessed from any screen by pressing the HELP button. -
Page 40: Checklist For Initial Operation
Initial Operation 4.9 Checklist for initial operation When the instrument is prepared to the point where it can be switched on, the menus listed below have to be opened and the corresponding parameters configured. → Screen display Press button Parameter selection Set warning values for the age of the carbon →... -
Page 41: Switching Off The Instrument
Initial Operation 4.10 Switching off the instrument If the instrument must be completely switched off or disconnected from the power supply, please proceed as follows: • Press MENU to switch to the MENU FUNCTIONS window. • Press the EXIT APPLICATION button there. The following message will be displayed. Fig. -
Page 42: Operation
Operation 5.1 Setting up the instrument parameters From the start screen, press MENU to switch to the MENU FUNCTIONS → window, and press the MORE button there. Fig. 22 Fig. 21 In the 5.1.1 System setup MORE MENU FUNCTIONS press SYSTEM SETUP SYSTEM SETUP is divided into five areas:... - Page 43 Operation PROGRAM OPTIONS Select the options with which programs are executed here. Press a button to change the associated value. • STATION SEQUENCE: By Age or Sequential By Age - RMS is activated, reagents will automatically be used in order of increasing cleanliness. Sequential - reagents will be used in sequential order of stations.
- Page 44 Operation DISPLAY/BUZZER: • The number next to DISPLAY OFF indicates the remaining time (in min) until the screen saver (after the last user action) is activated. • The BUZZER VOLUME can be set between 1 and 10. INSTRUMENT Press PARAFFIN BATH SET TEMP. to open the input screen (Fig.
-
Page 45: Access Levels
Operation SECURITY Access rights to the instrument are managed here as user profiles. Supervisor mode is disabled in factory condition. Fig. 29 SUPERVISOR MODE: Enabled or Disabled Enabled - There are two different user profiles. A password is required for supervisor level access to the instrument. - Page 46 Operation Enabled or Disabled LOCK MODE: In the Leica ASP300 S, there is a lock mode to protect against operation by unauthorized per- sons. Enabled: The lock mode has to be activated in the System Setup. A password is required for the activation and deactivation.
-
Page 47: Installation Menu
Operation 5.1.3 INSTALLATION menu Use this menu to set the name of the instrument and the language of the user interface. → → The serial number of the instrument and the cur- rent software version are entered at the factory and cannot be edited. - Page 48 Operation Setting the altitude of the installation location (in meters above sea level) This is important as it affects the actual pressure in the retort. Press SITE ELEVATION (meters), enter the value in → the number field and press OK. This parameter (in meters) must be entered to ensure that the ASP300 S makes the appropriate corrections when calculating the proper pressure or vacuum.
- Page 49 Operation Saving data to an USB memory stick These kind of data can be transferred from/to an USB memory stick: • Programs • Reagents • Logs • Instrument status, configuration and installation To print files, connect the USB memory stick to a PC with a printer connec- tion, open the TXT file with an editor software and print its content.
-
Page 50: Editing The Reagent List
Operation 5.1.4 Editing the reagent list Adding new reagents 1. Enter the reagent name and allocate the new reagent to the reagent group it belongs to. 2. Determine how many stations (bottles) work with the new reagent. 3. Fill the stations (bottles) according to the reagent list. Entering reagent names Takes place via the REAGENTS menu option. - Page 51 Operation Allocation of reagents to the correct reagent group is the basis for compatibility monitoring. Allocation to the wrong reagent group can lead to reagent cross contamination. Changeable parameters Entering / modifying reagent thresholds If warning thresholds are required for a certain reagent, enter them as fol- lows: • Highlight the reagent to be modified, either by pressing the reagent name or using the UP/DOWN buttons.
- Page 52 Operation Deleting reagents • Highlight the reagent to be deleted in the SET UP REAGENTS AND WARNING THRESHOLDS screen. • Press CLEAR. ↓ • Press YES in the screen to confirm the reagent is deleted. Please remember that a reagent which is already used in a program cannot be deleted. Fig.
-
Page 53: Viewing The Program List
Operation 5.1.5 Viewing the program list This list (Fig. 43) shows all programs defined in the ASP300 S. → You can create: • Up to 15 infiltration programs • 3 retort cleaning programs • 1 paraffin cleaning program At supervisor access level: • The program names for the infil- tration programs can be edited. • New infiltration programs can be added and existing ones can be deleted. -
Page 54: Adding And/Or Modifying Programs
Operation 5.1.6 Adding and/or modifying programs Creating a new program • Make sure you are logged on at supervisor level. • In the VIEW/EDIT PROGRAMS screen (Fig. 43) highlight a program as similar as possible to the program you wish to create. (This minimizes the number of operating steps). • Press COPY to copy the selected program. The new program will have the same name as the program copied, however, the figure "(2)"... - Page 55 Operation Editing program steps • To edit a step, highlight the corresponding line and press the respective headline. • In the entry windows that pop up, enter / select the program step settings. ↓ ↓ ↓ ↓ ↓ Fig. 45 Leica ASP300 S...
- Page 56 Operation Editing program steps (continued) Setting a delay step A delay step is a step that is extended to ensure that a program will finish at a specified time. • Highlight the program step you wish to define as delay step. • Touch the DELAY button. The delay symbol is moved to the selected step, thus defining the step as delay step.
-
Page 57: Favorites
Operation 5.1.7 Favorites Up to five favorites can be configured in the ASP300 S. Favorites can be programmed so that they: • end "as soon as possible" (NOW) or • end at a predefined time. ↓ Fig. 46 Adding/modifying a Favorite • Select the program line to be modified. ↓ • Touch the PROGRAMS button. • Select the program you want and press OK to confirm. Setting the end time • Press the END TIME button. - Page 58 Operation Assigning a day for the end time If an end time has been assigned to a Favorite program, a specific weekday can also be set on which the program is to end. ↓ • Press the DAY button. • Select the desired day from the list and confirm with OK. Assigning a symbol to a "Favorite" A corresponding symbol is displayed, which helps the operator recognize Fig.
-
Page 59: Configuring The Stations
Operation 5.1.8 Configuring the stations This window (Fig. 50) shows a list of all stations with the → → allocated reagents defined in the instrument. ↓ Fig. 50 Adding/changing a reagent Allocation of the reagents Select the desired station. • Stations 1 – 10 can only be assigned specimen processing reagents (other than paraffin). -
Page 60: Reagent Groups
Operation 5.1.9 Reagent groups In this window (Fig. 51), the colors used in the graphical → → program display for each reagent group are displayed. ↓ Fig. 51 Changing the color of a reagent group • Highlight the line containing the reagent to be modified. • Press the COLOR button in the table header; the SELECT COLOR window appears. -
Page 61: Reagent Handling
Operation 5.2 Reagent handling 5.2.1 Draining/filling reagents (other than paraffin) 1. Manually changing the reagents • Remove the appropriate reagent container from the reagent cabinet, remove the bottle screw cap. ↓ • Drain/refill the reagent by pouring to/from a bulk container. Use the included funnel for clean filling. • On the REAGENT STATUS screen, verify correct allocation and set the ↓... - Page 62 Operation Filling/draining reagents → From the FAVORITES screen, press MENU. In the MENU FUNCTIONS window, tap the SMART SCREEN button. The SMART SCREEN (Fig. 53) pops up. The smart screen is the initial screen for manual operation of the instrument. The following steps should only be carried out by trained laboratory personnel, experienced in handling...
-
Page 63: Replacing The Paraffin
Operation 5.2.2 Replacing the paraffin Draining the paraffin • Connect the paraffin drain hose (36) to the spout (17) of the paraffin drain at the front of the instrument (Fig. 55) and into a catch tank. • Use caution when handling melted paraffin –... - Page 64 Operation Filling with paraffin pellets • Fill the paraffin reservoir to the brim (1 in Fig. 58) with paraffin pellets. This corresponds to approx. 3.5 kg/bath (Leica Histowax pellets). → → • Press BACK and REAGENT STATUS to switch to the status table (Fig.
- Page 65 Operation Filling with liquid paraffin The temperature of filled liquid paraffin must not be greater than 70 °C to prevent damage to the thermal fuse. Caution! Burn hazard. • If filling with already melted paraffin, the liquid → → level must not exceed the MAX level mark (see Fig.
-
Page 66: Running Programs
Operation 5.3 Running programs There are two different windows from which a program can be started: FAVORITES ALL PROGRAMS Fig. 61 Fig. 62 Up to five favorites can be configured in the In the Start screen, press the ALL ASP300 S. PROGRAMS button. -
Page 67: Editing A Program That Has Been Called Up
Operation 5.3.1 Editing a program that has been called up Resetting the end time: • Touch the FINISH TIME button and reset the end time in the input window. ↓ Fig. 63 To modify a program before the start, press the EDIT button. A message appears that the changes will affect running programs only. - Page 68 Operation The RUN OPTIONS function displays the options with which the current program is started. • LEVEL TEST enabled: The lower level sensor in the retort is acti- ↓ vated. The program is stopped with an error message if the level is not reached. • WAVE MOTION activated: During each infiltration step, the reagent is periodically pumped from the bottle to the re-...
-
Page 69: Starting A Program
Operation 5.3.2 Starting a program ↓ Fig. 67 Fig. 68 • Pressing START starts the program. Confirm the prompt that follows with OK. The number of blocks to be edited (NUMBER OF BLOCKS) must be entered if the RMS has been enabled. • The FINISH TIME button displays the time when the currently running program will end. -
Page 70: Opening The Retort
Operation 5.3.3 Opening the retort The signal tone and the 10-second waiting time occur each time the retort is unlocked! For this reason, we recommend only locking the retort before starting a program or before cleaning in order to prevent unnecessary waiting times. • To unlock, turn the lever for the retort's locking/unlocking mechanism (Fig. - Page 71 Operation 5.3.4 Retort emergency release (continued) Aside from this, the system is also equipped with a mechanical emergency unlock (a predeter- mined breaking point in the retort lock). Mechanical emergency unlock If the retort cannot be opened while in a powered-down state, Approx.
-
Page 72: Reagent Status
Operation 5.4 Reagent status This window (Fig. 64) is used to display and update the current reagent → status of the stations. In addition, reagent stations can be marked as full or empty here. The following is displayed: • The current age of each reagent • The current status of each station • Criteria that trigger warning mes- sages (Fields colored in red) -
Page 73: System Monitor
Operation 5.5 System monitor The SYSTEM MONITOR function provides important infor- → → mation about the status of the Leica ASP300 S. PUMP AGE: Indication of the operating hours of the pressure/ vacuum pump. The configured warning value determines the triggering of a warning message. The pump must be maintained by Leica Service after approx. -
Page 74: The Online Help
Operation 5.6 The online help The Leica ASP300 S has an online help that can be started from every main window. It contains a reference to the Instruction for Use. The online help can be accessed from any screen by pressing the HELP button. -
Page 75: Troubleshooting
Troubleshooting 6.1 General The Leica ASP300 S is equipped with a cutting-edge fault detection and troubleshooting system. When detecting a malfunction, the instrument provides the operator with detailed error messages and corresponding steps to take via the screen. For all error states, the instrument takes corrective measures to protect the specimens, except in such cases where continued func- tioning of the instrument would be possible only under hazardous operating conditions. -
Page 76: Troubleshooting
Troubleshooting 6.3 Troubleshooting If a problem occurs in the Leica ASP300 S, take the following steps to diag- nose the problem: • Check for error messages indicating the nature of the problem. • Check the Run Log for any messages that indicate the nature of the fail- ure. If the failure occurred during a program run, check the Run Log for an indication of whether the failure occurred during the fill, processing →... -
Page 77: Typical Fill Or Drain Problems
Troubleshooting 6.4 Typical fill or drain problems Fill and drain problems may be due to several causes: 1. There is insufficient reagent • Verify that the fill level of the reagent containers and the paraffin reservoirs is sufficient. 2. Insufficient pressure or vacuum The instrument is unable to create sufficient vacuum (for a fill) or pres- sure (for a drain) in the retort. -
Page 78: Cleaning And Maintenance
Cleaning and maintenance 7.1 Clean programs The cleaning programs are at the end of the list of all pro- grams (Fig. 43). To display a clean program, highlight the → → respective line and press EDIT. Three retort cleaning programs and a paraffin cleaning program are defined in the ASP300 S. Clean programs cannot be copied or deleted. - Page 79 Cleaning and Maintenance Editing steps • To edit a program step highlight the corresponding line and press the respective table header. • The number of cycles cannot be set to "0". To exclude the water or de- tergent step, delete it out of the cleaning program. The following characteristics of each step can be edited: • Reagent name – only those reagents that are compatible with the re- agent station being edited will be displayed.
-
Page 80: Paraffin Cleaning
Cleaning and maintenance 7.1.2 Paraffin cleaning It is possible to clean used paraffin of solvent residues (xylene) in the Leica ASP300 S. To do so, select the paraffin bath for which the paraffin should be cleaned in the CLEANING ↓ PROGRAMS menu. -
Page 81: Smart Clean
Cleaning and Maintenance 7.1.3 Smart clean The smart cleaning prepares the ASP300 S for transport. During a smart clean, a series of air cleaning steps will be applied which will remove any excess liquid (condensate) from all internal tubing. Before starting a smart cleaning, a complete retort cleaning program must be carried out in the ASP300 S. -
Page 82: General Cleaning Steps
Cleaning and maintenance 7.2 General cleaning steps Paraffin reservoirs Work carefully! Be careful as the walls of the paraffin reservoirs are very hot and may cause burns! • Wipe the paraffin reservoirs and lids clean. The lid can be removed for cleaning purposes. • If they are dirty, remove the wax strainers from the paraffin reservoirs. Clean, dry, and reinsert them. • Ensure that the air vent hole at the top rear right hand corner is unob- structed. - Page 83 Cleaning and Maintenance Draining the condensate container • Remove, empty, and reinsert the blue conden- sate container (Fig. 83). Dispose of waste solvents with care according to local regulations and the waste management policy of the com- pany or institution. Fig. 83 Replacing the active carbon filter • The life of the active carbon filter will depend on the reagent types used and the frequency of vacuum cycles.
-
Page 84: Daily Cleaning And Maintenance
Cleaning and maintenance 7.2.1 Daily cleaning and maintenance Cleaning the retort lid • Remove wax from the inside of the retort lid with the plastic scraper provided. Thoroughly remove all wax deposits from around the lid seal. • For convenience, the lid may be removed during cleaning. Lift the lid to a vertical position, release the hinge lock and pull the lid toward you. Only use the plastic scraper provided when cleaning the retort lid and seal to avoid damage to the retort lid seal and to the PTFE coat- ing on the retort lid. - Page 85 Cleaning and Maintenance Cleaning the surface of the infiltration module Important in order to ensure that the seals always seal properly. • Remove both covers for cleaning. • First, clean the stainless steel surface using the plastic spatulas, then wipe to remove all dirt particles around the retort and the paraffin res- ervoirs. Reagent and condensate bottle seal lubrication • To ensure easy removal of the reagent and condensate bottles, lubricate the O-ring seals on the plug-in nozzles with the O-ring lubricant supplied.
-
Page 86: Periodic Cleaning And Maintenance
Cleaning and maintenance 7.2.2 Periodic cleaning and maintenance Cleaning the reagent containers • Empty and clean the reagent containers. Using a bottle brush and a laboratory detergent in warm water. Never clean reagent containers in an automatic dishwasher. The reagent containers are NOT dishwasher-proof! • Refill and reconnect the bottles once cleaned. Make sure the bottle lids are tight and the bottles are properly seated in their home position at the rear of the reagent module. - Page 87 Cleaning and Maintenance 7.2.2 Periodic cleaning and maintenance (continued) Cleaning the level sensors The level sensors must be cleaned of all residues (reagents and paraffin) after every cleaning program! You will be prompted to clean the sensors by the instrument software at the end of each cleaning program (Fig.
-
Page 88: Checklist For Preventive Maintenance
Cleaning and maintenance 7.3 Checklist for preventive maintenance Step Daily Weekly Monthly every 3 months √ √ Lubricate the O-rings of the reagent * During container and check them for damage. remote filling and draining √ After exiting the retort cleaning program, wipe the retort and cover dry. - Page 89 Cleaning and Maintenance Step Daily Weekly Monthly every 3 months √ Check the filter screens of the paraffin reservoirs and clean if necessary. √ Check the air circulation opening of the paraffin reservoirs and clean if necessary. √ Check and empty the condensate container. Clean the inlet openings.
-
Page 90: Warranty And Service
Warranty and Service Warranty Leica Biosystems Nussloch GmbH guarantees that the contractual product delivered has been subjected to a comprehensive quality control proce- dure based on the Leica in-house testing standards, and that the product is faultless and complies with all technical specifications and/or agreed characteristics warranted. -
Page 91: Decontamination Confirmation
Decontamination Confirmation Every product that is returned to Leica Biosystems or that requires on-site maintenance must be properly cleaned and decontaminated. You can find the dedicated template of the decontamination confirmation on our website www.LeicaBiosystems.com within the product menu. This template has to be used for gathering all required data. -
Page 92: Appendix 1 - Notes On Specimen Preparation
Appendix 1 - Notes on Specimen Preparation Notes on Specimen Preparation • Cut the tissue samples that are to be embedded to a size that fits the type of tissue and embedding cassette being used. • Use a sharp and clean knife in order to prevent the transmission of contaminants and to avoid damaging the tissue samples. -
Page 93: Appendix 2 - Exhaust Hose (Optional) Installation
Appendix 2 - Exhaust Hose (Optional) Installation Exhaust hose (optional) installation Leica recommends connecting the ASP300 S to an external exhaust system by using the optional exhaust hose kit. Step 1: Preparation Unpack the exhaust hose kit and check if it is complete. - Page 94 Appendix 2 - Exhaust Hose (Optional) Installation Exhaust hose (optional) installation (continued) Step 3: Connecting the exhaust hose to the instrument The exhaust air connection (Fig. 90, 1) is located on the back of the instrument. 1. Unscrew the nut (Fig.
- Page 96 Leica Biosystems Nussloch GmbH Heidelberger Strasse 17-19 69226 Nussloch Germany Phone: +49 6224 - 143 0 Fax: +49 6224 - 143 268 Web: www.LeicaBiosystems.com...
Need help?
Do you have a question about the ASP300S and is the answer not in the manual?
Questions and answers