
Related Manuals for Leica BIOSYSTEMS HistoCore BIOCUT


Summary of Contents for Leica BIOSYSTEMS HistoCore BIOCUT
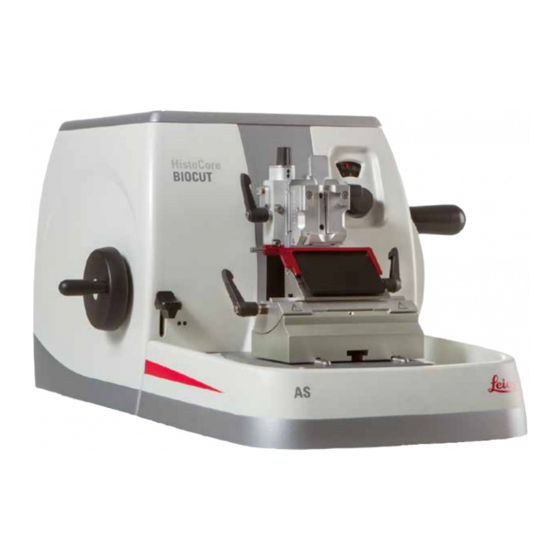
- Page 1 HistoCore BIOCUT Rotary Microtome Instructions for Use English Order No.: 14 0517 80101 - Revision K Always keep this manual with the instrument. Read carefully before working with the instrument.
- Page 3 – including any electronic systems and media – requires express prior permission in writing by Leica Biosystems Nussloch GmbH. For the instrument serial number and year of manufacture, please refer to the nameplate on the back of the instrument.
-
Page 4: Table Of Contents
Table of Contents Important Information ..........................Symbols used in the text and their meanings ..................... 7 Instrument type ..............................9 Intended purpose ............................. 9 Qualification of personnel ..........................9 Safety ................................Safety notes ..............................10 Warnings ................................. 10 2.2.1 Markings on the instrument itself ....................... 11 2.2.2 Transport and installation .......................... - Page 5 7.3.2 Mounting the clamping top onto the segment arc ................... 79 The setting of the clamping system of the clamp mount on the base plate ........79 Cleaning and Maintenance ........................Cleaning the instrument..........................80 Maintenance instructions ..........................83 Lubricating the instrument ........................... 84 HistoCore BIOCUT...
- Page 6 Table of Contents Warranty and Service ..........................Warranty ................................. 86 Service information ............................86 Decommissioning and disposal........................86 Decontamination Confirmation ......................Version 1.7, Revision K...
-
Page 7: Important Information
The CE marking is the manufacturer's declaration that the medical product meets the requirements of the applicable EC directives and regulations. The Country of Origin box defines the Country where the final character transformation of the product has been performed. HistoCore BIOCUT... - Page 8 Important Information The UKCA (UK Conformity Assessed) marking is a new UK product marking that is used for goods being placed on the market in Great Britain (England, Wales and Scotland). It covers most goods which previously required the CE marking. The package contents are fragile and must be handled with care.
-
Page 9: Instrument Type
Qualification of personnel • The HistoCore BIOCUT must be operated by trained laboratory personnel only. The instrument is intended for professional use only. • All laboratory personnel designated to operate this instrument must read these Instructions for Use carefully and must be familiar with all technical features of the instrument before attempting to operate it. -
Page 10: Safety
Serious injury of persons and/or property damage including specimen damage. • Never remove or modify any protective devices of the instrument or any accessories. Only service personnel qualified by Leica Biosystems may repair the instrument and access the instrument's internal components. -
Page 11: Markings On The Instrument Itself
Ground needs to be vibration-free as far as possible. • Always make sure that all 4 feet are positioned completely on the laboratory table. • If the instrument has been potentially moved by other persons (for example for servicing) always double-check correct positioning. HistoCore BIOCUT... -
Page 12: Operating The Instrument
Safety Warning Knife/blade holder falling off the instrument. Serious injury of persons and/or property damage. • If the knife/blade holder is not fixed, for example, during installation or cleaning, pay special attention that the blade holder is not falling off. •... - Page 13 Serious injury of persons and/or property damage including specimen damage. • Never remove or modify any protective devices of the instrument or any accessories. Only service personnel qualified by Leica Biosystems may repair the instrument and access the instrument's internal components.
- Page 14 Safety Warning The operator grabs into the knife/blade due to inappropriate working procedure. Serious injury of persons when putting the specimen in place if knife/blade has been installed before. • Prior to uploading the specimen on the microtome, make sure that the cutting edge has been covered by the safety guard and the hand wheel locking mechanism has been activated.
- Page 15 Working with the instrument and brittle specimen without appropriate protective clothes. Serious injury of persons by splinters while cutting brittle specimen. • Always wear appropriate protective clothes (including safety goggles) and work especially carefully when cutting brittle specimen. HistoCore BIOCUT...
- Page 16 Safety Warning Wrong fine adjustment of the force balance. Serious injury of the operator due to contact with knife and/or specimen damage. • Before working with the instrument, always double-check that the fine adjustment of the force balance is properly set. •...
- Page 17 The feather key is lost when mounting the handwheel. The instrument cannot be used, and it may cause the delay of diagnosis. • Before assembling the handwheel, check the feather key and make sure that it is in the handwheel shaft. HistoCore BIOCUT...
-
Page 18: Cleaning And Maintenance
Safety Note Accessories and components experience corrosion due to using corrosive/strongly acidic/alkaline reagent or solvent with the instrument or accessories, such as decalcified solution that contains acid, ammonium hydroxide that contains alkali, etc. Accessories can malfunction. • Avoid corrosive/strongly acidic/alkaline reagent or solvent dripping onto the instrument surface or accessories. -
Page 19: Integrated Protective Devices
Serious injury of persons and/or property damage including specimen damage. • Never remove or modify any protective devices of the instrument or any accessories. Only service personnel qualified by Leica Biosystems may repair the instrument and access the instrument's internal components. -
Page 20: Safety Guard On The Knife/Blade Holder
Safety 2. To unlock the handwheel, turn the handwheel brake lever (→ "Fig. 1-3") back to its original position (→ "Fig. 1-5"). • Using the handwheel locking mechanism (→ "Fig. 1-2") on the top of the handwheel, the handwheel can be braked in the 12 o'clock position. 1. -
Page 21: Instrument Components And Specifications
Anti-static waste tray 10 Coarse feed wheel Window for displaying the section thickness 11 Trimming lever Handwheel locking mechanism 12 Microtome base Handwheel 13 Two-in-one blade holder E Adjusting knob for setting the section thickness 14 Blade holder base HistoCore BIOCUT... -
Page 22: Instrument Specifications
Instrument Components and Specifications Rear view Fig. 5 Magnet Retraction switch Coarse feed direction change Instrument specifications Basic instrument with 2-step mechanical trimming, silent retraction with ON/OFF selection, ergonomically positioned coarse feed wheel with user selectable turn directions, without specimen orientation or additional accessories. - Page 23 • Lateral displacement function • 3 positions East-west movement • Movement of blade holder base • North-south: ± 24 mm Operating environment Operating temperature range +18 °C to +30 °C Operating relative humidity 20 % to max. 80 % non-condensing HistoCore BIOCUT...
- Page 24 Instrument Components and Specifications Operating environment Operating altitude Up to 2000 m above sea level Transport and storage environment Transport temperature range -29 °C to +50 °C Storage temperature range +5 °C to +50 °C Transport and storage relative humidity 10 % to max.
-
Page 25: Setting Up The Instrument
Universal cassette clamp 14 0502 37999 Blade holder base 14 0502 55546 2-in-1 Blade holder E 14 0502 54497 HistoCore BIOCUT basic instrument includes the following delivery list. Quantity Part description Order No. HistoCore BIOCUT basic instrument 14 0517 56235... -
Page 26: Unpacking And Installation
The accessories ordered are included in a separate box. Please check all delivered parts against the packing list and against your order to verify whether the delivery is complete. Should you find any discrepancies, please contact your Leica Biosystems sales office without delay. - Page 27 In this case, please mark the shipping documents accordingly and check the shipment for damage. The transport carton and included retaining elements should be kept in case a return shipment is necessary later. To return the instrument, follow the instructions below in reverse order. HistoCore BIOCUT...
- Page 28 Setting up the instrument • Remove the packing strap and the adhesive tape (→ "Fig. 6-1"). • Remove the carton lid (→ "Fig. 6-2"). Fig. 6 • Take out the accessory carton (optional accessories) (→ "Fig. 7-3") and the cartons (→...
-
Page 29: Assembling The Handwheel
Fig. 9 Assembling the handwheel The handwheel has to be assembled before attempting to use the instrument. The necessary parts and tools can be found in the tool kit supplied in the delivery. HistoCore BIOCUT... - Page 30 Setting up the instrument Fig. 10 The feather key (→ "Fig. 10-2") is loosely placed in the handwheel shaft (→ "Fig. 10-1") and fixed in place with a cable tie during transport. 1. Remove the cable tie (→ "Fig. 10-3"). Caution The feather key is lost when mounting the handwheel.
-
Page 31: Operation
In the front end position, no more feed motion takes place. Fig. 12 Caution Rotating the handwheel and the coarse feed wheel at the same time. Specimen damage. • Do not turn the coarse feed wheel whilst rotating the handwheel. HistoCore BIOCUT... -
Page 32: Specimen Retraction
Operation 5.1.3 Specimen retraction The silent specimen retraction offers the advantage of easy ribboning and avoids contact to protect both the cut block surface and the blade during the return stroke of the object head. It can be switched ON/OFF by the operator. While trimming, using the rocking mode, it is recommended to switch the retraction off. -
Page 33: Fine Directional Specimen Holder Fixture
For better display of the zero position, the orientation has two red indicators (→ "Fig. 15-4"). When both indicators are fully visible and both setscrews are in zero position at the same time (white markings align with the arrows), the specimen is in zero position. HistoCore BIOCUT... -
Page 34: Fine Adjustment Of The Force Balance
Operation Orienting the specimen Warning Specimen is oriented in retraction phase. Specimen damage due to re-orienting the specimen in retraction phase. • Specimen blocks must not be oriented during the retraction phase. If a block is oriented during retraction, the block will advance by the retraction value plus the selected section thickness before the next section. - Page 35 (→ "Fig. 17-1") approx. 1/2 turn counterclockwise each time. • Continue this procedure until the object head no longer moves once released. Fig. 17 Repeat the adjusting procedure several times till the object head no longer moves. HistoCore BIOCUT...
-
Page 36: Inserting The Two-In-One Blade Holder E
Operation Inserting the two-in-one blade holder E 5.2.1 Setting up the blade holder base Fig. 18 1. Release the clamping lever (→ "Fig. 18-1") by rotating it counterclockwise. 2. Insert the blade holder base (→ "Fig. 18-2") using the notch (→... -
Page 37: Adjusting The Clearance Angle
The recommended clearance angle setting for the two-in-one blade holder E is approx. 2.5° - 5°. 3. Hold down the two-in-one blade holder E in this position and retighten the screw (→ "Fig. 20-3") for clamping. Inserting the universal cassette clamp Fig. 21 HistoCore BIOCUT... -
Page 38: Clamping The Specimen
Operation There are two specimen holder fixtures with orientation and one without, please see (→ P. 48 – 6. Optional Accessories). The specimen orientation allows for simple position correction of the specimen surface when the specimen is clamped into place. You can use the quick clamping system (→... -
Page 39: Clamping The Knife/Disposable Blade
• Re-install the blade and make sure that it is parallel to the upper edge of the pressure plate. • Always check the parallelism between the blade and pressure plate after moving the blade using the lateral movement function. • Ensure there is no paraffin waste and the insert is clean before use. HistoCore BIOCUT... - Page 40 Operation Inserting high-profile blades Fig. 22 Fig. 23 1. Bring the safety guard (→ "Fig. 22-1") down. 2. To insert the blade, rotate the right clamping lever (→ "Fig. 22-2") counterclockwise. 3. Carefully push in the blade from above or from the side. Make sure that the blade is positioned in the center and, most importantly, parallel to the upper edge of the pressure plate(→...
- Page 41 • Never place a knife anywhere with the cutting edge facing upwards and never try to catch a falling knife! • Always clamp the specimen BEFORE mounting and clamping the knife/blade. HistoCore BIOCUT...
-
Page 42: Trimming The Specimen
Operation Detailed descriptions for inserting the knife into the individual knife holders are provided in (→ P. 48 – 6. Optional Accessories). Trimming the specimen Warning Wheel turn direction of coarse feed incorrectly selected. Specimen damage. • Always assure that you have selected the correct turn direction of the coarse feed wheel by checking the setting of the coarse feed wheel direction at the rear side of the instrument. -
Page 43: Sectioning
Leica Biosystems. Warning Turn the handwheel counterclockwise. People injury/Damage to specimen • Do not turn the handwheel counterclockwise, which may lead to handwheel locking mechanism malfunction. HistoCore BIOCUT... - Page 44 Operation Warning The rotation speed of the handwheel does not suit the hardness of the specimen. Instrument damage and possibly specimen damage. • The rotation speed of the handwheel must be adapted to suit the hardness of the specimen. For harder specimens, use a slower speed.
-
Page 45: Changing The Specimen Or Interrupting Sectioning
5.10 Finishing the daily routine Warning Section waste tray falling down after it has been detached. Injury of persons. • Work especially carefully when detaching the section waste tray and put it in a safe place. HistoCore BIOCUT... - Page 46 Operation Warning Knife/blade was not removed when knife/blade holder was uninstalled from the microtome. Serious injury of persons due to contact with extremely sharp knife/blade. • Before uninstalling the knife/blade holder from the microtome always make sure to detach the knife/ blade wearing cut-resistant gloves and store the knife/blade in a safe place.
- Page 47 Setting up the instrument HistoCore BIOCUT...
-
Page 48: Optional Accessories
Optional Accessories Optional Accessories Assembly for fixture for specimen clamps Tips Depending upon the purchase order, the basic instrument is delivered with the fine directional, directional or rigid fixture for specimen clamps which must be assembled first. All specimen clamps available as accessories can be used in one of the three fixtures for specimen clamps. -
Page 49: Directional Fixture For Specimen Clamps
Hexagon key No. 3, fasten the baseplate to the object head (→ "Fig. 31-4"). • Now, screw the fine-directional fixture for specimen clamps with the 4 screws (→ "Fig. 31-2") and the Hexagon key No. 3 onto the object head. Fig. 31 HistoCore BIOCUT... -
Page 50: Quick Clamping System
Optional Accessories Tips If the fine-directional fixture for specimen clamps is not used, retain the baseplate (→ "Fig. 31-1") 4 screws (→ "Fig. 31-3") together with the fine-directional fixture for specimen clamps. 6.1.4 Quick clamping system It is used as an adaptor for use with the fine- directional fixture for specimen clamps with zero point indicators or the directional fixture for specimen clamps. -
Page 51: Standard Specimen Clamp
Leica Biosystems. 6.2.2 Universal cassette clamp Leica Biosystems cassettes with minimum dimensions of 39.8 x 28 mm and maximum dimensions of 40.9 x 28 mm may be clamped in the universal cassette clamp (UCC) horizontally as well as vertically. - Page 52 Optional Accessories Warning Insufficient frame conditions for sectioning. Specimen damage or poor sectioning results, for example, sections alternating in thickness, compressed, folded or stripped sections. • Do not continue sectioning if you recognize insufficient sections results. • Make sure that all prerequisites for appropriate sectioning are met. Refer to the troubleshooting section of these Instructions for Use for further details.
-
Page 53: Super Cassette Clamp
• The orientation must be in position "0" and the cover for backlighting illumination must be detached. • NEVER use the super cassette clamp with backlighting illumination. • The force balance system has to be adjusted when using the super cassette clamp. HistoCore BIOCUT... -
Page 54: Knife Holder Base And Knife Holder
Segment arc Pressure plate Blade holder base The two-in-one blade holder optimized for use with Leica Biosystems disposable blades: low-profile blades (L x H x W): (80 +/-0.05) mm x (8 +0/- 0.1) mm x (0.254 +/-0.008) mm; high-profile blades (L x H x W): (80 +/-0.05) mm x (14 +0/-0.15) mm x (0.317 +/-0.005) mm. - Page 55 • Re-install the blade and make sure that it is parallel to the upper edge of the pressure plate. • Always check the parallelism between the blade and pressure plate after moving the blade using the lateral movement function. • Ensure there is no paraffin waste and the insert is clean before use. HistoCore BIOCUT...
-
Page 56: Knife Holder Base, Without Lateral Displacement Feature
Optional Accessories 6.3.2 Knife holder base, without lateral displacement feature Repositioning the knife holder base The one-piece knife holder base (rigid) (→ "Fig. 39-2") can be moved forwards and backwards on the microtome base plate. This vertical displacement allows bringing the knife holder into the optimal cutting position in relation to the specimen. -
Page 57: Knife Holder N
• Set the knife support bar (→ "Fig. 42-2") onto the height adjustment screws. The flat ends of the height adjustment screws must be located in the slots at each end of the knife support bar. HistoCore BIOCUT... - Page 58 Optional Accessories Warning The knife/blade is installed before the knife/blade holder and the knife/blade holder base are installed on the instrument. Serious injury of persons due to contact with extremely sharp knives and/or blades. • Prior to inserting the knife/blade, both the knife/blade holder and the knife/blade holder base must be installed on the microtome.
-
Page 59: Section Waste Tray
Tips The backlighting cannot be used with the blade holder base of the two-in-one blade holder E. To use with backlighting on HistoCore BIOCUT, the External power supply unit Backlighting (Order No.: 14 0500 31244) must be ordered separately. HistoCore BIOCUT... -
Page 60: Top Tray
Optional Accessories • Remove the two screws (→ "Fig. 45-1") using a slotted screwdriver and then remove the cover plate (→ "Fig. 45-2"). • Insert the backlighting (→ "Fig. 45-3") in the recess at the rear of the knife holder base. •... - Page 61 (→ "Fig. 48-4") support plate, depending on the microtome to be used. Attach the support plate to the baseplate with the included 4 countersunk screws (→ "Fig. 48-7") using the Hexagon key No. 3 (→ "Fig. 48-6"). Fig. 49 HistoCore BIOCUT...
- Page 62 Optional Accessories • Attach vertical column. Insert the cap screw (→ "Fig. 50-12") into the hole of the baseplate from below. Place the lock washer (→ "Fig. 50-13") on the cap screw from above. Thread Fig. 50 the silver vertical column (→...
-
Page 63: Magnifying Lens, Led Illumination
• The adapter (→ "Fig. 53-2") allows the LED Hi-power spots to be installed. Connect the LED 1000 Hi- Power spots, 2-arms, with the adapter (→ "Fig. 54"). Insert the plugs (→ "Fig. 54-1") of the LED 1000 HistoCore BIOCUT... - Page 64 Optional Accessories Hi-Power spots, 2-arms, into the sockets (→ "Fig. 54-2") of the high-power spot controller (→ "Fig. 54-3"). Connect the power adapter (→ "Fig. 54-4") of the LED 1000 control unit to the high-power spot controller, then connect to the power supply. Make sure to choose a correct plug from the provided ones (→...
-
Page 65: Additional Accessories
Quick clamp system with ability to shift the clamping top laterally 3 click-stop positions make it easier to utilize the entire blade length Fig. 57 Color-coded, foldaway safety guard • Order No.: 14 0502 38961 HistoCore BIOCUT... - Page 66 (L x H x W): (80 +/-0.05) mm x (14 +0/-0.15) mm x (0.317 +/- 0.005) mm. Fig. 59 For HistoCore BIOCUT Ability to shift the clamping top laterally 3 click-stop positions make it easier to utilize the entire blade length The pressure plate is replaceable.
- Page 67 Note: Knife case 14 0213 11140 included • Order No.: 14 0216 07132 Fig. 62 Knife case - small Plastic, variable for 1 or 2 knives of 10 to 16 cm length. • Order No.: 14 0213 11140 Fig. 63 HistoCore BIOCUT...
- Page 68 Optional Accessories Universal cassette clamp with adapter, silver For use with standard cassettes with dimensions that are 39.8 x 28 x 5.8 mm at minimum and 40.9 x 28.8 x 6.2 mm at maximum. • Order No.: 14 0502 37999 Fig.
- Page 69 For specimen holder for use with the fine- directional fixture for specimen clamps with zero point indicators 14 0502 37717 or the directional fixture for specimen clamps 14 0502 38949 • Order No.: 14 0502 37718 Fig. 70 HistoCore BIOCUT...
- Page 70 14 0502 38160, which has to be ordered separately. Backlighting 14 0502 38719 cannot be used in connection with a Super cassette clamp. We recommend use with Leica Biosystems Super cassettes and covers, white (VSP 59060B-BX, VSP 59060-CS) and Super metal embedding molds Fig. 71...
- Page 71 • Order No.: 14 0502 40580 Fig. 74 Backlighting Note: For HistoCore BIOCUT and MULTICUT only together with the External power supply unit Backlighting 14 0500 31244. Backlighting cannot be used in connection with a Super Mega cassette clamp 14 0502 38967.
- Page 72 Optional Accessories External power supply unit Backlighting For use with backlighting 14 0502 38719, for rotary microtome series HistoCore BIOCUT and MULTICUT The following adapters are included: UK, Europe, USA/Japan, Australia • Order No.: 14 0500 31244 Fig. 76 Top tray For HistoCore rotary microtome series •...
-
Page 73: Ordering Information
Knife 16 cm - profile c - steel 14 0216 07100 Knife 16 cm - profile d - steel 14 0216 07132 Knife case - small 14 0213 11140 Universal cassette clamp 14 0502 37999 Standard specimen clamp 50x55 mm 14 0502 38005 HistoCore BIOCUT... - Page 74 Optional Accessories Standard specimen clamp 40x40 mm 14 0502 37998 Directional fixture for specimen clamp 14 0502 38949 Rigid fixture for specimen clamp 14 0502 38160 Fine-directional fixture for specimen clamp 14 0502 37717 Quick clamping system 14 0502 37718 Super cassette clamp 14 0502 38967 Leica RM CoolClamp...
-
Page 75: Troubleshooting
In this case, have Technical Service inspect and reconfigure the universal cassette clamp. HistoCore BIOCUT... - Page 76 Leica Biosystems, or the specimen is torn out of the cassette may become the embedding. In extreme deformed or other clamping cases, there are no sections problems may arise.
-
Page 77: Instrument Malfunctions
• Adjust the clearance angle. Instrument malfunctions Problem Possible cause Corrective action There is no further feed motion • The front end position has • Run the specimen back by and thus no sectioning. been reached. turning the coarse feed wheel. HistoCore BIOCUT... -
Page 78: Malfunctions Of The Two-In-One Blade Holder E
Troubleshooting Malfunctions of the two-in-one blade holder E 7.3.1 Replacing the pressure plate Fig. 82 Fig. 81 1. Bring the safety guard down (→ "Fig. 81-1"). 2. Rotate the clamping lever counterclockwise (→ "Fig. 81-2"). 3. Pull out the bolt (→... -
Page 79: Mounting The Clamping Top Onto The Segment Arc
Hexagon key No. 4 (→ "Fig. 84-6"), so that the eccentric bolt (→ "Fig. 84-2") can be clamped at 0 ° position (→ "Fig. 84-3") and 270 ° position (→ "Fig. 84-4"). HistoCore BIOCUT... -
Page 80: Cleaning And Maintenance
Cleaning and Maintenance Cleaning and Maintenance Cleaning the instrument Warning The liquids go into the interior of the instrument. Serious injury of instrument/persons, or specimen damage. • Ensure that liquids do not enter the interior of the instrument during operation and maintenance. Warning Knife/blade was not removed when knife/blade holder was uninstalled from the microtome. - Page 81 The instrument must be completely dry before it can be used again. Warning Wiping the knife in the wrong direction during cleaning. Serious injury of persons. • Always wipe the knife from the back of the knife to the cutting edge. HistoCore BIOCUT...
- Page 82 Cleaning and Maintenance Two-in-one blade holder E Fig. 85 1. Remove the insert (→ "Fig. 85-9") for low-profile blades. 2. Remove the pressure plate (→ "Fig. 85-4") from the clamping top. To do so, rotate the blade clamping lever (→ "Fig. 85-6") counterclockwise and pull it out sideways;...
-
Page 83: Maintenance Instructions
Allow the cassette clamp to cool down before Fig. 86 mounting it back to the instrument. Maintenance instructions Tips Only authorized and qualified service personnel may access the internal components of the instrument for service and repair! The instrument is basically maintenance-free. HistoCore BIOCUT... -
Page 84: Lubricating The Instrument
3. Have the instrument inspected on a regular basis by a qualified service technician authorized by Leica Biosystems. The intervals depend on how heavily the instrument is used. We recommend the following inspection intervals depending on the general workload of the instrument... - Page 85 • Clamping lever (→ "Fig. 88-2") for the blade. Universal cassette clamp Fig. 89 Lubricate the spiral springs (→ "Fig. 89-1") of the tension lever (→ "Fig. 89-2") and move it back and forth several times. HistoCore BIOCUT...
- Page 86 Service information If you are in need of technical customer support or spare parts, please contact your Leica Biosystems representative or the Leica Biosystems dealer where you purchased the instrument. Please provide the following information: •...
- Page 87 Decontamination Confirmation Decontamination Confirmation Every product that is returned to Leica Biosystems or that requires on-site maintenance must be properly cleaned and decontaminated. You can find the dedicated template of the decontamination confirmation on our website www.LeicaBiosystems.com within the product menu. This template has to be used for gathering all required data.
- Page 88 Notes Version 1.7, Revision K...
- Page 90 Leica Biosystems Nussloch GmbH Heidelberger Strasse 17 - 19 D-69226 Nussloch Germany Tel.: +49 - (0) 6224 - 143 0 Fax: +49 - (0) 6224 - 143 268 Web: www.LeicaBiosystems.com...
Need help?
Do you have a question about the HistoCore BIOCUT and is the answer not in the manual?
Questions and answers