Table of Contents
Advertisement
2000 Series
Installation/Operation Manual with Service Re
For Champion Model DH2000 • Moyer Diebel Model MD2000
3765 Champion Boulevard
Winston-Salem, NC 27105
336/661-1556 Fax: 336/661-1660
Toll-free: 800/ 858-4477
2674 N. Service Road, Jordan Station
Ontario, Canada L0R 1S0
905/562-4195 Fax: 905/562-4618
Toll-free: 800/ 263-5798
placement Parts
Door-type
High Temperature
Dishwasher
Model: 2000 Series
Hot water sanitizing machine w/fresh
water rinse and built-in stainless steel
electric booster
Issue Date: 8.22.11
Manual P/N
114614 rev. i
For machines beginning with S/N D09037592 and above
Machine Serial No.
Printed in the USA
Advertisement
Chapters
Table of Contents

Related Manuals for Champion DH2000


Summary of Contents for Champion DH2000
- Page 1 2000 Series Installation/Operation Manual with Service Re For Champion Model DH2000 • Moyer Diebel Model MD2000 3765 Champion Boulevard 2674 N. Service Road, Jordan Station Winston-Salem, NC 27105 Ontario, Canada L0R 1S0 336/661-1556 Fax: 336/661-1660 905/562-4195 Fax: 905/562-4618 Toll-free: 800/ 858-4477...
- Page 2 For future reference, record your dishwasher information in the box below. Model Number__________________________ Serial Number_______________________ Voltage________________Hertz_____________ Phase__________________ Service Agent __________________________________ Tel:______________________ Parts Distributor _________________________________ Tel:______________________ In Canada: Toll-free: 800/ 263-5798 Tel: 905/ 562-4195 Fax: 905/ 562-4618 email: service@moyerdiebellimited.com ATTENTION: The model no., serial no., voltage, Hz and phase are needed to identify your machine and to answer questions.
-
Page 3: Register Your Product Online
REGISTER YOUR PRODUCT ONLINE Make sure you are connected to the internet then click or enter the address below. In the U.S.A http://www.championindustries.com/register In Canada http://www.championindustries.com/canada/register... -
Page 4: Product Registration Card
PRODUCT REGISTRATION COMPLETE THIS FORM AND FAX TO: (336) 661-1660 in the USA 1-(800) 204-0109 in Canada PRODUCT REGISTRATION CARD Model Date of Installation: Company Name: Address: Telephone #: ( Contact: Installation Company: Address: Telephone #: Contact: FAILURE TO REGISTER YOUR PRODUCT MAY VOID YOUR WARRANTY IMPORTANT BY FAX Serial #... -
Page 5: Revision History
• The Revision History can contain part number changes, new instructions, or information that was not available at print time. • We reserve the right to make changes to these instructions without notice and without incurring any liability by making the changes.. • Equipment owners may request a revised manual, at no charge, by calling 1 (800) 858-4477 in the USA or by calling 1 (800) 263-5798 in Canada. Revision Revised Serial Number Date Pages Effectivity 6.12.09 D09037592 8.12.09 D09037592 9.11.09 24-25 D09087829 9.16.09 31-32 D09087829 10.23.09 20-21 D09087829 2.12.10 26-27 D09087829 2.22.10 D09087829 10.6.10 D09087829 3.8.11 24-25 8.22.11 30-31 D10088521 Released First Edition Changed Schematic for... -
Page 6: Limited Warranty
Limited Warranty LIMITED WARRANTY Champion Industries Inc. (herein referred to as Champion), 3765 Champion Blvd., Winston-Salem, North Carolina 27105, and P.O. Box 301, 2674 N. Service Road, Jordan Station, Canada, L0R 1S0, warrants machines, and parts, as set out below. Champion warrants all new machines of its manufacture bearing the name Warranty of Machines: "Champion" and installed within the United States and Canada to be free from defects in material and workman ship for a period of one (1) year after the date of installation or fifteen (15) months after the date of shipment by Champion, whichever occurs first. [See below for special provisions relating to glasswashers.] The warranty registration card must be returned to Champion within ten (10) days after installation. If warranty card is not returned to Champion within such period, the warranty will expire after one year from the date of shipment. Champion will not assume any responsibility for extra costs for installation in any area where there are jurisdictional problems with local trades or unions. If a defect in workmanship or material is found to exist within the warranty period, Champion, at its election, will either repair or replace the defective machine or accept return of the machine for full credit; provided; however, as to glasswashers, Champion's obligation with respect to labor associated with any repairs shall end (a) 120 days after shipment, or (b) 90 days after installation, whichever occurs first. In the event that Champion elects to repair, the labor and work to be performed in connection with the warranty shall be done during regular working hours by a Champion authorized service technician. Defective parts become the property of Champion. Use of replacement parts not authorized by Champion will relieve Champion of all further liability in connection with its warranty. In no event will Champion's warranty obligation exceed Champion's charge for the machine. The following are not covered by Champion's warranty: a. Lighting of gas pilots or burners. b. Cleaning of gas lines. c. Replacement of fuses or resetting of overload breakers. d. Adjustment of thermostats. e. Adjustment of clutches. f. Opening or closing of utility supply valves or switching of electrical supply current. g. Cleaning of valves, strainers, screens, nozzles, or spray pipes. h. Performance of regular maintenance and cleaning as outlined in operator’s guide. -
Page 7: Table Of Contents
Rinse Sentry Mode ...11 Automatic Drain Cycle ...11 Cleaning and Maintenance Cleaning ...12 De-liming ...14 Maintenance ...15 Troubleshooting ...16 Service Replacement Parts ... Timer Chart Electrical Schematic... 36 2000 Series Door-type Dishwasher ..Table of Contents Table of Contents... -
Page 8: Model Descriptions
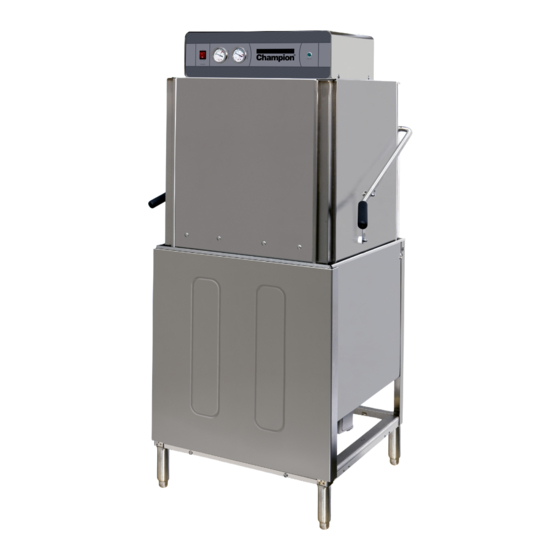
Model Description Model Description 2000 Series High temperature hot water sanitizing dishwasher with built-in 40-70°F/22-82°C rise booster heater. 208-240VAC/60/1 & 3 Field convertible single or three phase Self-draining pump Automatic start Fresh water rinse 55 racks per hour/60-second total cycle time Rinse sentry Automatic drain valve Optional Equipment (consult factory) Drain water tempering kit Side panels... -
Page 9: Installation
Immediately mail the warranty card to validate your warranty. Move the dishwasher near its permanent location. CAUTION: Be careful when lifting and moving the dishwasher to prevent damage to the machine. NOTE: The installation of the dishwasher must comply with local health codes. -
Page 10: Converting Straight-Through Operation To Corner Operation
In addition, the door handles should move freely without interference from walls or other obstructions. Nominal wall clearance is 6" [152mm]; the minimum wall clearance is 4" [102mm]. Position the dishwasher as shown below and refer to the next page for instructions on changing the dish rack guides and door operation. - Page 11 Lift the door handle up and back until the springs relax. Adjust the door spring hooks (E) located at the rear of dishwasher to reduce door spring tension until the front and side doors open and close without binding. Re-adjust the door springs at the rear of the dishwasher then check that the doors open and close without binding.
-
Page 12: Electrical Connections
Lock-out and tag the breaker to indicate that work is being performed on the circuit. ATTENTION A qualified electrician must connect the main incoming power to the dishwasher in accordance with all local codes and regulations or in the absence of local codes in accordance with the National Electrical Code. -
Page 13: Phase To 3 Phase Conversion
A standard 3-phase operation dishwasher can be converted for 1-phase operation with the installation of a jumper wire on the main terminal and rewiring of the wash tank and booster tank heaters. A jumper wire, jumper bars and a new data plate are stowed on top of the wash tank heater junction box. -
Page 14: Hot Water Connection
Installation Hot Water Connection The hot water connection is located at the lower left-rear side of the dishwasher. A 3/4" line strainer and pressure regulating valve (PRV) were installed at the factory. The size of the incoming hot water line should be 3/4"... -
Page 15: Vent Fan Control
2. The 120VAC signal is designed only to operate an external vent fan contactor (supplied by others) and is limited to 1 AMP maximum load and is available when the dishwasher power switch is turned ON. CAUTION: Do not connect a vent fan motor to the signal connection terminals. -
Page 16: Initial Start-Up
Initial Start-up Installation Check List Remove any protective film from dishwasher. Check the interior for foreign material. Make sure that the dishwasher is permanently located. Make sure that all utility connections are complete. Make sure that the chemical supply containers are full. -
Page 17: Operation
Door Safety Switch Follow the instructions below to operate the dishwasher in a Normal Wash Mode. A Rinse Sentry feature holds the dishwasher in a wash mode if the booster heater temperature is below 180ºF/82ºC. Turn the main power on at the main circuit breaker. - Page 18 14. Check the FINAL RINSE temperature gauge during the final rinse and make sure that it indicates a minimum of 180ºF/82ºC. The acceptable range of operation is 180-195ºF/82-91ºC. 15. Check the pressure gauge located at the top of the dishwasher to ensure that the final rinse pressure maintains a flowing pressure between 20-25 PSI.
-
Page 19: Rinse Sentry Mode
If for any reason, the hot water temperature in the booster tank cannot provide this temperature, the dishwasher will enter a Rinse Sentry Mode of operation and extend the cycle time. The Rinse Sentry changes the Normal Operation Mode as described below: The Rinse Sentry constantly monitors the water temperature inside final rinse booster. -
Page 20: Cleaning And Maintenance
Cleaning and Maintenance Cleaning After Each Meal Period or every 8 Hours of Operation. Press the lighted power switch to the OFF position. The power switch light will go out and the automatic drain cycle will operate for 10-minutes. Flush the interior of the machine with fresh water. Remove the scrap screens and remove debris in a waste container. - Page 21 10. Wipe the interior and exterior of the machine with a soft cloth and a mild detergent. DO NOT HOSE THE EXTERIOR OF THE MACHINE WITH WATER. 11. Reassemble the dishwasher and leave the door open to allow overnight drying. Wash Spray arm...
-
Page 22: De-Liming
Cleaning and Maintenance De-liming Minerals accumulate on the interior surfaces of the dishwasher. The deposits have a white haze and, in cases of heavy accumulation, may appear as a granular solid. The generic name for mineral deposits is lime. The removal of lime deposits is called de-liming. Your dishwasher should be de-limed regularly;... -
Page 23: Maintenance
1. Perform Steps 1-5 in the Daily Maintenance. 2. Inspect water lines for leaks. 3. Check for water leaks underneath the dishwasher. 4. Make sure the floor drain and/or piping handles the drain water discharge. 5. Make sure the dishwasher is level. -
Page 24: Troubleshooting
Troubleshooting Follow the troubleshooting guide below in the event that your dishwasher does not operate as expected. Perform the basic checks below before calling an authorized service agent: Make sure that the main water supply is turned on. Make sure that the main power is turned on. -
Page 25: Service Replacement Parts
Service Replacement Parts Illustrations Wash Pump/Motor Assembly ... Booster Assembly ... Control Panel Assembly ... Wash and Rinse Spray Arm Assemblies ... Hood and Door Assembly ... Track Assembly ... Wash Tank Heat, Drain, Screens, Hoses ... Dish racks, Line Strainer and Pressure Regulating Vavle (PRV) ... Timer Chart ... -
Page 26: Wash Pump/Motor Assembly
Wash Pump/Motor Assembly... - Page 27 Item Part 114134 114135 114136 114137 114138 114139 114140 114141 114142 114143 114144 114145 114322 114525 NOTE: THE MOTOR CANNOT BE ORDERED AS A SEPARATE REPLACEMENT PART. Wash Pump/Motor Assembly Description SLINGER, WATER SCREW BACKPLATE, PUMP GASKET, PUMP SEAL, PUMP WASHER IMPELLER WASHER...
-
Page 28: Booster Assembly
Booster Assembly... - Page 29 Item Part 100184 100210 100571 102444 107550 107908 107966 109069 109985 110562 110768 110929 110930 111233 111437 109516 109903 0509042 0512027 108528 B500355 113269 206727 206987 333154 111488 Description NIPPLE, 3/4" NPT X CLOSE BRASS PLUG, 1/8" SST UNION, 3/4" NPT BRASS ELBOW, STREET 3/4"...
-
Page 30: Control Panel Assembly
Control Panel Assembly... - Page 31 GAUGE, RINSE, TEMPERATURE, 4FT. CAPILLARY OVERLAY, 180°F, RINSE SWITCH, REED ALEPH GAUGE, WASH, TEMPERATURE 8FT. CAPILLARY CONTROL BD., ELECTRONIC DECAL CHAMPION DH2000, CONTROL CABINET DECAL MOYER DIEBEL MD2000, CONTROL CABINET RAIL, DIN 35MM X 15MM RAIL, DIN 35MM X 15MM COVER, CONTROL CABINET...
-
Page 32: Wash And Rinse Spray Arm Assemblies
Wash and Rinse Spray Arm Assemblies... - Page 33 Item Part 100135 GAUGE, PRESSURE 0-60 PSI 100156 LOCKNUT, 3/4" NPT BRASS 100171 BUSHING, RED. FACE 3/4" X 1/2" BRASS 100599 CROSS, 3/4" NPT BRASS 100736 BOLT, HEX HD. 1/4-20 X 3/4" SST 102388 BUSHING, RED 1/2" NPT X 1/4" NPT BRASS 102525 TEE, RED.
-
Page 34: Hood And Door Assembly
Hood and Door Assembly 11 25 12 24 19... - Page 35 Item Part 100002 BOLT, HEX HD., 1/4-20 X 1-3/8" SST 100738 BOLT, HEX HD., 1/4-20 X 1" SST 106014 NUT, HEX ACORN PLAIN, 1/4-20 SST 106026 WASHER, FLAT 1/4" SST 107962 HANDLE, GRIP 107967 HEX, GRIP NUT, 1/4-20 SST W/NYLON 108954 HEX, GRIP NUT, 6-32 SST W/NYLON 113745...
-
Page 36: Track Assembly
Track Assemby... - Page 37 Item Part 100003 HEX PLAIN NUT, 1/4-20 SST 100073 SCREW, TRUSS HD., 1/4-20 X 1/2" SST 100754 SCREW, FLAT HD., 10-32 X 1/2" SST 104985 HEX PLAIN NUT, 10-32 SST 106482 WASHER, LOCK 1/4" SPLIT SST 106486 WASHER, LOCK #10 SPLIT, SST 332021 TRACK, REAR 332022...
-
Page 38: Wash Tank Heat, Drain, Screens, Hoses
Wash Tank Heat, Drain, Screens, Hoses... - Page 39 Item Part 107340 114745 104203 114467 332543 114472 304816 107967 106026 104165 205990 114471 108345 114178 ---- 100740 ---- 102376 ---- 106013 109069 113271 110561 111092 ---- 107089 ---- 104822 305164 332544 333021 108418 108417 109034 111488 Wash Tank Heat, Drain, Screens, Hoses Description CLAMP, HOSE HOSE, DISCHARGE...
-
Page 40: Dish Racks, Line Strainer And Pressure Regulating Vavle (Prv)
Dish Racks, Line Strainer, PRV Item Part Description Qty. - Page 41 Item Part 101273 101285 110768 107550 Dish Racks, Line Strainer, PRV Description DISH RACK, FLAT-BOTTOM DISH RACK, PEG STRAINER, LINE 3/4" BRONZE VALVE, PRES. REGULATING 3/4" (Optional) Qty.
- Page 42 Electrical Schematic, Timer Chart Timer Chart, Electrical Schematic Illustrations Page Timer Chart ... 35 Electrical Schematic ... 36...
-
Page 43: Timer Chart
Timer Chart 60 SECONDS TOTAL CYCLE WASH DWELL RINSE SANITARY DWELL CYCLE STRUCTURE 60 seconds cycle consisting of: 40 seconds Wash 1 second Dwell 12 seconds Rinse 7 seconds Sanitary Dwell 40 41 40 SECONDS 1 SECOND 12 SECONDS 7 SECONDS TIME CYCLE - DH/MD2000 DWG. -
Page 44: Electrical Schematic
Electrical Schematic...
Need help?
Do you have a question about the DH2000 and is the answer not in the manual?
Questions and answers