Table of Contents
Advertisement
Operation, Cleaning and Maintenance Manual
LISTED
3765 Champion Boulevard
Winston-Salem, NC 27105
(336) 661-1556 Fax: (336) 661-1660
Toll-free: 1 (800) 858-4477
Issue Date: 3.30.18
Manual P/N
For machines beginning with S/N xxxxxxxxxx and above
2674 N. Service Road, Jordan Station
Ontario, Canada L0R 1S0
(905) 562-4195 Fax: (905) 562-4618
Toll-free: 1( 800) 263-5798
Models:
DH6000T
Hot water sanitizing machine w/fresh
water rinse and built-in stainless steel
electric booster
Options:
Ventless Heat Recovery
116084 rev. -
Printed in the USA
Advertisement
Table of Contents

Related Manuals for Champion DH6000T


Summary of Contents for Champion DH6000T
- Page 1 Issue Date: 3.30.18 Manual P/N LISTED 116084 rev. - For machines beginning with S/N xxxxxxxxxx and above 3765 Champion Boulevard 2674 N. Service Road, Jordan Station Printed in the USA Winston-Salem, NC 27105 Ontario, Canada L0R 1S0 (336) 661-1556 Fax: (336) 661-1660...
- Page 2 The USGBC Member Logo is a trademark owned by the U.S. Green Building Council and is used by permission. The logo signifies only that Champion Industries is a USGBC member; USGBC does not review, certify or endorse the products or services offered by its members.
- Page 3 ACTIVATE YOUR WARRANTY. 4:34 PM • Use your mobile device to scan the QR code located on the front panel of your machine or enter our URL http://www.champdw.us/DH6000T. • Visit our website at www.championindustries.com and register your product there. • Use the fax form on the next page and fax to 1-800 661-1660.
- Page 4 Product Registration PRODUCT REGISTRATION BY FAX COMPLETE THIS FORM AND FAX TO: (336) 661-1660 in the USA 1-(800) 204-0109 in Canada PRODUCT REGISTRATION CARD Model Serial # Date of Installation: Company Name: Address: (Street) Province Postal Code Telephone #: ( Contact: Installation Company: Address:...
-
Page 5: Revision History
Revision History Revision History Specifications are subject to change based on continual product improvement. Equipment owners may request a revised manual, at no charge, by calling 1 (800) 858-4477 in the USA or 1(800) 263-5798 in Canada. Revision Revised Serial Number Revision Date Pages... -
Page 6: Limited Warranty
(b) 90 days after installation, whichever occurs first. In the event that The Company elects to repair, the labor and work to be performed in connection with the warranty shall be done during regular working hours by a Champion authorized service technician. -
Page 7: Table Of Contents
Table of Contents Table of Contents Revision History ........................ i Limited Warranty ......................ii Safety Symbols ........................iv Operation ..................1 Controls ....................1 Cycle Times ....................2 Operation Sequence .................. 3 Rinse Sentry ....................5 Low Temp Lockout Option ................5 Change Water Alarm Option .............. -
Page 8: Safety Symbols
Safety Symbols Safety Symbols Safety Symbols The following symbols are used throughout this manual to alert the reader to important information. WARNING: Warning statements indicate a condition or practice that can result in personal injury or possible death. CAUTION: Caution statements indicate a condition or practice that can result in damage to the machine or associated equipment. -
Page 9: Operation
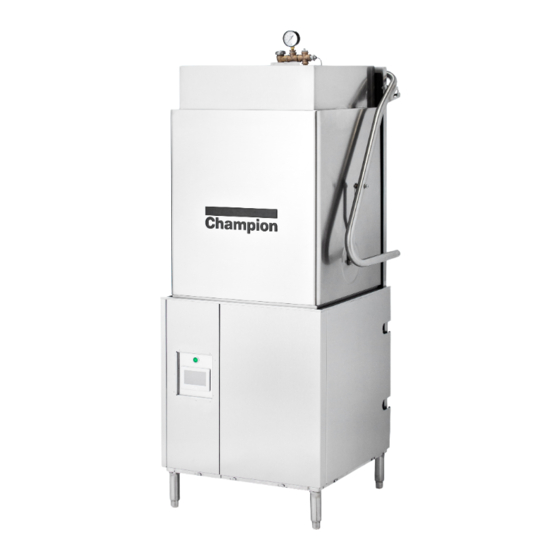
Operation Controls The pressure gauge is located at the top of the machine. The control panel is located on the front left side of the lower panel. A - Pressure Gauge - Displays the incoming water pressure to the machine. B - Green Push Button Power Switch - Turns the power on and off. -
Page 10: Cycle Times
Operation Cycle Times • The DH6000T operates as a dishwasher using 1 and 2 minute cycles and as pot/pan washer using the 4 and 6 minute time cycles (see Tables 1 and 2 below). STANDARD CYCLE OPTION* STANDARD CYCLE TIMES Dishwasher Cycle Option 1 Approx. -
Page 11: Operation Sequence
Operation Operation Sequence Detergent Rinse-aid Push the green power button Check the chemical containers and refill as needed. SELECT CYCLE SELECT CYCLE FILLING READY Touch to Change Touch to Change RINSE TEMP WASH TEMP TIME REMAINING TIME REMAINING Filling is displayed as machine fills When READY appears, wait 15-20 minutes automatically. - Page 12 Operation Operation Sequence (continued) 1 MIN CYCLE 1 MIN CYCLE Touch to Change Touch to Change WASH TEMP WASHING RINSE TEMP RINSING TIME REMAINING TIME REMAINING When 1 MIN CYCLE is selected, the machine At the end of the wash cycle the 15 sec. starts and the WASHING time remaining final rinse begins.
-
Page 13: Rinse Sentry
Operation Rinse Sentry • Rinse Sentry extends the wash cycle time 660 seconds so the final rinse booster tank temp- erature has time to reach the minimum required final rinse water temperature of 180°F. • After 660 seconds, Rinse Sentry will stop and the cycle will resume unless the optional LOW TEMP LOCKOUT feature is enabled. -
Page 14: Change Water Alarm Option
Operation Change Water Alarm Option • The alarm alerts the operator to drain and refill the machine after a preset number of wash cycles have elapsed. • The alarm will not lockout the machine operation but will remain on the display until the alarm is reset. -
Page 15: Automatic Electric Drain Valve
Operation Automatic Electric Drain Valve • The drain valve is located underneath the dishwasher and is connected to the building drain line. It opens automatically whenever power to the dishwasher is off. • The drain valve has a lever for manually open the valve if necessary. Manual Drain Lever Electric Drain Valve Fig. -
Page 16: Machine Assembly
Operation Machine Assembly To Assemble the dishwasher: • Install the pump suction strainer. • Install the scrap screens and screen spacer. • Install the upper and lower wash and rinse spray arms. The arms are interchangeable. • Make sure the arms spin freely. SCRAP SCREENS X 2 PUMP STRAINER Fig. -
Page 17: Loading Wares
Operation Loading Wares • Wares should be scrapped and rinsed to remove large food particles and debris (Fig. 6). Fig. 6 CAUTION: Ferrous metal scrub pads must not be used to clean wares or dishwasher surfaces. Avoid putting any type of ferrous metal in the machine. •... -
Page 18: Cleaning
Cleaning Cleaning • Clean the machine at the end of each meal period or after every 2 hours of continuous operation and at the end of the day. WARNING: Dishwasher surfaces can be hot and cleaning chemicals can be caustic to the skin and eyes. -
Page 19: Wash Tank And Scrap Screens
Cleaning Cleaning • Remove the scrap screens and pump suction strainer Flush/backflush the screens in a sink. Do not strike the screens against hard surfaces. • Clean the drain in the bottom of the wash tank. • Clean the float switch. SCRAP SCREENS X 2 PUMP STRAINER DRAIN... -
Page 20: Deliming
Cleaning Deliming • Minerals accumulate on the interior surfaces of the dishwasher appearing as a white haze and, in cases of heavy accumulation, may appear as a granular solid. • Contact a qualified chemical supplier for deliming chemicals and procedures. •... -
Page 21: Maintenance
Maintenance Maintenance Schedules Daily Maintenance • Clean the machine. • Check all of the wash arm and rinse arm spray jets and clean as necessary. • Make sure the water supply is on and the drain is not clogged. • Check the HMI temperature display and pressure gauge to ensure proper operation •... -
Page 22: Troubleshooting Chart
Maintenance Troubleshooting Chart Condition Cause Solution Dishwasher will not run. Hood not closed. Close Hood completely. Main power OFF. Check breaker on panel. Cycle not selected Select 1,2,4 or 6 min. cycle. Low or no water. Main water supply is off. Open supply valve.
Need help?
Do you have a question about the DH6000T and is the answer not in the manual?
Questions and answers