Table of Contents

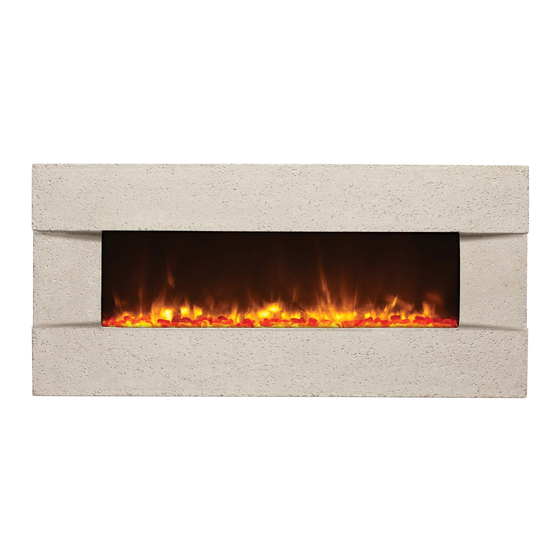
Summary of Contents for Amantii BLT-IN-5124
- Page 1 INSTALLATION AND OPERATING INSTRUCTIONS FOR Built-in units Blt-in-38, Blt-in-58, Blt-in-5124 & Blt-in-62 INSTALLER: LEAVE THIS MANUAL WITH THE APPLIANCE. CONSUMER: RETAIN THIS MANUAL FOR FUTURE REFERENCE. 7 18 11 - 02...
-
Page 3: Table Of Contents
TAbLE OF CONTENTS Important Instructions page 3 BLT-IN-38 Specifications page 4 BLT-IN-58 Specifications page 5 BLT-IN-5124 Specifications page 6 BLT-IN-62 Specifications page 7 Installation Overview page 8 Built-In Installation page 10 Wall Mount Installation page 12 Fire Glass Media Installation... -
Page 5: Important Instructions
• Amantii reserves the right to update and change the specifications and instructions in this manual as needed. If in doubt, please visit our website at www.amantii.com for the most recent version of the manual. SAVE THESE INSTRUCTIONS... -
Page 6: Blt-In-38 Specifications
Blt-in-38 spECiFiCAtiOns this appliance has been tested in accor- Model Number Blt-iN-38 dance with the ETL Intertek Standards for Description Built-in appliance fixed and location-dedicated electric room Voltage appliances in the United States and Cana- da. If you need assistance during installa- Watts 10.5 tion, please contact your local dealer. -
Page 7: Blt-In-58 Specifications
Blt-in-58 spECiFiCAtiOns this appliance has been tested in accor- Model Number Blt-iN-58 dance with the ETL Intertek Standards for Description Built-in appliance fixed and location-dedicated electric room Voltage appliances in the United States and Cana- da. If you need assistance during installa- Watts 10.5 tion, please contact your local dealer. -
Page 8: Blt-In-5124 Specifications
Blt-in-5124 spECiFiCAtiOns this appliance has been tested in accor- Model Number Blt-iN-5124 dance with the ETL Intertek Standards for Description Built-in appliance fixed and location-dedicated electric room Voltage appliances in the United States and Cana- da. If you need assistance during installa- Watts 10.5... -
Page 9: Blt-In-62 Specifications
Blt-in-62 spECiFiCAtiOns this appliance has been tested in accor- Model Number Blt-iN-62 dance with the ETL Intertek Standards for Description Built-in appliance fixed and location-dedicated electric room Voltage appliances in the United States and Cana- da. If you need assistance during installa- Watts 10.5 tion, please contact your local dealer. -
Page 10: Installation Overview
INSTALLATION OVERVIEW SITE SELECTION NOTE: bEFORE yOU INSTALL A 15 Amp, 120 Volt circuit is required. Review and consider all of the a dedicated circuit is preferred but not following conditions for essential in all cases. installation: 1. Select a location that is not suscep- •... - Page 11 INSTALLATION OVERVIEW figure 1 Locate fire glass media and set aside for later installation. (See Page 13) figure 2 Remove sides of box figure 3 Remove packaging surrounding the unit and front. figure 4 Discard packaging materials and store fireplace in a safe, dry location.
-
Page 12: Built-In Installation
FirEplACE instAllAtiOn - Built-in Built-in CAUTION: figure 5 Two people may be needed to per- form this installation. 1. Prepare a wall with a framed opening to accomodate the size of your unit. (Figure 5) WARNING: Ensure that the Main ON/OFF Switch is set to the OFF Position (page 16) and that the circuit on which the fireplace is to be in-... - Page 13 FirEplACE instAllAtiOn - Built-in NOTE: bEFORE yOU INSTALL 1. Lift fireplace and insert into opening. Ad- just the unit to achieve the desired amount • For Glass front Models: of depth. (Figure 6) units must stick out of the wall a minimum of 2”...
-
Page 14: Wall Mount Installation
FirEplACE instAllAtiOn - WAll MOunt figure 8 NOTE: bEFORE yOU INSTALL Mounting holes for stakes for hanging It is strongly recommended that the screws wall bracket be screwed into the wall studs where pos- sible. If the wall studs cannot be used, ensure that plastic anchors are used. -
Page 15: Fire Glass Media Installation
FIRE GLASS MEDIA INSTALLATION NOTE: bEFORE yOU INSTALL figure 11 CLEANING THE MEDIA: The media may contain a fine white dust that needs to be cleaned prior to installation. Clean the media with soap, drain, rinse thoroughly and dry before placing into the tray. -
Page 16: Installing The Front
FRONT INSTALLATION NOTE: bEFORE yOU INSTALL It is recommended that two people install figure 13 the front onto the appliance, wear safety glasses and gloves when handling glass. 1. Lift fireplace front (Figure 13) and line up the brackets with the four (4) shoulder screws on the side of the appliance body (figure 14, or figure 15) 2. -
Page 17: Operating The Unit
OPERATING THE UNIT GETTING POWER TO THE UNIT figure 16 1. Make sure the appliance is switched OFF Wall (refer to page 16 for instruction) 2. Attach the provided adaptor to the power port on the right hand side of the unit. - Page 18 OPERATING THE UNIT CONTROLLING THE FIREPLACE figure 17 bUTTONS AND INDICATORS There are three (3) buttons on the remote controller (figure 14), and three (3) on the control panel of the fireplace, each pair of buttons with the same label perform the same function.
-
Page 19: Fireplace Maintenance
FIREPLACE MAINTENANCE WARNING: Disconnect power before performing any maintenance or cleaning to reduce the risk of fire, electric shock or damage. LED LIGHT bULb REPLACEMENT LED light bulbs are to be replaced by the manufacturer, it’s service agent or similar quali- fied person in order to avoid hazard. -
Page 20: Warranty
Products covered by this limited warranty have been tested and inspected prior to shipment and, subject to the provisions of this war- ranty, Amantii warrants such products to be free from defects in material and workmanship for a period of one (1) year from the date of the first purchase of such products. - Page 21 Date of Purchase: Dealer Information:...


Need help?
Do you have a question about the BLT-IN-5124 and is the answer not in the manual?
Questions and answers