Table of Contents
Advertisement
Quick Links
INSTALLATION AND OPERATION INSTRUCTIONS FOR
TRADITONAL ( TRD) BESPOKE
TRD-26 BESPOKE
TRD-30 BESPOKE
TRD-33 BESPOKE
TRD-38 BESPOKE
TRD-44 BESPOKE
TRD-48 BESPOKE
SAFETY INFORMATION
WARNING
if the information in these instructions
are not followed exactly, a fire or
explosion may result causing property
damage, personal injury or loss of life.
Do not store or use gasoline or other flammable vapors
and liquids in the vicinity of this or any other.
INSTALLER: LEAVE THIS MANUAL WITH THE APPLIANCE.
CONSUMER: RETAIN THIS MANUAL FOR FUTURE REFERENCE.
WARNING: This product can expose you to chemicals including
lead in the wiring, which is [are] known to the State of California
to cause birth defects of other reproductive harm. For more
information visit: www.p65warnings.ca.gov
ELECTRIC FIREPLACE
www.amantii.com
BS2000026-1
BS2000030-1
BS2000033-1
BS2000038-1
BS2000044-1
BS2000048-1
1
REVISED - 08/14/21
Advertisement
Table of Contents

Subscribe to Our Youtube Channel
Related Manuals for Amantii BS2000026-1


Summary of Contents for Amantii BS2000026-1
- Page 1 ELECTRIC FIREPLACE www.amantii.com INSTALLATION AND OPERATION INSTRUCTIONS FOR TRADITONAL ( TRD) BESPOKE TRD-26 BESPOKE BS2000026-1 TRD-30 BESPOKE BS2000030-1 TRD-33 BESPOKE BS2000033-1 TRD-38 BESPOKE BS2000038-1 TRD-44 BESPOKE BS2000044-1 TRD-48 BESPOKE BS2000048-1 SAFETY INFORMATION WARNING if the information in these instructions are not followed exactly, a fire or explosion may result causing property damage, personal injury or loss of life.
-
Page 2: Table Of Contents
TABLE OF CONTENTS Please read and carefully follow all of the instruction found in this manual. The instructions included here will assure that you have many years of dependable and enjoyable service from your Amantii Electric Fireplace. IMPORTANT INSTRUCTIONS CAUTIONS... -
Page 3: Important Instructions
1. Read all instructions before installing or using this heater. 2. Keep combustible materials, such as furniture, pillows, bedding, papers, clothes and curtains at least 3 feet from the front, sides and rear of the heater. 3. Always unplug heater when not in use. 4. -
Page 4: Cautions
CAUTIONS Always install the heater in accordance with this guide. If in doubt obtain expert advice. Always make sure the electrical socket is accessible and located adjacent to, but not above the heater. Always disconnect the heater from the electrical supply before moving it, or carrying out cleaning, maintenance. -
Page 5: Fcc Cautions
FCC CAUTIONS This device complies with part 15 of the FCC Rules. Operation is subject to the following two conditions:(1)This device may not cause harmful interference, and (2) this device must accept any interference received, including interference that may cause undesired operation. Any Changes or modifcations not expressly approved by the party responsible for compliance could void the user's authority to operate the equipment. -
Page 6: Unpacking And Testing Appliance
UNPACKING AND TESTING APPLIANCE Carefully remove the appliance from the box. Prior to installing the appliance, test to make sure the appliance operates properly by plugging the power supply cord into a 120 Volt grounded outlet. Test all aspects of its operation (manual switches, remote and heater) to make sure all components are operating correctly. -
Page 7: Product Specification
NOTE: This appliance must be electrically wired and grounded in accordance with local codes. In the absence of local codes, use the current CSA C22.1 Canadian Electrical Code in Canada or the ANSI/NFPA 70 National Electrical Code in the United States. BS2000026-1 BS2000030-1 BS2000033-1... - Page 8 BS2000038-1 BS2000044-1 BS2000048-1 product model (TRD-38 BESPOKE) (TRD-44 BESPOKE) (TRD-48 BESPOKE) Voltage 120V AC 60Hz Watts 1465W 5000 Appliance size 37 1/8”x 12 3/8” x 27 1/4” 43 1/4”x 13 3/4” x 31 5/8” 47 1/4”x 13 3/4” x 41 5/8” (W x D x H) 120 x 34.8 x 105.8 cm 94.4 x 31.3 x 69.1 cm...
-
Page 9: Outdoor Installations
OUTDOOR INSTALLATIONS The Symmetry Bespoke Series electric fireplaces are suitable for installation in outdoor areas on an inside wall in an area protected from direct water impingement. In addition to maintaining the listed mantel and combustibles clearances, a rain protection overhang factor of 1/2 shall be constructed to the front and to each side of the installed appliance. -
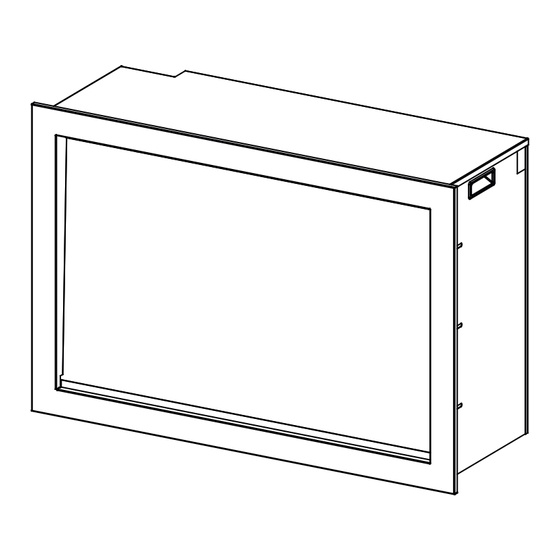
Page 10: Installation- Built-In
INSTALLATION- BUILT-IN NOTE: Due to the many different materials used to build walls, it is highly recommended that you consult your local builder before you install this appliance on a wall. PREPARATION Select a location that is not prone to moisture and is located at least 0.91m or 3 feet away from combustible materials such as curtains, drapes, furniture, bedding, paper, etc. - Page 11 2. Carefully remove the front glass panel once the trim has been removed. Use caution as the glass is now loose. 3. Unscrew the 2 screws located on each side and take off the inner side steel panels. Inner side panels 4.
- Page 12 5. Put the fireplace into the wall opening and fix it to the wall by screwing 2 screws each side. Screw the appliance onto the wall 6. Remove the trim following STEP 1. Screw back the inner side steel panels. 7.
-
Page 13: Hardwire Installation
HARDWIRE INSTALLATION Turn off the appliance completely and let cool before servicing. Only a qualified service person should service and repair this electric appliance. If it is necessary to hardwire this appliance, a qualified electrician must remove the cord connection, and wire the appliance directly to the house hold wiring. This appliance must be electrically connected and grounded in accordance with local codes, if hardwired. -
Page 14: Decorative Media Installation
DECORATIVE MEDIA INSTALLATION Consumers may purchase optional decorative media if they choose. See dealer for more details. 1. Unscrew 4 screws the quantity varies depending on the size of the unit and take off the trim. (NOTE: Keep hold of the front glass as it may fall down automatically when the trim is removed.) Screws Located Here Magnetic Stones located here 2. -
Page 15: Manual Operation
MANUAL OPERATION The fireplace operates either by the touch panel located on the left front top side of the fireplace or by supplied remote control. Ensure that the ON / OFF Power Switch on the fireplace is in the ON position. Touch the control panel once to “wakes up”... -
Page 16: Remote Control Operation
REMOTE CONTROL OPERATION For the remote to function make sure the fireplace is plugged in and the ON / OFF Power Switch on the fireplace is in the ON position and the remote has batteries. Important: When operating the remote make sure you point the remote to the center of the fireplace. - Page 17 Each time Speed Button is pressed, the speed of the flame will change. Three options are available: Medium- High- Low. The Moodlight Button turns the moodlight on and off. When in on position, the display screen of the remote control shows AD 1, when the number “1” flash, you can set the color of moodlight with keys.
- Page 18 7 day timer function NOTE: Ensure that the current time setting accurate, otherwise the effective time of the 7 day timer function will be different from what you set. Press the key once, 7 days from Monday to Sunday will display on the LCD screen of the remote control, press key within 5 seconds to enter 7 day timer function .
-
Page 19: Trouble Shooting
TROUBLE SHOOTING Fault code Fault Cause Solution The heater overheating Call after-sales service. NTC is defective. Call after-sales service. If the vents are dirty or clogged. Unplug the power, The heater not working. clean the dust and debris of the vent area. Wait for 5 minutes, plug in and turn on the heater. -
Page 20: Replacement Parts
REPLACEMENT PARTS PART NUMBER BS2000026-1 BS2000030-1 BS2000033-1 BS2000038-1 BS2000044-1 BS2000048-1 DESCRIPTION (TRD-26 BESPOKE) (TRD-30 BESPOKE) (TRD-33 BESPOKE) (TRD-38 BESPOKE) (TRD-44 BESPOKE) (TRD-48 BESPOKE) LED STRIP 30001812-38 30001859-44 3000181230001961-33 FOR EMBER BED LED STRIP 30002059-33 30002056-38 30002059-44 FOR FLAME FRONT GLASS... -
Page 21: Exploded View
EXPLODED VIEW...
Need help?
Do you have a question about the BS2000026-1 and is the answer not in the manual?
Questions and answers