Amantii BI-50-DEEP Installation And Operation Instructions Manual
Hide thumbs
Also See for BI-50-DEEP:
- Installation & owner's manual (35 pages) ,
- Installation and operation instructions manual (29 pages) ,
- Assembly, installation and operation instructions (27 pages)
Table of Contents
Advertisement
Quick Links
INSTALLATION AND OPERATION INSTRUCTIONS FOR BI-DEEP
UNITS
BI-40-DEEP
BI-50-DEEP
BI-60-DEEP
BI-72-DEEP
BI-88-DEEP
SAFETY INFORM ATION
WARNING
If the information in these instructions are
not followed exactly, a fire or explosion
may result causing property damage,
personal injury or loss of life.
Do not store or use gasoline or ot her flammable vapors
and liquids in t he vicinit y of t his or any ot her appliance.
INSTALLER: LEAVE THIS M ANUAL W ITH THE APPLIANCE.
CONSUM ER: RETAIN THIS M ANUAL FOR FUTURE REFERENCE.
Advertisement
Table of Contents

Related Manuals for Amantii BI-50-DEEP


Summary of Contents for Amantii BI-50-DEEP
- Page 1 INSTALLATION AND OPERATION INSTRUCTIONS FOR BI-DEEP UNITS BI-40-DEEP BI-50-DEEP BI-60-DEEP BI-72-DEEP BI-88-DEEP SAFETY INFORM ATION WARNING If the information in these instructions are not followed exactly, a fire or explosion may result causing property damage, personal injury or loss of life.
-
Page 2: Table Of Contents
Amant ii product . IMPORTANT INSTRUCTIONS............................3 UNPACKING AND TESTING APPLIANCE .......................4 GROUNDING APPLIANCE ............................4 LOCATING THE FIREPLACE .............................4 BI-40-DEEP ...................................5 BI-50-DEEP ...................................6 BI-60-DEEP ...................................7 BI-72-DEEP ...................................8 BI-88-DEEP ...................................9 INSTALLATION................................10 SAFETY DRILL SCREW AREA ..........................15 FOR BATHROOM USE ..............................15... -
Page 3: Important Instructions
IM PORTANT INSTRUCTIONS Read all inst ruct ions before inst alling or using t his heat er. Keep combust ible mat erials, such as furnit ure, pillows, bedding, papers, clot hes and curt ains at least 3 feet from t he front of t he heat er; keep t hem away from sides and rear as well. ’... -
Page 4: Unpacking And Testing Appliance
UNPACKING AND TESTING APPLIANCE Carefully remove t he appliance from t he box. Prior to inst alling t he appliance, t est t o make sure t he appliance operat es properly by plugging t he power supply cord int o a convenient ly located 120 Volt grounded out let . -
Page 5: Bi-40-Deep
BI-40-DEEP This appliance has been tested in accordance wit h t he UL St andard 2021 Descript ion Built-in Appliance fixed locat ion dedicated Voltage 120V AC 60Hz elect ric room appliances in t he Unit ed Watt s 1500W M ax St ates and Canada. -
Page 6: Bi-50-Deep
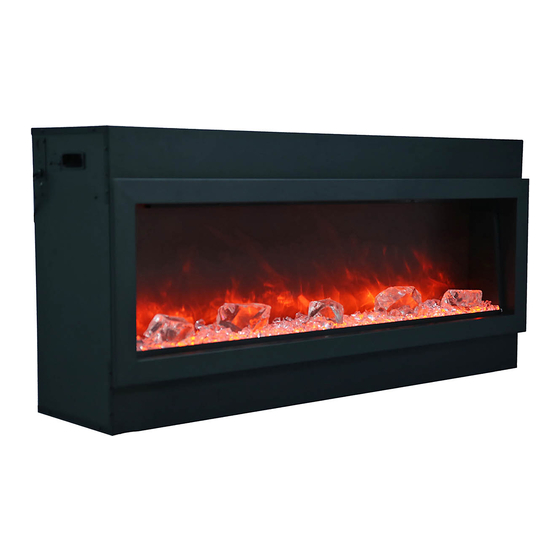
BI-50-DEEP This appliance has been t est ed M odel Number BI-50-DEEP accordance wit h t he UL St andard 2021 Voltage 120V AC 60Hz for fixed and locat ion dedicated elect ric Watt s 1500W M ax room appliances in t he United St at es and NO HEATER Canada. -
Page 7: Bi-60-Deep
BI-60-DEEP Descript ion Built-in Appliance Voltage 120V AC 60Hz This appliance has been t est ed in accordance Watt s 1500W M ax wit h t he UL St andard 2021 for fixed and NO HEATER locat ion dedicat ed elect ric room appliances M OTOR HEATER in t he United St ates and Canada. -
Page 8: Bi-72-Deep
BI-72-DEEP Descript ion Built-in Appliance This appliance been t ested Voltage 120V AC 60Hz accordance wit h t he UL St andard 2021 for Watt s 1500W M ax fixed and locat ion dedicat ed elect ric room NO HEATER appliances in t he Unit ed St ates and... -
Page 9: Bi-88-Deep
BI-88-DEEP Descript ion Built-in Appliance Voltage 120V AC 60Hz This appliance has been t est ed in accordance Watt s 1500W M ax wit h t he UL St andard 2021 for fixed and NO HEATER locat ion dedicat ed elect ric room appliances M OTOR HEATER in t he United St ates and Canada. -
Page 10: Installation
Not e: The opt ional t rim can be pulled out direct ly from t he unit . It will need t wo people t o do it . The rough wall opening size of t he fireplace: " " " BI-40-DEEP BI-50-DEEP BI-60-DEEP BI-72-DEEP 73 1/2 BI-88-DEEP 89 1/4 1. - Page 11 2. Remove the framing plates from the unit framing plat e 3. Re-fix the framing plates to the unit as the picture shows framing plat e...
- Page 12 4. Bend up the framing plates. 5. Put the unit into the opening.
- Page 13 6. Drive the mounting screws into the framing plates on the unit and the wall studs. framing plat e 7. After checking that the fireplace operates properly, cover the glass panel with protective plastic bag and install polywood. NOTE: IF YOU WANT TO USE THE TRIM KIT SUPPLIED that the thickness of the wall finish can only be 1 inch.
- Page 14 8. Decorate the polywood with glazed tile, wallpaper, etc. Fireplace 9. Put back the trim that you’ve removed from the unit at STEP 1. t rim...
-
Page 15: Safety Drill Screw Area
SAFETY DRILL SCREW AREA There is a safet y drill screw area as show below. Please make sure t hat t he fix screws are in t his area. Sa fe ty d rill s cre w a re a (Da rk a re a ) T h e m a n u a l c o n tro l p a d p o s itio n For Bathroom Use... -
Page 16: Hard-Wire Installation
HARD- W IRE INSTALLATION Turn off t he appliance complet ely and let cool before servicing. Only a qualified service person should service and repair t his elect ric appliance. If it is necessary t o hard wire t his appliance, a qualified elect rician must remove t he cord connect ion, and wire t he appliance direct ly t o t he household wiring. -
Page 17: Panorama Cover Installation
PANORAM A COVER INSTALLATION M ake sure inst all t he pan-cover when t he fireplace used out doors. Remove t he cover from t he packaging. The handles will need t o be at t ached t o t he cover wit h t he provided hardware as shown in fig. -
Page 18: Media Options
Media Options The BI-40-DEEP, BI-50-DEEP,BI-60-DEEP 2. Installing the fire glass media. Pour the is shipped with 3 large glass nuggets, clear fire glass media into the tray as shown and blue diamond shaped media and 11 below. Feel free to use any combination piece log set. -
Page 19: Operation
OPERATION The fireplace can be operat ed eit her by t he swit ches located on t he left bot t om of t he fireplace unit or by supplied remot e cont rol. Plug t he fireplace int o a 15 Amp wall socket . M ANUAL OPERATION The main power ON/ OFF swit ch in posit ion O, t he fireplace is OFF. - Page 20 REM OTE CONTROL OPERATION For remot e t o funct ion make sure t he heat er is plugged in and main power swit ch located on t he bott om left hand side is at posit ion I. When operat ing t he remot e make sure you point t he remote t o t he cent re of t he fireplace and make sure each t ime you press t he butt on t he buzzer inside t he unit will beep once.
-
Page 21: Installing Wall Thermostat
INSTALLING WALL THERM OSTAT WALL THERM OSTAT W IRING DIAGRAM S W ire the wall thermostat prior to installing the fireplace. WALL THERM OSTAT W IRING(24 VAC) Install Wall Thermostat per instructions provided with kit and per the follow ing information: Turn off circuit breaker. -
Page 22: Replacement Parts
REPLACEM ENT PARTS This list cont ains replacement part s DESCRIPTION QTY . BI-40-DEEP BI-50-DEEP BI-60-DEEP BI-72-DEEP BI-88-DEEP 602030C 602030C 602030C 602030C 602030C BLOWER AND HEATER ASSEM BLY FIREPLACE BOX 10104010 10104010 10104010 10104010 10104010 SWITCH 601032B 601032B 601032B 601032B... -
Page 23: Exploded View
EXPLODED VIEW... -
Page 24: Trouble Shooting
TROUBLE SHOOTING PROBLEM POSSIBLE CAUSE SOLUTION ’ ’ Dim or no flame Flame LED s are burnt out Inspect t he LED s and replace t hem if necessary. ’ ’ Ember Ember LED s are burnt out Inspect t he ember bed LED s and glowing or dimming replace t hem if necessary. -
Page 25: Service History
SERVICE HISTORY This heat er must be serviced annually depending on usage. Date Dealer Service technician Service Performed Special Concerns Name Name NOTES:...
Need help?
Do you have a question about the BI-50-DEEP and is the answer not in the manual?
Questions and answers