Table of Contents
Advertisement
Quick Links
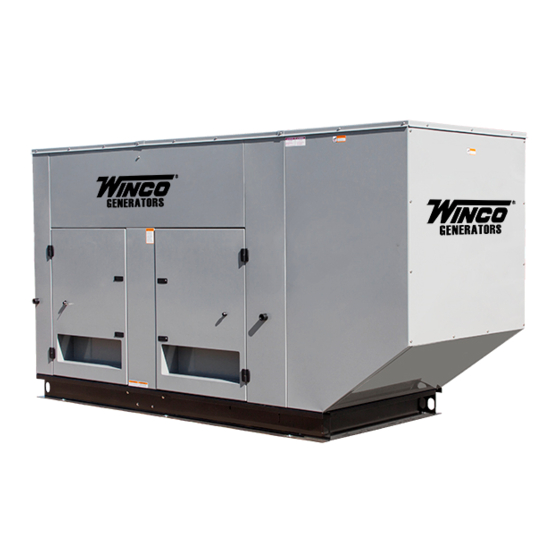
PSS150/A
GENERATOR
INSTALLATION AND
OPERATORS MANUAL
COPY YOUR MODEL AND SERIAL NUMBER HERE
No other WINCO generator has the same serial number as yours.
If you should ever need to contact us on this unit, it will help us to
respond to your needs faster.
MODEL __________________________________________________
16200-017
SERIAL NUMBER _________________________________________
PURCHASE DATE _________________________________________
DEALER NAME ___________________________________________
DEALER PHONE # ________________________________________
www.wincogen.com
Advertisement
Table of Contents

Related Manuals for Winco PSS150/A


Summary of Contents for Winco PSS150/A
- Page 1 OPERATORS MANUAL COPY YOUR MODEL AND SERIAL NUMBER HERE No other WINCO generator has the same serial number as yours. If you should ever need to contact us on this unit, it will help us to respond to your needs faster.
-
Page 2: Table Of Contents
“Troubleshooting Tables” near the end of this manual. LIQUID PROPANE VAPOR (LP) The warranty listed in the manual describes what you can NATURAL GAS (NG) expect from WINCO should you need service assistance in FUEL PRESSURE the future. FUEL PRESSURE TABLES... -
Page 3: Safety Information
SAFETY INFORMATION This engine generator set has been designed and WARNING: FIRE HAZARD manufactured to allow safe, reliable performance. Poor Gasoline and other fuels present a hazard of possible maintenance, improper or careless use can result in explosion and/or fire. potentially deadly hazards;... -
Page 4: Specifications
SPECIFICATIONS LP Gas Wattage 125,000 125,000 125,000 125,000 Volts 120/240 120/208 120/240 277/480 Phase Single Three Three Three Amps CB Size Adjustable Circuit Breaker Hertz Natural Gas Wattage 125,000 150,000 150,000 150,000 Volts 120/240 120/208 120/240 277/480 Phase Single Three Three Three Amps... -
Page 5: Introduction
INTRODUCTION PRODUCT DESCRIPTION The Package Standby System is designed to automatically provide standby power to unattended loads during electrical outages. Upon interruption of normal electrical service, the Packaged Standby System electrical control circuits will automatically start the engine. The generator will produce electrical power and the Automatic Transfer Switch (ATS) will automatically transfer the electrical loads to the engine-generator set. -
Page 6: Preparing The Unit
1. As you receive your unit, it is critical to check it for any damage. If any damage is noted, it is always easiest to refuse the shipment and let WINCO take care of the freight claim. If you sign for the unit, the transfer of the ownership requires that you file the freight claim 2. -
Page 7: Engine-Generator Set Mounting
INSTALLATION WARNING WARNING: FIRE HAZARD Before proceeding with installation, be sure the All fuel runs should be installed by a licensed fuel operation selector switch is in the stop position and the supplier. battery disconnected. To connect the fuel line to the generator set you will connect your incoming fuel line to the 1.25 inch NPT fitting These engine generator sets are designed to be mounted on a pad where there is proper ventilation. -
Page 8: Natural Gas (Ng)
FUEL PRESSURE LP TANK SIZING Correct fuel pressure cannot be stressed enough. The most Tank Temperature Tank Size common cause for inoperative systems is an inadequate 60° F (16° C) 1,000 Gallons or incorrect fuel pressure. Performance of the engine is in direct relation to the correctness of the fuel system. -
Page 9: Fuel Pressure Tables
We have partnered with a national lubrication oil Full load Line PSI 7-11 in 7-11 in manufacturer to give you access to Winco private branded 4-6 oz 4-6 oz premium oil available at comparable prices to conventional Two regulator system (LP vapor only) oils. -
Page 10: Installing The Battery
INSTALLING THE BATTERY CAUTION 1. Always wear full eye protection and protective clothing. In the following battery installation procedure, check to 2. Where electrolyte contacts skin, wash off immediately be sure the selector switch remains in the ‘off’ position. with water. This should be your last step before initial start-up. -
Page 11: Connecting Battery Charger & Block Heater
CAUTION: EQUIPMENT DAMAGE NEVER JUMP START these units. Doing so will destroy the engine control module, rendering the unit non- operational. Remove and fully recharge the battery before attempting to start. CONNECTING BATTERY CHARGER & BLOCK HEATER A three-stage battery charger is provided standard for all 12 volt standby systems. -
Page 12: Ac Connections
WINCO uses an adjustable breaker, which allows us to no feedback from the generator to the power line or the use the same breakers in reconnectable units. These power line to the generator. - Page 13 the transfer switch can be wired in directly after the watt- hour meter and the service entrance, providing the service entrance ampere rating is within the transfer switch’s rated capability. If only specific circuits are to be powered under emergency power failure conditions, an additional distribution panel designated “emergency distribution panel”...
-
Page 14: Dc Connection
DC CONNECTION CAUTION D - Remote Display Panel Interface Terminals. These interface terminals are pre-wired to allow for the connection Never run the AC and DC wiring on the same conduit. of a remote display. This display allows for the remote annunciation of alarms at a location such as a nurses station NOTE or a control room. -
Page 15: Starting Procedure
STARTING PROCEDURE INITIAL START UP CONTROL LAYOUT WARNING: EQUIPMENT DAMAGE Before attempting to start this unit, complete your pre-start checklist and ensure the generator mainline circuit breaker is in the proper position prior to starting. Starting this unit without it properly connected can cause serious personal injury or equipment damage. - Page 16 step is to check the voltage at the generator terminals in the Automatic Transfer Switch. The voltage between the G1 and the G3 terminals should be the same as it was on the generator front panel. The voltage should also be checked between the hot terminals (G1 and G3) and the G-N to be certain of a balanced voltage output and a solid neutral connection.
-
Page 17: Avr Wiring
AVR WIRING AS440 Automatic Voltage Regulator The following is a list of connections on the AVR. These have been factory set and other than voltage adjustment, should never be changed. 1. VOLTS - Adjust generator output voltage. Clockwise to increase voltage. 2. -
Page 18: Trouble Shooting Tables
TROUBLE SHOOTING TABLES UNIT WILL NOT 1. Digital genset controller not in “AUTO” CRANK WHEN THE 2. Transfer control switch not in “AUTOMATIC”. POWER FAILS 3. Incorrect wiring between transfer switch and generator. 4. Loose or dirty battery terminals. 5. Defective engine control module. 6. -
Page 19: Maintenance
MAINTENANCE Other than keeping the generator clean and free of debris, MAINTENANCE SCHEDULE there is no other routine or preventative maintenance SERVICE INTERVALS required as long as the generator is run bi-weekly to keep it dry and in good working order. Check Engine Oil Level Daily Check Coolant Level and for Leakage... -
Page 20: Ac Wiring
THREE PHASE AC WIRING HIGH AND LOW WYE AC WIRING THREE PHASE-HIGH WYE THREE PHASE-L 277/480 VOLTS 120/208 VOLTS 3-PH HIGH WYE 277/480V REE PHASE AC WIRING H AND LOW WYE SE-HIGH WYE THREE PHASE-LOW WYE 120/208 VOLTS 3-PH LOW WYE120/208V OPM-124/B... -
Page 21: 1-Ph 120/240V Double Delta
- 4 LEAD WIRING - DELTA LE PHASE THREE PHASE -DELTA 40 VOLTS 120/240 VOLTS 3-PH DELTA 120/240V 1-PH 120/240V DOUBLE DELTA 12 LEAD OPM-124/B... -
Page 22: Engine Harness Schematic
ENGINE HARNESS SCHEMATIC OPM-124/B... -
Page 23: Dse 7310 Mkii Wiring Diagram
DSE 7310 MKII WIRING DIAGRAM OPM-124/B... -
Page 24: Limited Warranty
WINCO Inc. shall not be liable for any claim in an amount greater than the purchase price of the product. In no event shall WINCO Inc. be held liable for any special, indirect, consequential or liquidated damages.
Need help?
Do you have a question about the PSS150/A and is the answer not in the manual?
Questions and answers