Table of Contents
Advertisement
Quick Links
Advertisement
Table of Contents

Related Manuals for Aim-TTI PowerFlex QPX1200 Series


Summary of Contents for Aim-TTI PowerFlex QPX1200 Series
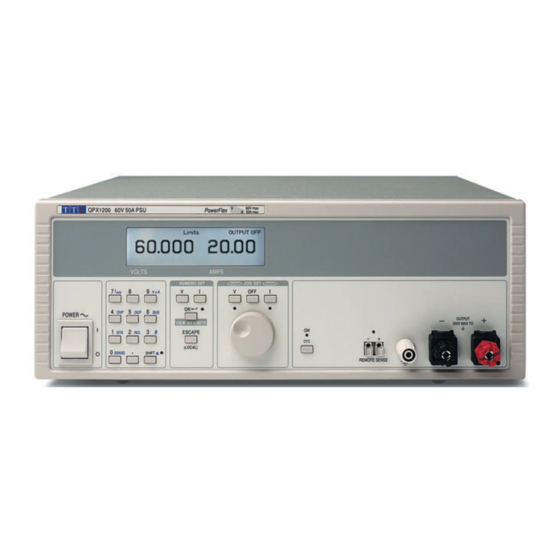
- Page 1 QPX1200 Series PowerFlex DC Power Supplies INSTRUCTION MANUAL...
-
Page 2: Table Of Contents
Table of Contents Specification Safety Installation Connections Initial Operation Manual Operation Remote Operation Remote Commands Maintenance Note: The latest revisions of this manual, device drivers and software tools can be downloaded from: http://www.tti-test.com/go/qsx This manual is 48511-1400 Iss 6... -
Page 3: Specification
Specification General specifications apply for the temperature range 5°C to 40°C. Accuracy specifications apply for the temperature range 18°C to 28°C after 1 hour warm-up with no load and calibration at 23°C. Typical specifications are determined by design and are not guaranteed. OUTPUT SPECIFICATIONS Voltage Range: 0V to 60V... - Page 4 Output Protection: Output will withstand an applied forward voltage of up to 70V. Reverse protection by diode clamp for reverse currents up to 3A. Over-voltage Protection Range 2V to 65V. Resolution 0.1V; accuracy: 0.2% ± 0.2V. (OVP): Response time typically 100µs. Over-current Protection Range 2A to 55A.
- Page 5 INTERFACES Full digital remote control facilities are available through the RS232, LAN and USB interfaces. Setting and readback resolutions are the same as the Output and Meter specifications respectively. RS232: Standard 9-pin D-connector. Baud rate 9600. USB: Standard USB 2.0 hardware connection. LAN: Ethernet 100/10base-T hardware connection.
- Page 6 EC Declaration of Conformity We Thurlby Thandar Instruments Ltd Glebe Road Huntingdon Cambridgeshire PE29 7DR England declare that the QPX1200L Power Supply with GPIB option meets the intent of the EMC Directive 2004/108/EC and the Low Voltage Directive 2006/95/EC. Compliance was demonstrated by conformance to the following specifications which have been listed in the Official Journal of the European Communities.
-
Page 7: Emc
This instrument has been designed to meet the requirements of the EMC Directive 2004/108/EC. Compliance was demonstrated by meeting the test limits of the following standards: Emissions EN61326-1 (2006) EMC product standard for Electrical Equipment for Measurement, Control and Laboratory Use. Test limits used were: Radiated: Class A Conducted: Class A... -
Page 8: Safety
Safety This power supply is a Safety Class I instrument according to IEC classification and has been designed to meet the requirements of EN61010-1 (Safety Requirements for Electrical Equipment for Measurement, Control and Laboratory Use). It is an Installation Category II instrument intended for operation from a normal single phase supply. -
Page 9: Installation
Installation Mains Operating Voltage This instrument has a universal input range and will operate from a nominal 115V or 230V mains supply without adjustment. Check that the local supply meets the AC Input requirement given in the Specification. Mains Lead Connect the instrument to the AC supply using the mains lead provided. -
Page 10: Connections
Connections Front Panel Connections The load should be connected to the positive (red) and negative (black) terminals marked OUTPUT. The terminals accept 4mm plugs into the end (but note that 4mm plugs will only support 32 Amps), 6mm diameter wire or plugs into the cross-hole or 8mm spade connections (with a maximum blade width of 16mm). - Page 11 Analogue Monitor The output terminal voltage and output current may be monitored on V MONITOR and I MONITOR respectively. The output scaling for both is the same as that set for V CONTROL and I CONTROL, see previous section. The COMMON return signal is referenced to the positive output of the power supply.
-
Page 12: Initial Operation
Initial Operation This section of the manual is a general introduction to the controls and operation of the instrument and is intended to be read before using the power supply for the first time. In this manual front panel keys, connections and indicators are shown in capitals, e.g. ESCAPE, JOG SET, OUTPUT, ON. - Page 13 Jog Control The rotary 'jog' control permits the output voltage or current limit to be incremented or decremented in steps with a resolution set by the JOG SET keys; the output immediately follows the setting, i.e. no OK is required. At power-up jog is always off.
-
Page 14: Manual Operation
Manual Operation New users should first read the Initial Operation chapter which describes the operating principles of the keypad and rotary jog control. Set Voltage Limits With the output off, the standard status display shows the set voltage; shows as a reminder beside OUTPUT OFF in the top line of the display. - Page 15 Set Current Limit With the output off, the standard status display shows the set current limit; with the output on it shows the actual output current in all modes (CV, CI or UNREG). Both the actual current and the current limit are shown to a resolution of 10mA. The current limit can be set directly from the numeric keypad: press the NUMERIC SET I key, enter the new value using the numeric keys and confirm by pressing OK.
- Page 16 Output Power (V x A) If SHIFT, V x A is pressed the display shows the product of measured output voltage x measured current in the form nn.n VA . . The V x A value is updated at the same measurement rate as for V and I.
- Page 17 Sense Miswiring Trip The output will be tripped off if the voltage between an output terminal and its corresponding sense terminal exceeds approximately 1V; this will happen if the sense wires are wired at the load to the wrong output or if an attempt is made to draw power from the sense wires. If the sense terminals are miswired in this way the output is turned off and the message Sense Error –...
- Page 18 Over-Current Protection Over-Current Protection (OCP) can be set from 2.0A to 55.0A. If the output current exceeds the set OCP the output is shut down (typically within 100ms). To set OCP press SHIFT, OCP. The display changes to show only the present setting together with the prompt Numeric Entry: Range 2-55...
- Page 19 Analogue Control Rear panel connections V CONTROL and I CONTROL provide quasi-analogue control of the Output Voltage and Current Limit respectively. The CONTROL inputs are read 4 times per second by the A-to-D converter and the output is set according to the selected input scaling. The input scaling for both can be set as 0 to 10 Volts or 0 to 5 Volts for maximum output.
- Page 20 Extra Functions Options for extra functions such as LOGIC CONTROL and ANALOGUE CONTROL/MONITOR, plus variations on some of the factory default functions, can be set by the user by using the # extra functions facility. The complete list of functions is accessed by pressing SHIFT, # ; the required function can be selected directly by entering nn from the keyboard, where nn is the 2- digit number in the list below, or by scrolling to the appropriate function in the list using the JOG SET control;...
-
Page 21: Remote Operation
Remote Operation The instrument can be remotely controlled via its RS232, USB, GPIB (factory option), LAN or Analogue interfaces. USB remote control operates in a similar way to RS232 but via the USB connector. Software supplied with the instrument sets up the controlling computer to treat the USB connection as a virtual COM port. - Page 22 Remote/Local Operation At power-on the instrument will be in the local state. In this state all keyboard operations are possible. When the instrument is addressed to listen and a command is received the remote state will be entered and REMOTE will be shown in the top line of the display. In this state the keyboard is locked out and remote commands only will be processed.
- Page 23 RS232 Character Set Because of the need for XON/XOFF handshake it is possible to send ASCII coded data only; binary blocks are not allowed. Bit 7 of ASCII codes is ignored, i.e. assumed to be low. No distinction is made between upper and lower case characters in command mnemonics and they may be freely mixed.
- Page 24 LAN Status Indication The LAN Status is displayed in the top left hand corner of the display during normal operation. It is not shown on all menus. There are 4 possible indications: No LAN If the unit cannot detect any connection to a LAN e.g. the cable is unplugged then the LAN status indicator is Configuring The unit has detected a LAN connection but is not yet configured, e.g.
- Page 25 XML Identification Document URL As required by the LXI standard, the instrument provides an XML identification document that can be queried via a GET at “http://<hostname>:80/lxi/identification” that conforms to the LXI XSD Schema (available at http://www.lxistandard.org/InstrumentIdentification/1.0) and the W3C XML Schema Standards ( http://www.w3.org/XML/Schema ).
- Page 26 The IEEE 488.2 error is handled as follows. If the response formatter is waiting to send DEADLOCK a response message and the input queue becomes full then the instrument enters the DEADLOCK state and an error is generated. This will cause the Query Error bit to be set in the Standard Event Status Register, a value of 2 to be placed in the Query Error Register and the response formatter to be reset thus clearing the output queue.
- Page 27 The Standard Event Status Register is read and cleared by the *ESR? command. The Standard Event Status Enable register is set by the *ESE <nrf> command and read by the *ESE? command. It is a bit field where each bit has the following significance. Bit 7 - Power On.
- Page 28 The Limit Event Status Register is read and cleared by the LSR1? command. The Limit Event Status Enable Register is set by the LSE1 <nrf> command and read by the LSE1? command. Bit 7 - Reserved for future use Bit 6 - Set when a fault trip has occurred which requires AC power OFF/ON to reset.
- Page 29 † Registers marked thus are specific to the GPIB section of the instrument and are of limited use in an RS232 environment. The instrument will be in local state with the keyboard active. The instrument parameters at power on are the same as at last switch off with the exception of the output status.
-
Page 30: Remote Commands
Remote Commands Remote Command Format RS232 input to the instrument is buffered in a 256 byte input queue which is filled, under interrupt, in a manner transparent to all other instrument operations. The instrument will send XOFF when approximately 200 characters are in the queue. XON will be sent when approximately 100 free spaces become available in the queue after XOFF was sent. - Page 31 Each query produces a specific which is listed along with the command in <RESPONSE MESSAGE> the remote commands list. is ignored except in command identifiers. e.g. '*C LS' is not equivalent to '*CLS'. <WHITE SPACE> is defined as character codes 00H to 20H inclusive with the exception of the NL <WHITE SPACE>...
- Page 32 V1O? Return the output readback voltage – response is <nr2>V<rmt> where <nr2> is in Volts. I1O? Return the output readback current – response is <nr2>A<rmt> where <nr2> is in Amps. DELTAV1 <nrf> Set the output voltage step size to <nrf> Volts. DELTAI1 <nrf>...
- Page 33 *PRE <nrf> Set the Parallel Poll Enable Register to the value <nrf>. *PRE? Returns the value in the Parallel Poll Enable Register in <nr1> numeric format. The syntax of the response is <nr1><rmt> *SRE <nrf> Sets the Service Request Enable Register to <nrf> *SRE? Report the value in the Service Request Enable Register.
-
Page 34: Maintenance
Calibration Specific Commands See Service Manual for details of calibration specific commands. Note: The use of ‘1’ in many of the commands (e.g. V1 <nrf>, I1O?) is to keep the commands entirely compatible with those for multi-output TTi programmable power supplies. ‘1’ refers to ‘Output 1’ which, for this power supply, is the only output;... - Page 35 Thurlby Thandar Instruments Ltd. Glebe Road • Huntingdon • Cambridgeshire • PE29 7DR • England (United Kingdom) Telephone: +44 (0)1480 412451 • Fax: +44 (0)1480 450409 tti-test International web site: www. .com • UK web site: www. .co.uk tti-test Email: info@ .com Aim Instruments and Thurlby Thandar Instruments Book Part No.
Need help?
Do you have a question about the PowerFlex QPX1200 Series and is the answer not in the manual?
Questions and answers