Table of Contents
Advertisement
Advertisement
Table of Contents

Related Manuals for Aim-TTI QL Series II


Summary of Contents for Aim-TTI QL Series II
- Page 1 QL Series II Precision Power Supplies INSTRUCTION MANUAL...
-
Page 2: Table Of Contents
Table of Contents Introduction Specification Safety Installation Connections Front Panel Connections Rear Panel Connections Initial Operation Manual Operation Main Outputs Main Outputs – Link Mode (T models only) Main Outputs – Copy Function (T models only) Auxiliary Output (T models only) Remote Operation (P models only) Interface Locking Address &... -
Page 3: Introduction
0·01 Watts. Fast, Simple and Safe to use The user interface of the QL series II has been carefully designed to provide rapid control whilst guarding against any possibility of error. Voltage and current setting can be performed either by direct numeric entry or, for applications where the voltage or current must be gradually changed, by using the quasi-analogue Jog control. - Page 4 The USB interface is compatible with USB 2.0 and USB 1.x. The LAN interface is 1.4 LXI Core 2011 compliant. The QL series II uses simple and consistent command structures which make programming particularly easy regardless of which interface is used.
-
Page 5: Specification
Specification General specifications apply for the temperature range 5°C to 40°C. Accuracy specifications apply for the temperature range 18°C to 28°C after 1 hour warm-up with no load and calibration at 23°C. Typical specifications are determined by design and are not guaranteed. MAIN OUTPUTS Voltage/Current Ranges: QL355... - Page 6 Output Protection: Output will withstand forward voltages of up to 20V above rated output voltage. Reverse protection by diode clamp for currents up to 3A. Over-voltage Protection: Range 1V to 40V (QL355), 1V to 60V (QL564) (OVP) Resolution 0·1V; accuracy ± (2% + 0·5V) Response time typically 100µs Over-current Protection: Range 0·01A to 5·5A (QL355), 0·01A to 4·4A (QL564)
- Page 7 ALARM OUTPUT Isolated rear-panel open-collector output signal. User can select output to be activated for either OVP, OCP, Overtemperature or Sense miswiring, or for any of those four faults. DIGITAL INTERFACES (P models only) Full digital remote control facilities are available through the RS232, USB, LAN and GPIB interfaces. General RS232: Standard 9-pin D-connector.
-
Page 8: Safety
Safety This power supply is a Safety Class I instrument according to IEC classification and has been designed to meet the requirements of EN61010-1 (Safety Requirements for Electrical Equipment for Measurement, Control and Laboratory Use). It is an Installation Category II instrument intended for operation from a normal single phase supply. -
Page 9: Installation
Installation Check that the instrument operating voltage marked on the rear panel is suitable for the local supply. Should it be necessary to change the operating voltage, proceed as follows: 1) Disconnect the instrument from all voltage sources. 2) Remove the screws which retain the top cover and lift off the cover. 3) Change the connections on both transformers following the appropriate diagram below: BROWN BROWN... -
Page 10: Connections
Mains Lead Connect the instrument to the AC supply using the mains lead provided. Should a mains plug be required for a different mains outlet socket, a suitably rated and approved mains lead set should be used which is fitted with the required wall plug and an IEC60320 C13 connector for the instrument end. - Page 11 Alarm Outputs Associated with each main output are recessed 2-pin connectors marked Alarm. These provide access to an opto-isolated NPN switching transistor, the function of which can be set from the keyboard, see the Alarm Output section of this manual. The maximum operating voltage that can be applied across the terminals is 20VDC and the maximum sink current for the switch 'closure' is 1mA.
-
Page 12: Initial Operation
Initial Operation This section of the manual is a general introduction to the controls and operation of the instrument and is intended to be read before using the power supply for the first time. In this manual front panel keys, connections and display indicators are shown in capitals, e.g. - Page 13 The OK key is used to confirm most keypad entries. At all other times it becomes the VIEW V/I LIMITS key and pressing it will cause the display to show preset output voltage and current limit for 3 seconds; during this period the LIM indicator in the display flashes. Pressing SHIFT illuminates the key and gives the numeric keys the functions marked above them (e.g.
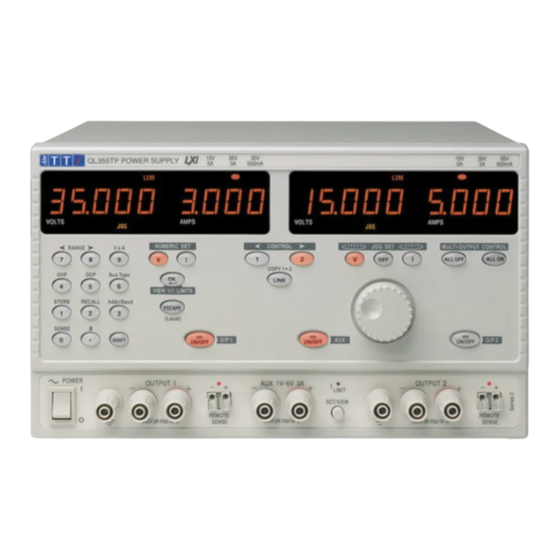
- Page 14 Display The displays shows the voltage on the left (5 digits) and the current on the right (4 digits) for both the main outputs. These 7-segment displays are also used to show prompts during some of the function settings (e.g. memory store/recall or remote control address setting) using the limited 'character set' that can be achieved with a 7-segment display;...
-
Page 15: Manual Operation
Manual Operation Main Outputs New users should first read the Initial Operation chapter which describes the operating principles of the keypad and rotary jog control. The following paragraphs describe the independent operation of either Main Output. To select which output is to be controlled by the keypad/Jog controls it is first necessary to select that output by pressing the appropriate CONTROL... - Page 16 Note that in constant current mode the actual voltage is measured and displayed to only 10mV resolution; the 1mV digit permanently displays zero. Further details on the jog control can be found in the Initial Operation chapter. Set Current Limit With the output off, the right-hand display shows the current limit to a resolution of 1mA (0·1mA on the 500mA range).
- Page 17 Range Selection The instrument has three ranges: 35V/3A, 15V/5A and 35V/500mA (QL355) or 56V/2A, 25V/4A and 56V/500mA (QL564). The selected range is shown by an illuminated indicator below the appropriate legend at the top right-hand side of the instrument; when the 500mA range is selected the indicator legend is mA to emphasise that the current meter now shows milliamps not amps.
- Page 18 To avoid instability and transient response problems, care must be taken to ensure good coupling between each output and sense lead. This can be done either by twisting the leads together or by using coaxially screened cable (sense through the inner). An electrolytic capacitor directly across the load connection point may also be beneficial.
- Page 19 could be set such that is was above the actual output voltage but below the set voltage. This could be used to trip the output under a fault condition which caused the load impedance to increase and the actual output voltage to therefore rise above the OVP point. Over-Current Protection Over-Current Protection (OCP) can be set from 0·01A to 5·5A (QL355) or to 4.4A (QL564).
- Page 20 Store Settings The instrument can store 50 set-ups for each output in non-volatile memory; the parameters stored are range, voltage, current limit, OVP and OCP. The output state and remote sense setting are not stored. In addition, a further 50 Link Mode set-ups can be saved, see Main Outputs –...
- Page 21 # Code Function Main Output always off at power-up (factory default) Main Output status at power-up the same as at last power-down Aux Output (T models only) always off at power up (factory default). Set with control assigned to Output 1. Aux Output (T models only) status at power up the same as at last power down.
-
Page 22: Main Outputs - Link Mode (T Models Only)
RS232: 9,600 Baud (P versions only) Address: 11 (P versions only) Error Messages The following hardware errors are indicated by showing the appropriate error number in the display. The OK key will flash and if pressed the error will be ignored and operation will continue as described. Error No. - Page 23 settings are different. Pressing LINK when different ranges are set will cause the buzzers to sound twice and the Range indicator of the previously unselected output to flash for 2 seconds. Selecting Link mode will cancel any Jog selection set on either Main Output. Set Voltage and Set Current Limit Setting the output voltage and current limit by numeric entry or Jog control is essentially the same as for the outputs in independent mode.
-
Page 24: Main Outputs - Copy Function (T Models Only)
Main Outputs – Copy Function (T models only) The principle settings of Output 1 can be copied to Output 2 using the Copy function, irrespective of the CONTROL mode (1, 2 or LINK) currently selected. The parameters copied are Range, Voltage, Current Limit, OVP and OCP; the status of Sense, ON/OFF, Jog and the Store contents are not copied. -
Page 25: Remote Operation (P Models Only)
Remote Operation (P models only) The instrument can be remotely controlled via its RS232, USB, LAN or GPIB interfaces. USB remote control operates in a similar way to RS232 but via the USB connector. Software supplied with the instrument sets up the controlling computer to treat the USB connection as a virtual COM port. -
Page 26: Remote/Local Operation
By default all interfaces are live at all times. It is however possible to configure the privileges for a particular interface to either “read only” or “no access” from the Web page interface. The status of the interface privileges may be viewed, but not changed, from the front panel. To view the interface privileges the CONTROL... -
Page 27: Usb Interface
Baud Rate is set as described above in Address and Baud Rate Selection; the other parameters are fixed as follows: Start Bits: 1 Parity: None Data Bits: 8 Stop Bits: 1 RS232 Character Set Because of the need for XON/XOFF handshake it is possible to send ASCII coded data only; binary blocks are not allowed. - Page 28 LAN Connection To use the LAN interface, the IP address of the unit must be known. On the supplied CD-ROM is a guide to the LXI Discovery Tool which provides links to the latest version of the tool and associated downloads. The tool is a Windows PC application which can be used to display the IP addresses or host names of all connected devices that comply with the VXI-11 protocol or support multicast Domain Name System (mDNS) records.
- Page 29 VISA Resource Name Because of the limited support for VXI-11(Discovery Protocol only), the instrument must be referred to by its raw socket information when used in software packages which communicate via a VISA resource name. For example, an instrument at IP address 192.168.1.100 would normally have a VISA resource name of "TCPIP0::192.168.1.100::inst0::INSTR"...
- Page 30 GPIB IEEE Std. 488.2 Error Handling – Query Error Register The IEEE 488.2 error (addressed to talk with nothing to say) is handled as follows. UNTERMINATED If the instrument is addressed to talk and the response formatter is inactive and the input queue is empty then the error is generated.
-
Page 31: Status Reporting
Status Reporting This section describes the complete status model of the instrument. Note that some registers are specific to the GPIB section of the instrument and are of limited use in an RS232 environment. Standard Event Status and Standard Event Status Enable Registers These two registers are implemented as required by the IEEE Std. - Page 32 Limit Event Status Registers 1 and 2 are read and cleared by the LSR1? and LSR2? commands respectively. Limit Event Status Enable Registers 1 and 2 are set by the LSE1< > and LSE2< > commands and read by the LSE1? and LSE2? commands respectively. Limit Event Status Register 1 Bit 7 - not used...
- Page 33 Status Model (For single output models ignore LSR2, LSE2 & LIM2)
- Page 34 Power on Settings The following instrument status values are set at power on: Status Byte Register Service Request Enable Register † Standard Event Status Register = 128 (pon bit set) Standard Event Status Enable Register † Execution Error Register Query Error Register Parallel Poll Enable Register †...
-
Page 35: Remote Commands
Remote Commands RS232/USB Remote Command Format Serial input to the instrument is buffered in a 256 byte input queue which is filled, under interrupt, in a manner transparent to all other instrument operations. The instrument will send XOFF when approximately 200 characters are in the queue. XON will be sent when approximately 100 free spaces become available in the queue after XOFF was sent. -
Page 36: Command List
is ignored except in command identifiers. e.g. '*C LS' is not equivalent to '*CLS'. <WHITE SPACE> is defined as character codes 00H to 20H inclusive with the exception of the NL <WHITE SPACE> character (0AH). The high bit of all characters is ignored. The commands are case insensitive. - Page 37 OVP< > < > Set output < > over voltage protection trip point to < > Volts I< > < > Set output < > current limit to < > Amps OCP< > < > Set output < > over current protection trip point to < >...
- Page 38 Simultaneously sets all outputs on/off where < > has the following meaning: OPALL < > 0=All OFF, 1=ALL ON. If OPALL sets all outputs ON then any that were already on will remain ON. If OPALL sets all outputs OFF then any that were already off will remain OFF SENSE<...
- Page 39 *ESE < > Set the Standard Event Status Enable Register to the value of < >. *ESE? Returns the value in the Standard Event Status Enable Register in < 1> numeric format. The syntax of the response is < 1>< >...
- Page 40 NETCONFIG? Returns the first means by which an IP address will be sought. The response is < >< > where < > is DHCP, AUTO or STATIC. The following commands specify the parameters to be used by the LAN interface. Note: a power cycle is required after these commands are sent before the new settings are used (or returned in response to the queries listed above).
-
Page 41: Maintenance
Maintenance The Manufacturers or their agents overseas will provide a repair service for any unit developing a fault. Where owners wish to undertake their own maintenance work, this should only be done by skilled personnel in conjunction with the Service Guide which may be purchased directly from the Manufacturers or their agents overseas. - Page 42 Thurlby Thandar Instruments Ltd. Glebe Road • Huntingdon • Cambridgeshire • PE29 7DR • England (United Kingdom) Telephone: +44 (0)1480 412451 • Fax: +44 (0)1480 450409 International web site: www.aimtti.com • UK web site: www.aimtti.co.uk Email: info@aimtti.com Aim Instruments and Thurlby Thandar Instruments...
Need help?
Do you have a question about the QL Series II and is the answer not in the manual?
Questions and answers