Table of Contents
Advertisement
Quick Links
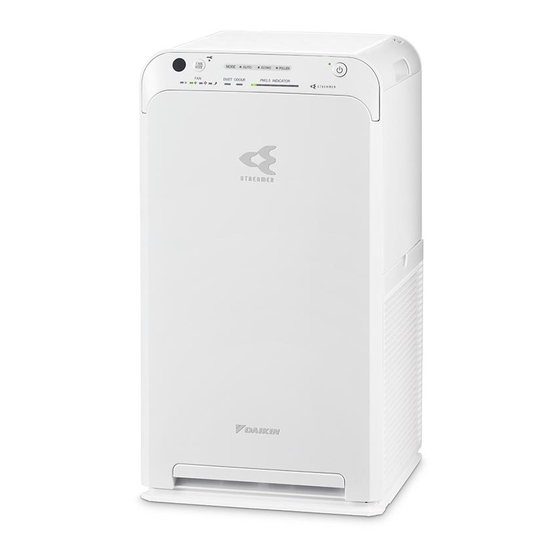
Air purifier
Floor standing or desktop type
Model
MC55WVM
• Thank you for purchasing this air purifier.
• Please read the operation manual carefully and follow it for correct use.
• Please read the "Safety Precautions" section before use.
Please keep the operation manual in a safe place for later reference.
Air Purifier
OPERATION MANUAL
►Page 3-5
Advertisement
Table of Contents
Troubleshooting

Subscribe to Our Youtube Channel
Related Manuals for Daikin STREAMER C55WVM


Summary of Contents for Daikin STREAMER C55WVM
- Page 1 Air purifier Floor standing or desktop type Air Purifier Model MC55WVM OPERATION MANUAL • Thank you for purchasing this air purifier. • Please read the operation manual carefully and follow it for correct use. • Please read the “Safety Precautions” section before use. ►Page 3-5 Please keep the operation manual in a safe place for later reference.
-
Page 3: Table Of Contents
Read First Contents Read First Safety Precautions ............Precaution During Use ............ Names of Parts and Operations ........Preparation Before Operation .......... Using Air Purifying Operation ......... 12 Operation Changing the Airflow Rate ..........12 Operating the Unit in a MODE ........13 AUTO FAN / ECONO / ANTI-POLLEN Useful Functions Using the Child Proof Lock .......... -
Page 4: Safety Precautions
Read First Safety Precautions „ Observe these precautions in order to prevent property damage or injury. „ The consequences of incorrect use are categorised as follows: WARNING CAUTION Failure to follow these instructions properly may Failure to follow these instructions properly result in property damage or personal injury, which may result in personal injury or loss of life. - Page 5 Read First WARNING Observe in order to prevent fire, electric shock or severe injury. „ During use • Do not use chlorinated or acidic detergents. (Injury may result from degradation or cracking of plastic, or harm may be caused to health from the production of toxic gases) •...
-
Page 6: Precaution During Use
Read First Safety Precautions CAUTION Observe in order to prevent electrical leakage, injury or property damage. • Do not use products that contain fine powder, such as cosmetics, near the unit. (An electric shock or malfunction may result) • Do not operate the unit when fumigating insecticide is in use. –After using insecticide, be sure to sufficiently ventilate the room before operating the unit. -
Page 7: Names Of Parts And Operations
Read First Names of Parts and Operations CAUTION Do not lift up the unit holding the grip on the deodorising filter unit. (Injury may result from the unit falling) Front Back Operating/Indicator panel ►Page 7, 8 Air outlet Active plasma ion generation unit Grip Inside the air outlet. - Page 8 Read First Names of Parts and Operations Operating/Indicator panel When a lamp is blinking ►Page 23 MODE lamps [green] ON/OFF lamp [green] Child proof lock lamp [orange] Indicate the MODE in operation. Lamp will light up when the power is ON. Lamp will be lit when the child proof lock active.
- Page 9 Read First Operating/Indicator panel Signal receiver FAN/MODE button ON/OFF button Press to cycle between FAN settings Press to turn the power ON or OFF. Receives signals from the remote controller. ►Page 12 and MODEs. ►Page 12-14 Receiving tones sound when signals are received, confirming successful reception.
-
Page 10: Preparation Before Operation
Read First Preparation Before Operation Positioning the unit Pointers for good positioning Before setting up, remove the fixing tape on the bottom • Choose a position from where airflow can reach all areas of the which is securing the power room. - Page 11 Read First CAUTION Carry out these steps before inserting the power supply plug. Attaching the deodorising filter Remove the deodorising filter unit from the Turn the deodorising filter unit over and main unit. attach the deodorising filter. ►Page 20 1 Set the deodorising filter under the fixed parts Front side (3 places).
- Page 12 Read First Preparation Before Operation Preparing the remote controller Attach the remote controller holder. Replacing the battery • Insert the hook on the remote controller holder into Move the catch on the battery tray at the the notch in the back of the unit. bottom of the remote controller in the Notch direction of the arrow.
-
Page 13: Operation
Operation WARNING Operation Do not turn off the unit by unplugging it from the power socket. (Fire due to overheating or electric shock may result) Operation Detailed settings can be made Remote controller Unit using the remote controller. Operation via remote controller. Operation via operating/indicator panel on unit. -
Page 14: Operating The Unit In A Mode
Useful Functions Useful Functions Remote controller Unit Operating the Unit in a MODE Select a MODE specific to your needs. Airflow is adjusted automatically when the unit is running in a MODE. Remote controller Press • Each press cycles between the MODE lamps [green]. (AUTO FAN) (ECONO) (ANTI-POLLEN) - Page 15 Useful Functions MODE Usage and Function Automatic airflow rate adjustment FAN setting (Quiet, Low, Standard, High) is automatically adjusted according to the degree of air impurity. AUTO FAN Purifying capacity increases as airflow rate rises. • Degree of air impurity corresponds to the volume of dust and the intensity of odours in the ambient air. Saving energy In Power saving mode within ECONO MODE, the FAN setting automatically switches between Quiet and Low only.
-
Page 16: Using The Child Proof Lock
Useful Functions Useful Functions Remote controller Unit Using the Child Proof Lock Button operation is restricted, preventing misoperation by small children. Remote controller Unit Hold down for about 2 Cannot be set from unit. seconds. • Hold down for 2 seconds again to turn off child proof lock. •... -
Page 17: Streamer Output Settings
Advanced Settings Advanced Settings If the hissing sound generated by the streamer discharge or the odour of ozone bothers you *Setting at time of purchase Streamer Output Settings Regular* Setting procedures Remote controller Hold down for about 3 seconds with the power supply plug inserted and the unit turned off. -
Page 18: Dust / Pm2.5 Sensor Sensitivity Setting
Advanced Settings Advanced Settings When the sensitivity of the dust/PM2.5 sensor does not meet your preferences *Setting at time of purchase Dust / PM2.5 Sensor Sensitivity Setting High High Normal* Normal* Setting procedures Remote controller Unit Hold down on the unit for about 5 seconds and when a short beep sounds, press on the remote controller while pressing on the unit. -
Page 19: Settings Of Modes Within Econo Mode
Advanced Settings If you want to turn Monitoring mode (within ECONO MODE) OFF *Setting at time of purchase Monitoring Monitoring Monitoring Monitoring Settings of Modes within ECONO MODE Setting procedures Remote controller Unit Hold down on the unit for about 5 seconds and when a short beep sounds, press on the remote controller while pressing on the unit. -
Page 20: Maintenance
Maintenance WARNING Maintenance Before cleaning and maintenance work, be sure to unplug the unit. (An electric shock or injury may result) Outflow Grille Wipe Wash/Rinse When dirt becomes an issue Removing • Wipe up dirt with a soft damp cloth and rinse with water. Place fingers into the notches •... - Page 21 Maintenance WARNING • Do not use petrol, benzine, thinner, polishing compound, paraffin, alcohol, etc. (An electric shock, fire or cracking may result) • Do not wash the main unit with water. (An electric shock, fire or malfunction/breakage may result) Deodorising Filter Unit When odour or dirt becomes an issue Removing Hold the lever and grip of the deodorising filter...
-
Page 22: Streamer Unit
Maintenance WARNING Maintenance Before cleaning and maintenance work, be sure to unplug the unit. (An electric shock or injury may result) Streamer Unit Replace If the streamer lamp blinks Basically, the streamer unit will not need to be replaced. However, depending on the location the unit is used (places where oils are present, or dust and humidity is abundant, or sprays and ►Page 23 chemical agents are used, etc.), replacement may become necessary. -
Page 23: Separately Sold Part
Maintenance Separately Sold Part Contact the place of purchase. Replacement part Dust collection filter (electrostatic HEPA filter) ( 1 piece Model: KAFP080B4E • Replace about every 10 years. • Catches dust and pollen. • Failure to maintain part properly may result in: •... -
Page 24: About The Indicator Lamps
Troubleshooting About the Indicator Lamps Operating/Indicator panel Check the indicator lamps and respond as indicated below. Indicator lamp Cause/Solution Odour sensor lamp blinks This lamp blinks if the deodorising filter unit has become detached or is not properly attached. ►Page 20 ¼... -
Page 25: Faqs
Troubleshooting FAQs Please check the following before contacting the place of purchase. Q: The dust/PM2.5 sensor seems to have poor sensitivity... Perform periodic cleaning of the dust/PM2.5 sensor as dirt on its lens can lead to ►Page 19 poor sensitivity. In addition, the response time of the dust/PM2.5 sensor depends on room size. -
Page 26: Troubleshooting
Troubleshooting Troubleshooting „ Before making an inquiry or a request for repair, please check the following. If the problem persists, contact the place of purchase. „ In the event of malfunction during operation If the indicator lamps light up abnormally, or become inoperable, due to a lightning strike etc., remove the power supply plug, wait at least 5 seconds then re-insert the power supply plug and turn the unit on again. - Page 27 Troubleshooting Phenomenon Check points All the FAN lamps ( (Quiet), (Low), • Are the pre-filter, outflow grille, and dust collection filter attached? These lamps may blink if the unit is operated without a part attached. (Standard), and (Turbo)) blink together [If one or more parts are not attached] ¼...
- Page 28 Troubleshooting Troubleshooting „ Air purifying function Phenomenon Check points Air purifying capacity is reduced • Is the unit surrounded by obstacles, or positioned in a place where airflow cannot reach? ¼ Choose a position that is obstacle-free and from where airflow can reach all areas of the room.
-
Page 29: Specifications
Troubleshooting Specifications Model name MC55WVM Power supply Single phase 50Hz 220-240V / 60Hz 220-230V Air Purifying Operation mode Turbo Standard Quiet Power consumption (W) Operating sound (dB) Airflow rate (m³/h) Coverage area (m²) External dimensions (mm) 500(H)× 270(W)× 270(D) Weight (kg) Power supply cord length (m) Made in China •... - Page 30 DAIKIN ISITMA VE SOĞUTMA SİSTEMLERİ SAN. TİC. A.Ş. Gülsuyu Mahallesi, Fevzi Çakmak Caddesi, Burçak Sokak No:20 34848 Maltepe / İSTANBUL / TÜRKİYE Tel: 0216 453 27 00 Faks: 0216 671 06 00 Çağrı Merkezi: 444 999 0 Web: www.daikin.com.tr The bar code is a manufacturing code.
Need help?
Do you have a question about the STREAMER C55WVM and is the answer not in the manual?
Questions and answers