Advertisement
Quick Links
Advertisement

Summary of Contents for Zavio B5010
- Page 1 B5010/ B5111/ B5210 8608551000030...
-
Page 2: Table Of Contents
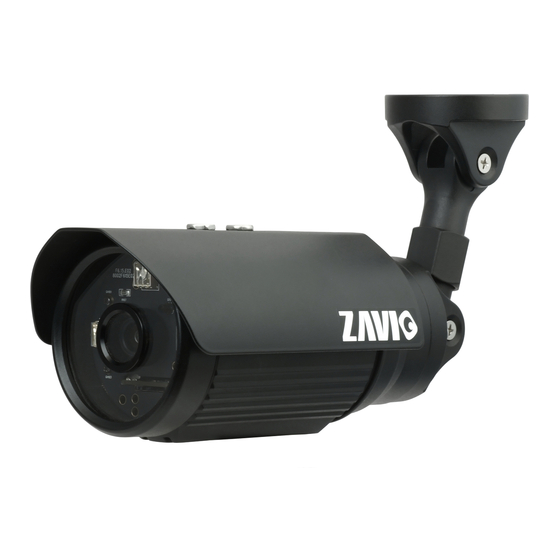
Zavio B5010/ B5111/ B5210 Quick Installation Guide Please follow the installation steps below to set up your B5010/ B5111/ B5210 Bullet IP Camera. Check the package contents against the list below. See P.1 Physical overview. See P.2 LED Indicator Definition. See P.2 Install the hardware and connect all cables. -
Page 3: Physical Overview. See
Physical Overview LED Indicator Definition Indication Steady red for booting up process. Power Steady blue for booting up completion. Flash purple for FW upgrading. Network Flash yellow while Network activity. Steady yellow means MicroSD card ready. MicroSD Card Flash yellow while accessing MicroSD card. Reset: When the device is empowered, press the Reset Button to reboot the device, or hold the Reset Button for 10 seconds to the settings back to factory default. -
Page 4: Install The Hardware And Connect All Cables. See
3. Tighten the screws at the two joints of the bracket. Warning before installation Note 1: IP Camera watertihgt ambit B5010/ B5111/ B5210 use IP-67 rated weatherproof housing. The image as below shows you the ambit of watertight and non-watertight, please make sure the cable with plug on the right side of cable molding should be avoided from water. -
Page 5: Microsoft Os: Use The Software Cd To Install Intelligent Ip Installer. See
b. Connet all cables b1. Without Power over Ethernet (PoE) connection b2. Power over Ethernet (PoE) 1. Connect the 12V power adaptor to the IP Camera. Using a standard RJ-45 network cable, 2. Using a standard RJ-45 network cable, connect connect the IP Camera to a PoE-enabled the IP Camera to a normal Hub/ Switch/ Hub/ Switch/ Router. - Page 6 4. When accessing the IP Camera for the first time, a yellow information bar appears below the address bar: This website wants to install the following add-on: ‘AxvideoView.cab from ‘Zavio Inc’. 5. Click the information bar, and select Install ActiveX control.
- Page 7 6. Click Install. 7. Live video displays in the centre of your web browser. Mac OS using Safari Browser 2. Click Bonjour function and select the 1. Select Safari icon camera you wish to access.
-
Page 8: Lighting Environment Setting. See
3. Enter name and password to login to the 4. The monitor image will be displayed in your browser. IP camera. (Default is admin / admin) Lighting environment setting The default setting of lighting environment is Auto. However, you may also select 50 or 60 Hz upon the lighting environment of your country. -
Page 9: Application Of Ip Camera. See
Application of IP Camera... - Page 10 Memo ………………………………………………………………………………………………………………………………………………….. ………………………………………………………………………………………………………………………………………………….. ………………………………………………………………………………………………………………………………………………….. ………………………………………………………………………………………………………………………………………………….. ………………………………………………………………………………………………………………………………………………….. ………………………………………………………………………………………………………………………………………………….. ………………………………………………………………………………………………………………………………………………….. ………………………………………………………………………………………………………………………………………………….. ………………………………………………………………………………………………………………………………………………….. ………………………………………………………………………………………………………………………………………………….. ………………………………………………………………………………………………………………………………………………….. ………………………………………………………………………………………………………………………………………………….. ………………………………………………………………………………………………………………………………………………….. ………………………………………………………………………………………………………………………………………………….. ………………………………………………………………………………………………………………………………………………….. ………………………………………………………………………………………………………………………………………………….. ………………………………………………………………………………………………………………………………………………….. ………………………………………………………………………………………………………………………………………………….. ………………………………………………………………………………………………………………………………………………….. ………………………………………………………………………………………………………………………………………………….. ………………………………………………………………………………………………………………………………………………….. ………………………………………………………………………………………………………………………………………………….. ………………………………………………………………………………………………………………………………………………….. ………………………………………………………………………………………………………………………………………………….. ………………………………………………………………………………………………………………………………………………….. ………………………………………………………………………………………………………………………………………………….. ………………………………………………………………………………………………………………………………………………….. ………………………………………………………………………………………………………………………………………………….. ………………………………………………………………………………………………………………………………………………….. …………………………………………………………………………………………………………………………………………………..
- Page 11 Memo ………………………………………………………………………………………………………………………………………………….. ………………………………………………………………………………………………………………………………………………….. ………………………………………………………………………………………………………………………………………………….. ………………………………………………………………………………………………………………………………………………….. ………………………………………………………………………………………………………………………………………………….. ………………………………………………………………………………………………………………………………………………….. ………………………………………………………………………………………………………………………………………………….. ………………………………………………………………………………………………………………………………………………….. ………………………………………………………………………………………………………………………………………………….. ………………………………………………………………………………………………………………………………………………….. ………………………………………………………………………………………………………………………………………………….. ………………………………………………………………………………………………………………………………………………….. ………………………………………………………………………………………………………………………………………………….. ………………………………………………………………………………………………………………………………………………….. ………………………………………………………………………………………………………………………………………………….. ………………………………………………………………………………………………………………………………………………….. ………………………………………………………………………………………………………………………………………………….. ………………………………………………………………………………………………………………………………………………….. ………………………………………………………………………………………………………………………………………………….. ………………………………………………………………………………………………………………………………………………….. ………………………………………………………………………………………………………………………………………………….. ………………………………………………………………………………………………………………………………………………….. ………………………………………………………………………………………………………………………………………………….. ………………………………………………………………………………………………………………………………………………….. ………………………………………………………………………………………………………………………………………………….. ………………………………………………………………………………………………………………………………………………….. ………………………………………………………………………………………………………………………………………………….. ………………………………………………………………………………………………………………………………………………….. ………………………………………………………………………………………………………………………………………………….. …………………………………………………………………………………………………………………………………………………..


Need help?
Do you have a question about the B5010 and is the answer not in the manual?
Questions and answers