Table of Contents
Advertisement
Quick Links
Advertisement
Table of Contents

Related Manuals for Electrolux EOC6631DAX


Summary of Contents for Electrolux EOC6631DAX
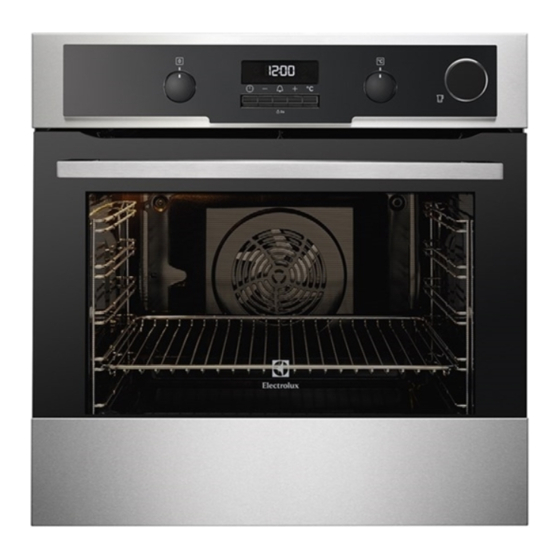
- Page 1 EOC6631DAX Steam oven User Manual...
-
Page 2: Table Of Contents
13. ENERGY EFFICIENCY.................. 39 WE’RE THINKING OF YOU Thank you for purchasing an Electrolux appliance. You’ve chosen a product that brings with it decades of professional experience and innovation. Ingenious and stylish, it has been designed with you in mind. So whenever you use it, you can be safe in the knowledge that you’ll get great results every time. -
Page 3: Safety Information
ENGLISH SAFETY INFORMATION Before the installation and use of the appliance, carefully read the supplied instructions. The manufacturer is not responsible for any injuries or damages that are the result of incorrect installation or usage. Always keep the instructions in a safe and accessible location for future reference. -
Page 4: Safety Instructions
Always use oven gloves to remove or put in • accessories or ovenware. Before carrying out any maintenance, disconnect the • appliance from the power supply. Ensure that the appliance is switched off before • replacing the lamp to avoid the possibility of electric shock. - Page 5 ENGLISH 2.2 Electrical connection 2.3 Use WARNING! WARNING! Risk of fire and electrical Risk of injury, burns and shock. electrical shock or explosion. • All electrical connections should be • This appliance is for household use made by a qualified electrician. only.
- Page 6 • Discoloration of the enamel or • Be careful when you remove the door stainless steel has no effect on the from the appliance. The door is performance of the appliance. heavy! • Use a deep pan for moist cakes. Fruit •...
-
Page 7: Product Description
ENGLISH – Remove any pets (especially WARNING! birds) from the vicinity of the Risk of electrical shock. appliance location during and after the Pyrolytic cleaning and • Before replacing the lamp, disconnect first use maximum temperature the appliance from the power supply. operation to a well ventilated •... -
Page 8: Before First Use
3.2 Accessories Use the trivet only with the Grill- / roasting pan. • Wire shelf • Core temperature sensor For cookware, cake tins, roasts. To measure how far the food is • Grill- / Roasting pan cooked. To bake and roast or as pan to collect •... - Page 9 ENGLISH 2. Turn the knob for the temperature to 3. To deactivate the appliance, turn the select a temperature. knobs for the oven functions and temperature to the off position. 5.3 Oven functions Oven function Application Off position The appliance is off. Fast Heat Up To decrease the heat-up time.
- Page 10 5.4 Fast heat up function An acoustic signal sounds when the appliance is at the set temperature. The fast heat up function decreases the The fast heat up function heat up time. does not deactivate after the Do not put food in the oven acoustic signal.
- Page 11 ENGLISH Use only water as the If you put too much water liquid. Do not use filtered into the tank, the safety (demineralised) or outlet moves the excess distilled water. Do not water to the bottom of the use other liquids. oven.
-
Page 12: Clock Functions
Do not use the drained water to fill the water tank again. 6. CLOCK FUNCTIONS 6.1 Clock functions table Clock function Application TIME OF DAY To show or change the time of day. You can change the time of day only when the appliance is off. -
Page 13: Using The Accessories
ENGLISH 6.4 Setting the END an acoustic signal sounds for 2 minutes. and time setting flash in the display. 1. Set an oven function. The appliance deactivates. 2. Press again and again until 7. Press any button to stop the acoustic starts to flash. - Page 14 3. Put the plug of the core temperature Every time you put the core sensor into the socket on the top of temperature sensor in the the cavity. socket, you need to set the core temperature time again. You cannot select the duration and end time.
- Page 15 ENGLISH 7.3 Telescopic Runners Keep the installation instructions for the telescopic runners for future use. With telescopic runners you can put in and remove the shelves more easily. CAUTION! Do not clean the telescopic runners in the dishwasher. Deep pan: Do not lubricate the telescopic runners.
- Page 16 7.4 Trivet and Grill- / Roasting 7.5 Accessories for steam cooking WARNING! The steam kit accessories Be careful when you remove are not supplied with the the accessories from a hot appliance. For more appliance. There is a risk of information, please contact burns.
- Page 17 ENGLISH Injector tube (C) • Do not use the baking dish on a hot Injector for direct steam cooking (D) cooking surface. Steel grill (E) • Do not clean the baking dish with abrasives, scourers and powders. • Do not put the hot baking dish on cold / wet surfaces.
- Page 18 WARNING! Be careful when you use the injector when the oven operates. Always use oven gloves to touch the injector when the oven is hot. Always remove the injector from the oven when you do not use a steam function.
-
Page 19: Additional Functions
ENGLISH For more information about steam cooking, refer to the cooking tables for steam cooking in the chapter "Hints and Tips". 8. ADDITIONAL FUNCTIONS 8.1 Using the Child Lock If the Pyrolysis function operates, the door is locked When the Child Lock is on, the appliance cannot be activated accidentally. -
Page 20: Hints And Tips
If you deactivate the appliance, the Temperature (°C) Switch-off time cooling fan can continue to operate until the appliance cools down. 120 - 195 8.6 Safety thermostat 200 - 245 Incorrect operation of the appliance or... - Page 21 ENGLISH • Leave the meat for approximately 15 Initially, monitor the performance when minutes before carving so that the you cook. Find the best settings (heat juice does not seep out. setting, cooking time, etc.) for your • To prevent too much smoke in the cookware, recipes and quantities when oven during roasting, add some water you use this appliance.
- Page 22 Food Top / Bottom Heat True Fan Cooking Time Com‐ (min) ments Tempera‐ Shelf po‐ Tempera‐ Shelf po‐ ture (°C) sition ture (°C) sition Small 150 - 160 20 - 30 In a bak‐ cakes - ing tray one lev‐...
- Page 23 ENGLISH Food Top / Bottom Heat True Fan Cooking Time Com‐ (min) ments Tempera‐ Shelf po‐ Tempera‐ Shelf po‐ ture (°C) sition ture (°C) sition Rich fruit 110 - 120 In a 24 cm cake cake mould Victoria 2 (left and 30 - 50 In a 20 cm sand‐...
- Page 24 Food Top / Bottom Heat True Fan Cooking Time Com‐ (min) ments Tempera‐ Shelf po‐ Tempera‐ Shelf po‐ ture (°C) sition ture (°C) sition 180 - 190 180 - 190 25 - 40 In a mould Lasagne Cannello‐ 180 - 190...
- Page 25 ENGLISH Food Top / Bottom Heat True Fan Cooking Time Com‐ (min) ments Tempera‐ Shelf po‐ Tempera‐ Shelf po‐ ture (°C) sition ture (°C) sition Hare 150 - 200 Cut in pieces Pheasant 90 - 120 Whole Fish Food Top / Bottom Heat True Fan Cooking Time Com‐...
- Page 26 Veal Food Quantity (kg) Temperature Time (min) Shelf position (°C) Roast veal 160 - 180 90 - 120 1 or 2 Knuckle of veal 1.5 - 2 160 - 180 120 - 150 1 or 2 Lamb Food Quantity (kg)
- Page 27 ENGLISH Food Temperature Time (min) Shelf posi‐ (°C) tion Moussaka 180 - 200 75 - 90 Lasagne 160 - 170 55 - 70 Cannelloni 170 - 190 65 - 75 Bread pudding 150 - 160 75 - 90 Rice pudding 170 - 190 45 - 60 Apple cake...
- Page 28 Food Temperature Time (h) Shelf position (°C) 1 position 2 positions Vegetables for 60 - 70 5 - 6 1 / 4 sour Mushrooms 50 - 60 6 - 8 1 / 4 Herbs 40 - 50 2 - 3...
- Page 29 ENGLISH Flans Food Tempera‐ Time Shelf po‐ Comments ture (°C) (min) sition Vegetables filled 170 - 180 30 - 40 In a mould Lasagne 170 - 180 40 - 50 In a mould Potato gratin 160 - 170 50 - 60 1 (2 and 4) In a mould Meat Food...
- Page 30 Vegetables Food Temperature (°C) Time (min) Shelf position Broccoli florets 20 - 25 Aubergine 15 - 20 Cauliflower florets 25 - 30 Tomatoes White asparagus 25 - 35 Green asparagus 35 - 45 Courgette slices 20 - 25 Carrots...
-
Page 31: Care And Cleaning
ENGLISH 9.13 Core temperature sensor table Food Food core temperature (°C) Roast veal 75 - 80 Veal knuckle 85 - 90 English roast beef, rare 45 - 50 English roast beef, medium 60 - 65 English roast beef, well done 70 - 75 Shoulder of pork 80 - 82... - Page 32 2. Clean the inner side of the door with hot water, so that the residues do not burn from the hot air. 3. Set the Pyrolysis function. Refer to "Oven functions". 4. When flashes, press set the necessary procedure: 2.
- Page 33 ENGLISH After some time, you can have lime The cleaning reminder deposits in your oven. To prevent this, goes out: clean the parts of the oven that generate • after the end of the the steam. Empty the tank after each Pyrolysis function.
- Page 34 5. Clean the drain pipe by hand in warm 3. Close the oven door halfway to the water with soap. To prevent damage, first opening position. Then pull do not use acids, sprays or similar forward and remove the door from its cleaning agents.
-
Page 35: Troubleshooting
ENGLISH 10.8 Replacing the lamp When the cleaning is completed, install the glass panels and the oven door. Do Put a cloth on the bottom of the interior the above steps in the opposite of the appliance. It prevents damage to sequence. - Page 36 Problem Possible cause Remedy The oven does not heat The oven is deactivated. Activate the oven. The oven does not heat The clock is not set. Set the clock. The oven does not heat The necessary settings are Make sure that the settings not set.
- Page 37 ENGLISH Problem Possible cause Remedy The display shows "C2". You want to start the Pyrol‐ Remove the core tempera‐ ysis or Defrost function, but ture sensor plug from the you did not remove the socket. core temperature sensor plug from the socket. The display shows "C3".
-
Page 38: Installation
11.2 Service data plate is on the front frame of the appliance cavity. Do not remove the If you cannot find a solution to the rating plate from the appliance cavity. problem yourself, contact your dealer or an Authorised Service Centre. -
Page 39: Energy Efficiency
20 A max. 13. ENERGY EFFICIENCY 13.1 Product Fiche and information according to EU 65-66/2014 Supplier's name Electrolux Model identification EOC6631DAX Energy Efficiency Index 81.2 Energy efficiency class Energy consumption with a standard load, con‐ 0.93 kWh/cycle ventional mode Energy consumption with a standard load, fan- 0.69 kWh/cycle... - Page 40 Keep food warm the temperature in the oven cavity may Choose the lowest possible temperature differ from the temperature indicated on setting to use residual heat and keep a the display during a cooking cycle and meal warm. The display shows the cooking times may be different from the residual heat indicator or temperature.
- Page 41 ENGLISH...
- Page 42 www.electrolux.com...
- Page 43 ENGLISH...
- Page 44 www.electrolux.com/shop...
Need help?
Do you have a question about the EOC6631DAX and is the answer not in the manual?
Questions and answers