Table of Contents
Advertisement
Quick Links
Advertisement
Table of Contents

Related Manuals for Electrolux EOC6631TAX


Summary of Contents for Electrolux EOC6631TAX
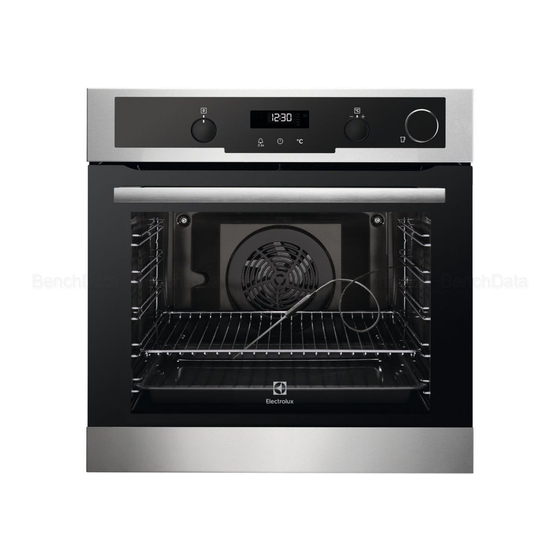
- Page 1 EOC6631TAX EOC6631TOX Steam oven User Manual...
-
Page 2: Table Of Contents
14. ENERGY EFFICIENCY.................. 41 WE’RE THINKING OF YOU Thank you for purchasing an Electrolux appliance. You’ve chosen a product that brings with it decades of professional experience and innovation. Ingenious and stylish, it has been designed with you in mind. So whenever you use it, you can be safe in the knowledge that you’ll get great results every time. -
Page 3: Safety Information
ENGLISH SAFETY INFORMATION Before the installation and use of the appliance, carefully read the supplied instructions. The manufacturer is not responsible for any injuries or damages that are the result of incorrect installation or usage. Always keep the instructions in a safe and accessible location for future reference. -
Page 4: Safety Instructions
Always use oven gloves to remove or put in • accessories or ovenware. Before carrying out any maintenance, disconnect the • appliance from the power supply. Ensure that the appliance is switched off before • replacing the lamp to avoid the possibility of electric shock. - Page 5 ENGLISH 2.2 Electrical connection 2.3 Use WARNING! WARNING! Risk of fire and electric Risk of injury, burns and shock. electric shock or explosion. • All electrical connections should be • This appliance is for household use made by a qualified electrician. only.
- Page 6 • Discoloration of the enamel or • Be careful when you remove the door stainless steel has no effect on the from the appliance. The door is performance of the appliance. heavy! • Use a deep pan for moist cakes. Fruit •...
-
Page 7: Product Description
ENGLISH – Remove any pets (especially • The type of light bulb or halogen lamp birds) from the vicinity of the used for this appliance is for appliance location during and household appliances only. Do not after the Pyrolytic cleaning and use it for house lighting. -
Page 8: Control Panel
3.2 Accessories • Core temperature sensor To measure how far the food is • Wire shelf cooked. For cookware, cake tins, roasts. • Telescopic runners • Baking tray For shelves and trays. For cakes and biscuits. • Grill- / Roasting pan To bake and roast or as pan to collect fat. -
Page 9: Daily Use
ENGLISH 5. Turn off the oven and let it cool 1. Set the function and the maximum down. temperature. Accessories can become hotter than 2. Let the oven operate for 1 hour. usual. The oven can emit an odour and 3. - Page 10 6.3 Turning the oven on and off Oven func‐ Application 1. Turn the knob for the oven functions tion to select an oven function. This function is de‐ 2. Turn the knob for the temperature to signed to save energy select a temperature.
- Page 11 ENGLISH 4. Push the water drawer to its initial 1. Prepare the draining pipe (C), position. included in the package with the user 5. Set the temperature between 130 °C manual. Put the connector (B) onto and 230 °C. one of the ends of the draining pipe. Steam cooking gives good results 2.
-
Page 12: Clock Functions
7. CLOCK FUNCTIONS 7.1 Clock functions table 7.3 Setting the DURATION 1. Set an oven function. Clock func‐ Application 2. Press again and again until tion starts to flash. 3. Turn the knob for the temperature To show or change the time of day. -
Page 13: Using The Accessories
ENGLISH hours for DURATION time and press to confirm. 1. Press The display shows flashing and "00" flash in the display. 4. Turn the knob for the temperature 2. Turn the knob for the temperature right or left to set the hours for END right or left to set the seconds and than the minutes. - Page 14 • three times - the display shows temperature to change the default the set oven temperature; if core temperature. desired, it can be modified within The display shows the symbol of the 5 seconds.
- Page 15 ENGLISH °C Small indentation at the top increase safety. The indentations are also anti-tip devices. The high rim Make sure you push back the telescopic around the shelf prevents runners fully in the oven before you close cookware from slipping of the oven door.
- Page 16 Lid (B) Steel grill (E) • Do not put the hot baking dish on The injector and the injector tube cold / wet surfaces. "C" is the injector tube for steam cooking, • Do not put cold liquids in the baking "D"...
- Page 17 ENGLISH Make sure that you do not crush the injector tube or let it touch a heating element on the top of the oven. 4. Set the oven for the steam cooking function. 8.6 Direct steam cooking Put the food onto the steel grill in the baking dish.
-
Page 18: Additional Functions
When you cook food such as chicken, For more information about steam duck, turkey, kid or large fish, put the cooking, refer to the cooking tables for injector (D) directly into the empty part of steam cooking in the chapter "Hints and the meat. -
Page 19: Hints And Tips
ENGLISH 9.5 Cooling fan Temperature (°C) Switch-off time When the oven operates, the cooling fan turns on automatically to keep the surfaces of the oven cool. If you turn off 30 - 115 12.5 the oven, the cooling fan can continue to 120 - 195 operate until the oven cools down. - Page 20 10.2 Inner side of the door • information about the oven functions, recommended shelf positions and On the inner side of the door you can temperatures for dishes. find: • the numbers of the shelf positions. 10.3 Baking and roasting table...
- Page 21 ENGLISH Food Top / Bottom Heat True Fan Cooking Time Com‐ (min) ments Tempera‐ Shelf po‐ Tempera‐ Shelf po‐ ture (°C) sition ture (°C) sition Small 140 - 150 2 and 4 25 - 35 In a bak‐ cakes - ing tray two lev‐...
- Page 22 Food Top / Bottom Heat True Fan Cooking Time Com‐ (min) ments Tempera‐ Shelf po‐ Tempera‐ Shelf po‐ ture (°C) sition ture (°C) sition Victoria 2 (left and 30 - 50 In a 20 cm sand‐ right) cake mould wich 1) Preheat the oven for 10 minutes.
- Page 23 ENGLISH Food Top / Bottom Heat True Fan Cooking Time Com‐ (min) ments Tempera‐ Shelf po‐ Tempera‐ Shelf po‐ ture (°C) sition ture (°C) sition Cannello‐ 180 - 190 180 - 190 25 - 40 In a mould 1) Preheat the oven for 10 minutes. Meat Food Top / Bottom Heat...
- Page 24 Food Top / Bottom Heat True Fan Cooking Time Com‐ (min) ments Tempera‐ Shelf po‐ Tempera‐ Shelf po‐ ture (°C) sition ture (°C) sition Pheasant 90 - 120 Whole Fish Food Top / Bottom Heat True Fan Cooking Time Com‐...
- Page 25 ENGLISH Food Tempera‐ Time (min) Food Tempera‐ Time (min) ture (°C) ture (°C) Saddle of 160 - 180 40 - 60 Goose, 3.5 - 160 - 180 120 - 180 lamb, 1 - 1.5 5 kg Turkey, 2.5 - 160 - 180 120 - 150 3.5 kg Poultry...
- Page 26 10.6 Defrost Food Quantity Defrosting Further defrost‐ Comments (kg) time (min) ing time (min) Chicken 100 - 140 20 - 30 Place the chicken on an upturned saucer placed on a large plate. Turn halfway through. Meat 100 - 140 20 - 30 Turn halfway through.
- Page 27 ENGLISH Food Temperature Time (h) Shelf position (°C) 1 position 2 positions Apple slices 60 - 70 6 - 8 1 / 4 Pears 60 - 70 6 - 9 1 / 4 10.8 True Fan + Steam Cakes and pastries Food Tempera‐...
- Page 28 Food Food (°C) (°C Roast pork, 1 kg 180 90 Rabbit, cut in pieces 60 - Veal, 1 kg 180 90 Use the first shelf position. Roast beef - rare, 1 kg 210 45 Food Roast beef - medium, 1 kg 200 55 (°C...
- Page 29 ENGLISH Food Tem‐ Time Food Tem‐ Time pera‐ (min pera‐ (min ture ture (°C) (°C) Casserole / Gratin 15 - Meat 10 - Pasta and sauce 10 - Vegetables 10 - Side dishes (e.g. rice, 10 - 10.9 Cooking in the dietary potatoes, pasta) baking dish One-plate dishes...
- Page 30 Fish Food Temperature (°C) Time (min) Shelf position Trout 25 - 30 Salmon filet 25 - 30 Side dishes Food Temperature (°C) Time (min) Shelf position Rice 35 - 40 Unpeeled potatoes, 50 - 60 medium Boiled potatoes, 35 - 45...
- Page 31 ENGLISH Food Function Acces‐ Shelf Tem‐ Time (min) Comments sories posi‐ pera‐ tion ture (°C) Small True Fan Baking 2 and 150 - 20 - 35 Put 20 small cake Cooking / tray cakes per one Fan Cook‐ baking tray. Apple pie Conven‐...
-
Page 32: Care And Cleaning
Food Function Acces‐ Shelf Tem‐ Time (min) Comments sories posi‐ pera‐ tion ture (°C) Beef bur‐ Grilling Wire max. 20 - 30 Put the wire shelf shelf and on the fourth lev‐ 6 pieces, dripping el and the drip‐... - Page 33 ENGLISH Option Description Light clean‐ ing. Duration: 1 h 30 min. Normal cleaning. Du‐ ration: 2 h 30 min. Install the removed accessories in the opposite sequence. After 2 seconds the pyrolysis starts. The retaining pins on the You can use the END function to delay telescopic runners must the start of the cleaning.
- Page 34 Types of water During the cleaning • Soft water with low lime content - procedure, some water can recommended type. It decreases the drip from the steam inlet quantity of cleaning procedures. onto the cavity of the oven. • Tap water - you can use it if your...
- Page 35 ENGLISH The oven door may close if you try to remove the glass panels before you remove the oven door. CAUTION! Do not use the oven without the glass panels. 1. Fully open the door and find the hinge to the right side of the door. 2.
-
Page 36: Troubleshooting
Make sure the glass slides out of the Make sure that you install the middle supports completely. panel of glass in the seats correctly. 11.8 Replacing the lamp WARNING! 10. Clean the glass panels with water Risk of electric shock. - Page 37 ENGLISH 12.1 What to do if... Problem Possible cause Remedy You cannot activate or op‐ The oven is not connected Check if the oven is cor‐ erate the oven. to an electrical supply or it rectly connected to the is connected incorrectly. electrical supply (refer to the connection diagram if available).
- Page 38 Problem Possible cause Remedy The display shows "F102". • You did not fully close • Fully close the door. the door. • Deactivate the oven • The door lock is defec‐ with the house fuse or tive. the safety switch in the fuse box and activate it again.
-
Page 39: Installation
ENGLISH Problem Possible cause Remedy The appliance is activated The demo mode is activa‐ 1. Deactivate the oven. and does not heat up. The ted. 2. Press and hold at the fan does not operate. The display shows "Demo". same time 3. - Page 40 13.1 Building In min. 550 min. 560 min. 1200 min. 550 min. 560 min. 1200 13.2 Securing the appliance to 13.3 Electrical installation the cabinet The manufacturer is not responsible if you do not follow the safety precautions from the Safety chapters.
-
Page 41: Energy Efficiency
2 cm longer than phase and neutral cables (blue and brown cables). 14. ENERGY EFFICIENCY 14.1 Product Fiche and information according to EU 65-66/2014 Supplier's name Electrolux EOC6631TAX Model identification EOC6631TOX Energy Efficiency Index 81.2 Energy efficiency class Energy consumption with a standard load, con‐... - Page 42 Use the residual heat to warm up other meal warm. The residual heat indicator dishes. or temperature appears on the display. Keep breaks between baking as short as Cooking with the lamp off possible when you prepare few dishes at Turn off the lamp during cooking.
- Page 43 ENGLISH...
- Page 44 www.electrolux.com/shop...
Need help?
Do you have a question about the EOC6631TAX and is the answer not in the manual?
Questions and answers