Chapters
Table of Contents

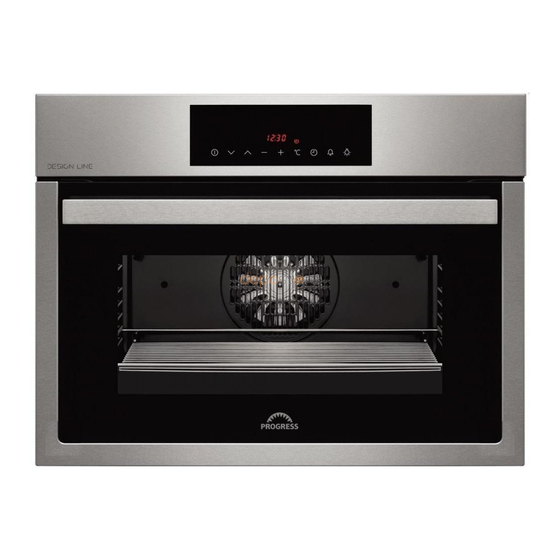
Related Manuals for AEG PBMF4500X


Summary of Contents for AEG PBMF4500X
- Page 1 User manual Notice d’utilisation Gebruikershandleiding Anwenderhandbuch Manual del usuario Built in electric oven Four intégré Inbouwoven Einbaubackofen Horno integrado PBMF4500X...
-
Page 2: Table Of Contents
Contents CONTENTS Operating instructions Child lock function Safety information Oven safety cut-out Product description Water cleaning function Control panel Care and cleaning Oven functions Environments concerns Before using for the fi rst time What to do if… Using the oven Technical data Cooking tables Installation... -
Page 3: Product Description
Safety Information • Never use the oven if the electrical supply Installation cable is damaged; or if the control panel, • Check your oven for any transport work top or plinth area are damaged such damage. Never connect a damaged that the inside of the appliance is freely machine. -
Page 4: Control Panel
Control Panel CONTROL PANEL Buttons Time functions display Temperature display Oven functions Time display Indicator lights The oven will only work if the time of day has been set. However, the oven can also be opera- ted without any programme. Buttons Function To switch appliance on or off... -
Page 5: Oven Functions
Oven Functions OVEN FUNCTIONS Conventional It is used for sponges and cakes where the heat received must be uniform to achieve a spongy texture. Lower element Heat only from beneath. Suitable for heating dishes and raising pastry and similar. Grill and Lower Special for roasts. - Page 6 Oven Functions Recommendations for • Defrost large pieces of meat or fi sh by placing them over the Wire Shelf with a Defrosting Food Deep Roasting Pan underneath to collect The defrost function works by means of a any liquid. 2-level system of hot air.
-
Page 7: Before Using For The First Time
Using the oven BEFORE USING FOR THE FIRST TIME Carefully read this Instruction Manual to • To cool the oven open the door to allow achieve the best results from your oven. ventilation and odours to escape from Due to the manufacturing process there inside. - Page 8 Using the oven 3 The temperature display will show the preset temperature for that cooking function. Press on the temperature button change it. Select the desired temperature by pressing on the buttons. 4 The top oven cavity will start to heat up. Functions will start the fast preheating function for a few minutes.
- Page 9 Using the oven Electronic clock functions Electronic programmer functions Cooking This function allows you to programme cooking time length, after which the oven Duration will turn off automatically. Programming Cooking Time: 1 Press on the clock button . The symbol will light up.
- Page 10 10 Using the oven Electronic programmer functions Cooking duration This function allows both cooking time length and the stop time to be Cooking duration and End of cooking programmed. With this function, the oven switches on automatically at the and End of cooking time combined set time and operates for the cooking time it has been programmed for.
-
Page 11: Cooking Tables
Cooking tables COOKING TABLES The Cooking Tables show examples of For the best results we recommend the temperature ranges and approximate oven to be preheated with the function cooking times. The cooking mode depends for 10 minutes. on the model. Weight Deep Roasting Cooking... - Page 12 12 Cooking tables Weight Deep Roasting Cooking Temperat. Time MEAT Receptacle (Kg) Pan Position Mode (ºC) (min) 190-210 70-75 Deep Roasting Suckling Pig Intermediate 170-190 70-75 180-200 55-60 Deep Roasting Rabbit Intermediate 170-190 45-50 170-190 30-35 190-210 50-55 Deep Roasting Lamb Intermediate 170-190...
- Page 13 Cooking tables Weight Deep Roasting Cooking Temperat. Time FISH Receptacle (Kg) Pan Position Mode (ºC) (min) 180-200 25-30 Deep Roasting Red Bream Intermediate 170-190 20-25 190-210 25-30 Deep Roasting Salted Dorado Intermediate 180-200 25-30 170-190 15-20 Deep Roasting Sole Intermediate 160-180 10-15 190-210...
- Page 14 14 Cooking tables CAKES AND Weight Deep Roasting Cooking Temperat. Time Receptacle DESSERTS (Kg) Pan Position Mode (ºC) (min) 150-170 35-40 Cake Mould Sponge Cake Intermediate 170-190 30-35 160-180 30-35 170-190 10-15 Deep Roasting Swiss Roll Intermediate 160-180 10-15 160-180 55-60 Flan Intermediate...
-
Page 15: Child Lock Function
Child lock function CHILD LOCK FUNCTION This function locks the oven, preventing small children from playing with it. To turn on the function, press on the buttons until you hear a long beep. The oven is now locked. If the oven is Off the word SAFE appears on the time display. -
Page 16: Care And Cleaning
Care and cleaning • After the cycle is fi nished please wait 15 • You can now clean the inside of the oven minutes before opening the door. • Make sure at the end to dry all the inside • Make sure that the appliance is switched and the surround of the appliance, off. - Page 17 Care and cleaning Cleaning the Large Interior Glass Door Warning! Be careful: the oven door closes when the interior glass is removed. 1. Open the oven door. 2. Pull the glass upwards from the bottom (A). 3. The interior glass is now free. Remove it.
-
Page 18: Environments Concerns
18 Enviroments concerns 2. Loosen the lens from the lamp holder with the help of the appropriate tool. Exchange the bulb. 3. Replace the lens, making sure it fi ts in the correct position without forcing The replacement bulb must be temperature resistant to 300 °C. -
Page 19: Technical Data
Technical data Problem Solution The oven does not work Check the connection to the electrical circuit. Check the fuses and current limiter of your installation. Ensure the clock is in the manual or programmed mode. Check the position of the function and temperature selectors The inside light of the oven Change the bulb. -
Page 20: Installation
Installation INSTALLATION This information is intended for the installer, Before Installation. Comments as the person responsible for assembly and • To unpack the oven, pull the tab located electrical connection. If you install the oven on the lower part of the box. yourself, the manufacturer will not be held •... - Page 21 Installation Installing the Oven For all ovens and after carrying out the electrical connection, 1. Introduce the oven into the kitchen unit, taking care not to trap the cable. 2. Fix the oven to the unit by means of the 2 screws supplied via the holes that can be seen when the door is opened.
-
Page 22: Instructions De Fonctionnement
22 Sommaire SOMMAIRE Instructions de fonctionnement Fonction sécurité enfants Informations de sécurité Arrêt automatique du four Description du produit Fonction nettoyage à l’eau Tableau de commandes Entretien et nettoyage Fonctions du four Considérations environnementales Avant la première utilisation Que faire si... Utilisation du four Informations techniques Tableaux de cuisson... -
Page 23: Description Du Produit
Informations de sécurité • N’utilisez pas le four si le câble Installation d’alimentation électrique est endommagé • Vérifi ez que le four n’a subi aucun ou si le panneau de commandes, la partie dommage pendant le transport. supérieure ou la base sont endommagés, Ne branchez jamais un appareil de sorte qu’il soit possible d’accéder à... -
Page 24: Tableau De Commandes
24 Tableau de commandes TABLEAU DE COMMANDES Boutons Indicateur des fonctions de temps Indicateur de température Fonctions du four Indicateur de temps Voyants indicateurs Le four ne fonctionne que si l’heure a été défi nie. Le four peut cependant être utilisé sans avoir été... -
Page 25: Fonctions Du Four
Fonctions du four FONCTIONS DU FOUR Traditionnelle Utilisée pour les biscuits et les tartes lorsque la chaleur doit être uniforme pour obtenir une texture moelleuse. Sole Chauffe uniquement par le bas. Idéale pour réchauffer des plats et élaborer des gâteaux, etc. Gril et sole Spécialement conçue pour les rôtis. - Page 26 26 Fonctions du four Recommandations pour • La viande et le poisson n’ont pas besoin d’être totalement décongelés pour décongeler des aliments être cuisinés. Les condiments peuvent La fonction décongélation fonctionne être ajoutés lorsque la surface est déjà avec un système d’air chaud à 2 niveaux. ramollie.
-
Page 27: Avant La Première Utilisation
Utilisation du four AVANT LA PREMIÈRE UTILISATION Lisez attentivement cette notice d’utilisation • Pour refroidir le four, ouvrez la porte afi n pour obtenir les meilleurs résultats avec de faciliter la ventilation et la sortie des votre four. Des résidus de graisse et autres, odeurs provenant de l’intérieur. - Page 28 28 Utilisation du four 3 L’indicateur de température affi chera la température prédéfi nie pour cette fonction de cuisson. Appuyez sur le bouton de température afi n de la modifi er. Sélectionnez la température souhaitée en appuyant sur les boutons 4 La cavité...
- Page 29 Utilisation du four Fonctions de l’horloge électronique Fonctions du programmateur électronique Durée de la Cette fonction vous permet de programmer la durée de cuisson. Une fois ce cuisson temps écoulé, le four s’éteindra automatiquement. Programmation du temps de cuisson: 1 Appuyez sur le bouton de l’horloge .
- Page 30 30 Utilisation du four Fonctions du programmateur électronique Cooking duration Cette fonction permet de programmer de manière simultanée le temps Temps de cuisson and End of cooking de cuisson et la fi n de la cuisson. Avec cette fonction, le four s’allume et fi...
-
Page 31: Tableaux De Cuisson
Tableaux de cuisson TABLEAUX DE CUISSON Les tableaux de cuisson donnent des de meilleurs résultats, nous recommandons exemples de températures et de temps de préchauffer le four avec la fonction approximatifs de cuisson. Le mode de pendant 10 minutes. cuisson dépend du modèle. Pour obtenir Poids Position de la Mode de... - Page 32 32 Tableaux de cuisson Poids Position de la Mode de Températ. Temps VIANDES Récipient (Kg) plaque cuisson (ºC) (min) 190-210 70-75 Cochon de lait Intermédiaire Plaque 170-190 70-75 180-200 55-60 Lapin Intermédiaire 170-190 45-50 Plaque 170-190 30-35 190-210 50-55 Agneau Intermédiaire 170-190 45-50...
- Page 33 Tableaux de cuisson Poids Position de la Mode de Températ. Temps POISSON Récipient (Kg) plaque cuisson (ºC) (min) 180-200 25-30 Daurade Intermédiaire Plaque 170-190 20-25 190-210 25-30 Daurade au sel Intermédiaire Plaque 180-200 25-30 170-190 15-20 Sole Intermédiaire Plaque 160-180 10-15 190-210 20-25...
- Page 34 34 Tableaux de cuisson GÂTEAUX ET Poids Position de la Mode de Températ. Temps Récipient DESSERTS (Kg) plaque cuisson (ºC) (min) 150-170 35-40 Moule à tarte Gâteau Intermédiaire 170-190 30-35 160-180 30-35 170-190 10-15 Gâteau roulé Intermédiaire Plaque 160-180 10-15 160-180 55-60 Flan...
-
Page 35: Fonction Sécurité Enfants
Fonction sécurité enfants FONCTION SÉCURITÉ ENFANTS Cette fonction verrouille le four pour éviter que les enfants ne jouent avec. Pour activer cette fonction, appuyez sur les boutons jusqu’à ce qu’un long bip retentisse. Le four est alors verrouillé. Si le four est éteint, vous pourrez lire le mot SAFE (sûr) sur l’indicateur de temps. -
Page 36: Entretien Et Nettoyage
36 Entretien et nettoyage • Réglez le programme de temps de • Utilisez la grande éponge absorbante cuisson sur 4 minutes en utilisant pour éliminer l’excès d’eau à l’intérieur du les boutons de fonction de l’horloge four. électronique. La température du four •... - Page 37 Entretien et nettoyage Nettoyage de la vitre intérieure de la porte Attention! Faites attention : la porte du four se ferme lorsque l’on retire la vitre intérieure. 1. Ouvrez la porte du four. 2. Tirez la vitre vers le haut depuis la partie inférieure (A).
-
Page 38: Considérations Environnementales
38 Considérations environnementales 2. Retirez la lentille du support de la lampe à l’aide d’un outil adapté. Remplacez l’ampoule. 3. Replacez la lentille en vous assurant qu’elle s’encastre dans la position correcte sans la forcer. L’ampoule de rechange doit supporter des températures allant jusqu’à... -
Page 39: Informations Techniques
Informations techniques Problème Solution Le four ne fonctionne pas Vérifi ez le branchement au réseau électrique. Vérifi ez les fusibles et le limiteur de courant de l’installation. Vérifi ez si l’horloge se trouve en mode manuel ou programmé. Vérifi ez la position des sélecteurs de fonction et de température. La lumière à... -
Page 40: Installation
40 Installation INSTALLATION Ces informations sont destinées à Avant l’installation. l’installateur, la personne responsable du Commentaires montage et du branchement électrique. • Pour déballer le four, tirez sur la languette Si vous installez vous-même le four, le située sur la partie inférieure de la boîte. fabricant n’assumera pas la responsabilité... - Page 41 Installation Installation du four Pour tous les fours et après avoir effectué le branchement électrique, 1. Introduisez le four dans la cuisine en veillant à ne pas coincer le câble. 2. Fixez le four à l’unité en insérant les 2 vis fournies dans les orifi...
-
Page 42: Bedienungsanleitung
42 Inhaltsverzeichnis INHALTSVERZEICHNIS Bedienungsanleitung Funktion der Kindersicherung Sicherheitsinformationen Automatisches Ausschalten des Backofens Produktbeschreibung Funktion der Wasserreinigung Bedienfeld Pfl ege und Reinigung Backofenfunktionen Umwelterwägungen Vor dem ersten Gebrauch Was tun, wenn...? Backofenfunktionen Technische Daten Gartabellen Installation SICHERHEITSINFORMATIONEN Für Ihre Sicherheit und zur Gewährleistung •... -
Page 43: Produktbeschreibung
Produktbeschreibung • Verwenden Sie den Backofen nicht, wenn Installation Stromversorgungskabel, Schalterleiste, • Prüfen Sie bitte nach, ob der Backofen Ober- oder Unterteil beschädigt sind und keine Transportschäden erlitten hat. man Zugriff auf das Innere des Elektrogeräts Schließen Sie niemals ein beschädigtes hat. -
Page 44: Bedienfeld
44 Bedienfeld BEDIENFELD Knöpfe Zeitfunktionsanzeige Temperaturanzeige Backofenfunktionen Zeitanzeige Anzeigen Der Backofen funktioniert nur, wenn die Tageszeit eingestellt wurde. Der Backofen kann aber auch ohne Programmierung eingesetzt werden. Knöpfe Funktion Zum Ein- und Ausschalten des Backofens Zum Wählen der Funktionen des Backofens Zur Einstellung von Temperatur und Zeit bzw. -
Page 45: Backofenfunktionen
Backofenfunktionen BACKOFENFUNKTIONEN Normal Verwendung für Kuchen und Tortenböden, bei denen die Wärmeeinwirkung gleichmäßig sein muss, damit diese gut aufgehen. Unterhitze Es wird nur von der Unterseite Wärme zugeführt. Geeignet zum Anwärmen von Tellern, zum Aufgehen von Teigmassen oder für ähnliche Anwendungen Grill und Besonders geeignet zum Braten. - Page 46 46 Backofenfunktionen Empfehlungen zum Auftauen • Die Lebensmittel ohne Verpackung bzw. in einem Behälter auf das Backblech des von Lebensmitteln Backofens legen. Die Auftaufunktion erfolgt über ein • Große Fleisch- oder Fischstücke auf dem Warmluftsystem auf zwei 2 Höhen. HI ist für Rost mit einem Backblech darunter zum Fleisch im Allgemeinen und LO für Fisch, Auffangen des Safts auftauen.
-
Page 47: Vor Dem Ersten Gebrauch
Backofenfunktionen VOR DEM ERSTEN GEBRAUCH Lesen Sie dieses Handbuch aufmerksam • Öffnen Sie die Backofentür, um durch, um beste Ergebnisse mit Ihrem den Backofen abzukühlen und das Backofen zu erzielen. Aufgrund des Entweichen der Gerüche aus dem Fertigungsablaufs können Fettreste und Backofeninnern zu fördern. - Page 48 48 Backofenfunktionen 3 Auf der Temperaturanzeige erscheint die für diese Garfunktion voreingestellte Zeit. Zum Ändern den Temperaturknopf drücken. Die gewünschte Temperatur durch Drücken der Knöpfe wählen. 4 Die obere Backofenmulde beginnt sich aufzuheizen. Bei den Funktionen wird die schnelle Aufheizfunktion für einige Minuten aktiviert.
- Page 49 Backofenfunktionen Funktionen der Elektronikuhr Funktionen des elektronischen Programmierers Garzeit-Dauer Diese Funktion ermöglicht die Einstellung der Dauer und Endzeit der Garung. Nach Ablauf dieser Zeit schaltet sich der Backofen automatisch ab. Programmierung der Garzeit-Dauer: 1 Den Uhrknopf . drücken. Das Symbol wird aufl...
- Page 50 Backofenfunktionen Funktionen des elektronischen Programmierers Cooking duration Diese Funktion gestattet es, zusammen die Garzeit und das Garzeit-Ende Kombinierte and End of cooking einzustellen. Mit dieser Funktion schaltet sich der Backofen automatisch Garzeit und time combined zur eingestellten Zeit ein und funktioniert während der programmierten Garzeit-Ende Garzeit.
-
Page 51: Gartabellen
Gartabellen GARTABELLEN Die Gartabellen zeigen Temperaturbeispiele Um bessere Ergebnisse zu erzielen, und ungefähre Garzeiten. Die Gardauer empfehlen wir, den Backofen mit Funktion hängt vom Modell ab. oder 10 Minuten lang vorzuheizen. Gewicht Temperatur Zeit VORSPEISEN Blechstellung Garmodus Behältnis (Kg) (ºC) (min) 180-200 25-30... - Page 52 52 Gartabellen Gewicht Temperatur Zeit FLEISCH Blechstellung Garmodus Behältnis (Kg) (ºC) (min) 190-210 70-75 Spanferkel Mittelstellung Backblech 170-190 70-75 180-200 55-60 Kaninchen Mittelstellung 170-190 45-50 Backblech 170-190 30-35 190-210 50-55 Lamm Mittelstellung 170-190 45-50 Backblech 180-200 50-55 170-190 35-40 Schweinelende Mittelstellung Backblech 170-190...
- Page 53 Gartabellen Gewicht Temperatur Zeit FISCH Blechstellung Garmodus Behältnis (Kg) (ºC) (min) 180-200 25-30 Seebrasse Mittelstellung Backblech 170-190 20-25 190-210 25-30 Dorade im Mittelstellung Backblech Salzmantel 180-200 25-30 170-190 15-20 Seezunge Mittelstellung Backblech 160-180 10-15 190-210 20-25 Wolfsbarsch Mittelstellung Backblech 180-200 10-15 190-210 25-30...
- Page 54 54 Gartabellen SÜSSSPEISEN Gewicht Temperatur Zeit Blechstellung Garmodus Behältnis UND DESSERTS (Kg) (ºC) (min) 150-170 35-40 Kuchenform Biskuit Mittelstellung 170-190 30-35 160-180 30-35 170-190 10-15 Biskuitrolle Mittelstellung Backblech 160-180 10-15 160-180 55-60 Pudding Mittelstellung Kastenform 150-170 50-55 160-180 20-25 Plätzchen Mittelstellung Backblech 150-170...
-
Page 55: Funktion Der Kindersicherung
Funktion der Kindersicherung FUNKTION DER KINDERSICHERUNG Diese Funktion verriegelt den Backofen, um zu verhindern, dass Kinder mit diesem spielen. Um diese Funktion zu aktivieren, die Knöpfe gleichzeitig drücken, bis ein langer Signalton ertönt. Der Backofen ist nun verriegelt. Wenn der Backofen eingeschaltet ist, ist das Wort SAFE (sicher) auf der Zeitanzeige zu sehen. -
Page 56: Pflege Und Reinigung
56 Pfl ege und Reinigung • Stellen Sie den Thermostatschalter auf • Verwenden Sie den saugfähigen 200 ºC. Schwamm, um überschüssiges Wasser • Stellen Sie das Programm der Gardauer aus dem Backofeninneren zu entfernen. auf 4 Minuten ein, indem Sie die •... - Page 57 Pfl ege und Reinigung Reinigung der Innenglasscheibe der Ofentür Achtung! Seien Sie vorsichtig: Die Backofentür wird geschlossen, wenn die Innenscheibe entfernt wird. 1. Öffnen Sie die Backofentür. 2. Ziehen Sie die Scheibe am unteren Teil (A) nach oben. 3. Die Innenscheibe ist frei. Entnehmen Sie sie.
-
Page 58: Umwelterwägungen
58 Umwelterwägungen 2. Entfernen Sie die Linse aus der Lampenhalterung mithilfe eines angemessenen Werkzeugs. Wech- seln Sie die Glühbirne aus. 3. Bringen Sie die Linse wieder an und stellen Sie sicher, dass sie ohne Gewalt in der richtigen Stellung einrastet. Die Ersatzglühbirne muss für Temperaturen bis 300 °C ausgelegt sein. -
Page 59: Technische Daten
Technische Daten Störung Abhilfe Der Backofen funktioniert Prüfen Sie nach, ob er an die Stromversorgung angeschlossen ist. nicht. Überprüfen Sie die Sicherungen und den Leistungsbegrenzer der Installation. Prüfen Sie nach, ob sich die Zeituhr im manuellen Modus befi ndet oder ob sie programmiert ist. Überprüfen Sie die Stellung der Funktions- und Temperaturwahlschalter. -
Page 60: Installation
60 Installation INSTALLATION Diese Informationen sind für den Vor der Installation. Installateur, d. h. für die Person, die für Anmerkungen Montage und den elektrischen Anschluss • Ziehen Sie zum Auspacken des zuständig ist, vorgesehen. Wenn Sie den Backofens an der Lasche am unteren Teil Backofen selbst anschließen, übernimmt der Packung. - Page 61 Installation Einbau des Backofens 3. Prüfen Sie nach, dass das Backofengehäuse nicht mit den Für alle Backöfen und nach dem Anschluss Seitenwänden des Möbelstücks in an das Stromnetz, Kontakt ist und dass mindestens 2 mm 1. Führen Sie den Backofen in die Küche Trennung dazwischen vorhanden sind.
-
Page 62: Gebruiksaanwijzingen
62 Inhoudsopgave INHOUDSOPGAVE Gebruiksaanwijzingen Kinderbeveiligingsfunctie Veiligheidsinformatie Automatische uitschakeling van de oven Omschrijving van het product Reinigingsfunctie met water Bedieningspaneel Onderhoud en reiniging Functies van de oven Milieuoverwegingen Vóór het eerste gebruik Wat te doen als... Gebruik van de oven Technische gegevens Baktabellen Installatie VEILIGHEIDSINFORMATIE... -
Page 63: Omschrijving Van Het Product
Omschrijving van het product Installatie • Gebruik de oven niet als de stroomkabel is beschadigd of wanneer het • Controleer of de oven tijdens het bedieningspaneel, de bovenkant of transport niet is beschadigd. Sluit nooit onderkant zijn beschadigd. Neem contact een beschadigd huishoudelijk apparaat op met uw plaatselijke technische dienst aan. -
Page 64: Bedieningspaneel
Bedieningspaneel BEDIENINGSPANEEL Knoppen Tijdfunctie-indicator Temperatuurindicator Functies van de oven Tijdindicator Controlelampjes De oven werkt alleen als de tijd van de dag is ingesteld. De oven kan echter ook zonder enige programmering worden gebruikt. Knoppen Functie De oven in- of uitschakelen De ovenfuncties selecteren De temperatuur en de tijd of het ontdooiniveau instellen De temperatuurwaarden instellen... -
Page 65: Functies Van De Oven
Functies van de oven FUNCTIES VAN DE OVEN Conventioneel Wordt gebruikt voor cakes en taarten omdat de warmte gelijkmatig ver- deeld moet worden om een luchtige textuur te verkrijgen. Ovenvloer Verwarmt alleen de onderkant. Geschikt voor het opwarmen van gerechten en het bakken van taarten en dergelijke. - Page 66 66 Functies van de oven Aanbevelingen voor het • Ontdooi grote stukken vlees of vis op de rooster met daaronder een bakplaat om ontdooien van etenswaren vloeistoffen op te vangen. De ontdooifunctie werkt met een • Vlees en vis hoeven niet volledig te warmeluchtsysteem op 2 niveaus.
-
Page 67: Vóór Het Eerste Gebruik
Gebruik van de oven VÓÓR HET EERSTE GEBRUIK Lees deze gebruiksaanwijzing aandachtig • Open de deur om de oven te laten om de beste resultaten met uw oven afkoelen. Op deze manier wordt de oven te bereiken. Als resultaat van het geventileerd en blijven er geen geuren in productieproces kunnen er vetresten of de oven hangen. - Page 68 68 Gebruik van de oven 3 De temperatuurindicator toont de vooraf ingestelde temperatuur van deze bakfunctie. Druk op de temperatuurknop om de temperatuur te wijzigen. Selecteer de gewenste temperatuur door de knoppen in te drukken. 4 De bovenste ruimte van de oven begint te verwarmen.
- Page 69 Gebruik van de oven Functies van de elektronische klok Functies van de elektronische programmeerinrichting Baktijd Met deze functie kunt u de baktijd programmeren. Na deze tijd gaat de oven automatisch uit. Programmering van de baktijd: 1 Druk de kloktoets in. Het symbool gaat branden.
- Page 70 Gebruik van de oven Functies van de elektronische programmeerinrichting Cooking duration Met deze functie kan de baktijd tegelijk met de eindtijd van het bakproces Combinatie van and End of cooking worden geprogrammeerd. Met deze functie gaat de oven automatisch aan baktijd en eindtijd time combined op het ingestelde tijdstip en werkt hij gedurende de geprogrammeerde...
-
Page 71: Baktabellen
Baktabellen BAKTABELLEN De baktabellen tonen voorbeelden van bij Voor de beste resultaten raden wij aan om benadering aangegeven baktemperaturen de oven tien minuten met de functie en -tijden. De bakwijze is afhankelijk van het voor te verwarmen. model. Gewicht Positie van Temperatuur Tijd VOORGERECHTEN... - Page 72 72 Baktabellen Gewicht Positie van Temperatuur Tijd VLEESGERECHTEN Bakfunctie Schaal (Kg) de bakplaat (ºC) (min) 190-210 70-75 Speenvarken Midden Bakplaat 170-190 70-75 180-200 55-60 Konijn Midden 170-190 45-50 Bakplaat 170-190 30-35 190-210 50-55 Lamsvlees Midden 170-190 45-50 Bakplaat 180-200 50-55 170-190 35-40 Varkensfi...
- Page 73 Baktabellen Gewicht Positie van Temperatuur Tijd Bakfunctie Schaal (Kg) de bakplaat (ºC) (min) 180-200 25-30 Zeebrasem Midden Bakplaat 170-190 20-25 Met zout 190-210 25-30 bereide Midden Bakplaat 180-200 25-30 goudbrasem 170-190 15-20 Tong Midden Bakplaat 160-180 10-15 190-210 20-25 Zeebaars Midden Bakplaat 180-200...
- Page 74 74 Baktabellen ZOETE SPIJZEN Gewicht Positie van Temperatuur Tijd Bakfunctie Receptacle EN NAGERECHTEN (Kg) de bakplaat (ºC) (min) 150-170 35-40 Taartvorm Cake Midden 170-190 30-35 160-180 30-35 170-190 10-15 Boomstam Midden Bakplaat 160-180 10-15 160-180 55-60 Pudding Midden Broodvorm 150-170 50-55 160-180 20-25...
-
Page 75: Kinderbeveiligingsfunctie
Kinderbeveiligingsfunctie KINDERBEVEILIGINGSFUNCTIE Deze functie vergrendelt de oven om te voorkomen dat kinderen ermee spelen. Om deze functie te activeren, dienen de toetsen ingedrukt te worden totdat een lange pieptoon te horen is. De oven is nu vergrendeld. Als de oven uit is, staat het woord SAFE (veilig) op de tijdindicator. -
Page 76: Onderhoud En Reiniging
76 Onderhoud en reiniging • Stel het baktijdprogramma op 4 minuten • Gebruik de grote absorberende spons om in door de functieknoppen van de het overtollige water uit de oven te halen. elektronische klok in werking te stellen. • Nu kunt u de binnenkant van de oven De oventemperatuur neemt toe. - Page 77 Onderhoud en reiniging Reiniging van het binnenglas van de ovendeur Opgelet! Wees voorzichtig: de ovendeur gaat dicht wanneer het binnenglas wordt verwijderd. 1. Open de ovendeur. 2. Trek van de onderkant (A) het glas omhoog. 3. Het binnenglas komt vrij. Verwijder het.
-
Page 78: Milieuoverwegingen
78 Milieuoverwegingen 2. Maak het glas van de lampfi tting los met behulp van geschikt gereedschap. Verwissel het lampje. 3. Monteer opnieuw het glas en zorg ervoor dat het zonder te forceren in de goede positie komt te zitten. Het vervangingslampje dient temperaturen tot 300°C te kunnen verdragen. -
Page 79: Technische Gegevens
Technische gegevens Probleem Oplossing De oven werkt niet Controleer de aansluiting op het elektriciteitsnet. Controleer de zekeringen en de stroombegrenzer van de installatie. Controleer of de klok in de handmatige of geprogrammeerde functie staat. Controleer de stand van de functie- en temperatuurschakelaar. Het binnenlicht van de oven Verwissel het lampje. -
Page 80: Installatie
80 Installatie INSTALLATIE Deze informatie is bestemd voor de Vóór de installatie. installateur, de verantwoordelijke persoon Opmerkingen voor de montage en de elektrische • Trek, om de oven uit te pakken, aan het aansluiting. Als u de oven zelf installeert, lipje aan de onderkant van de doos. - Page 81 Installatie Oveninstallatie 3. Zorg ervoor dat de ovenkast niet in aanraking komt met de zijkanten van Voor alle ovens en na de elektrische het keukenmeubel en dat er minstens aansluiting geldt: een ruimte van 2 mm tussen beide is. 1. Breng de oven voorzichtig in het keukenmeubel aan zonder de kabel te klemmen.
-
Page 82: Instrucciones De Funcionamiento
82 Índice ÍNDICE Instrucciones de funcionamiento Función de bloqueo para niños Información de seguridad Desconexión automática del horno Descripción del producto Función de limpieza con agua Panel de mandos Cuidado y limpieza Funciones del horno Consideraciones medioambientales Antes de usar por primera vez Qué... -
Page 83: Descripción Del Producto
Descripción del producto Instalación • No use el horno si el cable del suministro eléctrico está dañado, o si el panel de • Compruebe que el horno no ha sufrido mandos, la parte superior o la base daños durante el transporte. No conecte están dañados, de modo que se pueda nunca un electrodoméstico dañado. -
Page 84: Panel De Mandos
Panel de mandos PANEL DE MANDOS Botones Indicador de funciones de tiempo Indicador de temperatura Funciones del horno Indicador de tiempo Pilotos indicadores El horno sólo funciona si se ha ajustado la hora del día. Sin embargo, el horno también se pue- de usar sin ninguna programación. -
Page 85: Funciones Del Horno
Funciones del horno FUNCIONES DEL HORNO Convencional Se usa para bizcochos y tartas porque el calor debe ser uniforme para lograr una textura esponjosa. Solera Calienta sólo desde abajo. Adecuado para calentar platos y elaborar pasteles y similares. Grill y solera Especial para asados. - Page 86 86 Funciones del horno Recomendaciones para • Descongele piezas grandes de carne o pescado colocándolas sobre la parrilla descongelar alimentos con una bandeja debajo para recoger los La función de descongelación funciona jugos. con un sistema de aire caliente a 2 •...
-
Page 87: Antes De Usar Por Primera Vez
Uso del horno ANTES DE USAR POR PRIMERA VEZ Lea con atención este manual de • Para enfriar el horno, abra la puerta para instrucciones para obtener los mejores facilitar la ventilación y la salida de olores resultados de su horno. Como resultado de su interior. - Page 88 88 Uso del horno 3 El indicador de temperatura mostrará la temperatura preajustada para esa función de cocción. Pulse el botón de temperatura para modifi carla. Seleccione la temperatura deseada pulsando los botones 4 La cavidad superior del horno comenzará a calentarse.
- Page 89 Uso del horno Funciones del reloj electrónico Funciones del programador electrónico Duración Esta función le permitirá programar la duración de cocción, y pasado este de cocción tiempo el horno se desconectará automáticamente. Programación del tiempo de cocción: 1 Pulse el botón de reloj .
- Page 90 90 Uso del horno Electronic programmer functions Cooking duration This function allows both cooking time length and the stop time to be Cooking duration and End of cooking programmed. With this function, the oven switches on automatically at the and End of cooking time combined set time and operates for the cooking time it has been programmed for.
-
Page 91: Tablas De Cocción
Tablas de cocción TABLAS DE COCCIÓN Las tablas de cocción muestran ejemplos Para obtener mejores resultados, de temperaturas y tiempos aproximados de recomendamos precalentar el horno con la cocción. El modo de cocción depende del función ó durante 10 minutos. modelo. - Page 92 92 Tablas de cocción Peso Posición de Modo de Temperat. Tiempo CARNES Recipiente (Kg) la bandeja cocción (ºC) (min) 190-210 70-75 Cochinillo Intermedia Bandeja 170-190 70-75 180-200 55-60 Conejo Intermedia 170-190 45-50 Bandeja 170-190 30-35 190-210 50-55 Cordero Intermedia 170-190 45-50 Bandeja 180-200...
- Page 93 Tablas de cocción Peso Posición de Modo de Temperat. Tiempo PESCADO Recipiente (Kg) la bandeja cocción (ºC) (min) 180-200 25-30 Besugo Intermedia Bandeja 170-190 20-25 190-210 25-30 Dorada a la sal Intermedia Bandeja 180-200 25-30 170-190 15-20 Lenguado Intermedia Bandeja 160-180 10-15 190-210...
- Page 94 94 Tablas de cocción DULCES Y Peso Posición de Modo de Temperat. Tiempo Recipiente POSTRES (Kg) la bandeja cocción (ºC) (min) 150-170 35-40 Molde para Bizcocho Intermedia 170-190 30-35 tartas 160-180 30-35 170-190 10-15 Brazo de Intermedia Bandeja gitano 160-180 10-15 160-180 55-60...
-
Page 95: Función De Bloqueo Para Niños
Función de bloqueo para niños FUNCIÓN DE BLOQUEO PARA NIÑOS Esta función bloquea el horno para evitar que los niños jueguen con él. Para activar esta función, pulse los botones hasta oír un pitido largo. El horno está ahora bloqueado. Si el horno está... -
Page 96: Cuidado Y Limpieza
96 Cuidado y limpieza • Ajuste el programa de tiempo de cocción • Cuando la limpieza haya terminado, a 4 minutos accionando los botones asegúrese de apagar el electrodoméstico. de función del reloj electrónico. La • Use la esponja absorbente grande para temperatura del horno aumentará. - Page 97 Cuidado y limpieza Limpieza del cristal interior de la puerta ¡Atención! Tenga cuidado: la puerta del horno se cierra cuando se saca el cristal interior. 1. Abra la puerta del horno. 2. Tire del cristal hacia arriba desde la parte inferior (A). 3.
-
Page 98: Consideraciones Medioambientales
98 Consideraciones medioambientales 2. Saque la lente del soporte de la lám- para con la ayuda de una herramien- ta adecuada. Cambie la bombilla. 3. Vuelva a colocar la lente asegurándose de que encaja en la posición correcta sin forzarla. CONSIDERACIONES MEDIOAMBIENTALES indebida de la basura. -
Page 99: Datos Técnicos
Datos técnicos Problema Solución El horno no funciona Compruebe la conexión a la red eléctrica. Compruebe los fusibles y el limitador de corriente de la instalación. Compruebe si el reloj está en modo manual o programado. Compruebe la posición de los selectores de función y temperatura. -
Page 100: Instalación
100 Instalación INSTALACIÓN Esta información está destinada al Antes de instalar. Comentarios instalador, la persona responsable del • Para desembalar el horno, tire de la montaje y la conexión eléctrica. Si instala pestaña que hay en la parte inferior de la el horno usted mismo, el fabricante no se caja. - Page 101 Instalación Instalación del horno Para todos los hornos y tras haber realizado la conexión eléctrica: 1 Introduzca el horno en la cocina con cuidado de no atrapar el cable. 2. Fije el horno a la unidad insertando los 2 tornillos suministrados en los agujeros que pueden observarse una vez abierta la puerta.
- Page 102 www.progress-hausgeraete.de 3172575-000...
Need help?
Do you have a question about the PBMF4500X and is the answer not in the manual?
Questions and answers