Table of Contents
Advertisement
Advertisement
Table of Contents

Related Manuals for AEG KB9810EM


Summary of Contents for AEG KB9810EM
- Page 1 KB9810E User manual Electric built-in oven...
- Page 2 Dear Customer Thank you for choosing one of our high-quality products. With this appliance you will experience the perfect combination of functional design and cutting edge technology. Convince yourself that our appliances are engineered to deliver the best performance and control - indeed we are setting the highest standards of excellence.
-
Page 3: Table Of Contents
Contents Contents Operating instructions Safety information Electrical safety Children's safety Safety during use Microwave How to avoid damage to the appliance Do not use the appliance Description of product General view Control panel Oven layout Accessories Oven Before using for the first time Setting and changing the time Cleaning for the first time Getting to know the appliance... - Page 4 Contents Memory function Clock functions Countdown Microwave Cook Time min. Cook Time End Time Cook Time and End Time combined Other functions Switching off the display Child safety device Button Beep Automatic switch-off Uses, Tables and Tips Baking General instructions Baking Table Tips for baking Bakes and Gratins Table...
- Page 5 Contents POTATO GRATIN (serves 4-5) CHICKEN 1200 G Cleaning and care The outside of the appliance Oven interior Accessories Side rails Removing the side rails Replacing the side rails Oven lighting If something is wrong… Electrical Connection Installation instructions Safety information for the installer Disposal Guarantee/Customer Service GREAT BRITAIN &...
-
Page 6: Operating Instructions
Safety information Operating instructions Safety information Important safety instructions! Read carefully and keep for future use! Electrical safety • This appliance must only be connected by a qualified installation engineer. • In the event of a fault or damage to the appliance: Take the fuses out or switch off. -
Page 7: Microwave
Safety information • Be careful if connecting electrical appliances to sockets near to this appliance. Electrical leads must not be caught under the hot oven door. • Warning: Risk of burns! The interior surfaces of the oven become very hot during use. - Page 8 Safety information • When heating liquids always put a cof- fee spoon or a glass rod in the container to avoid boiling delay. With boiling de- lay the boiling temperature is reached without the typical steam bubbles ris- ing. If the container is shaken even slightly the liquid can suddenly boil over or spray violently.
-
Page 9: How To Avoid Damage To The Appliance
Safety information How to avoid damage to the appliance • Do not line the oven with aluminium foil and do not place a baking tray or saucepan etc. on the floor, as otherwise the oven enamel will be damaged by the heat build-up. -
Page 10: Do Not Use The Appliance
Safety information Do not use the appliance ... for cooking eggs in their shells (with fried eggs, pierce the yolks first) and snails, as oth- erwise these burst. Cooking oil (fondue, deep frying) and drinks with high alcohol content: Spontaneous ig- nition! Risk of explosion! ... -
Page 11: Description Of Product
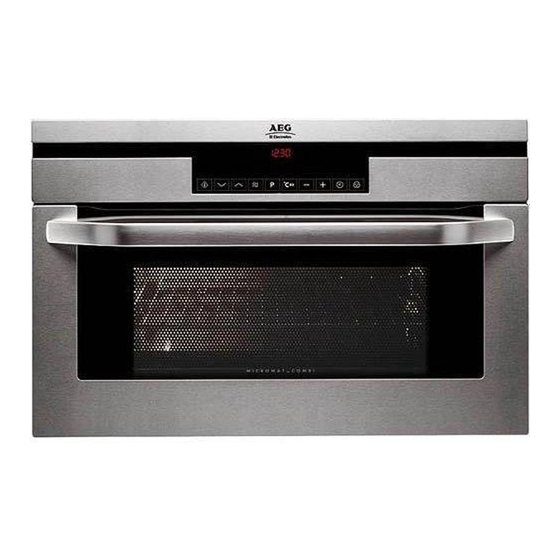
Description of product Description of product General view Control Panel Door handle Full glass door... -
Page 12: Control Panel
Description of product Control panel Oven displays Oven functions buttons Oven layout Grill element... -
Page 13: Accessories Oven
Before using for the first time Microwave generator Light in the oven Rear heating panel Oven lighting Glass base, removable Side rails, removable Oven shelf levels Accessories Oven Oven shelf For cookware, cake tins, roasts and grilling food. Baking tray For cakes and biscuits. -
Page 14: Cleaning For The First Time
Before using for the first time 2. Using the button, set the current time. After approx. 5 seconds, the flashing stops and the clock displays the time set. The appliance is now ready to use. The time can only be modified, if the child safety device is deactivated, none of the clock functions Countdown , Cook Time... -
Page 15: Getting To Know The Appliance
Operating the oven Oven Operation Getting to know the appliance The appliance can be operated in test mode to test or demonstrate all operating steps. The oven does not heat up. Test mode Switching on 1. Switch off the appliance using the Stop button. -
Page 16: The Control Panel
Operating the oven Oven Operation Temperature/Time/Microwave Power Weight display Time functions Length of operation Thermometer symbol Baking/Roasting Programmes Oven functions The control panel Start button Microwave button Fast Warm Up Stop button / Restore settings Clock functions Selector buttons Baking/Roasting Programmes Oven functions General instructions •... -
Page 17: Selecting The Oven Function
Operating the oven Oven Operation • If the oven door is opened during operation, the function stops. After closing the door continue with the Start button . If the Start button is not started within 30 seconds, the appliance switches itself off. •... -
Page 18: Switching The Oven Off
Operating the oven Oven Operation Switching the oven off To switch the oven off, press the Stop button repeatedly until only the time and any residual heat is displayed. Cooling fan The fan switches on automatically to keep the appliance surfaces cool. When the oven is switched off, the fan continues to run to cool the appliance down and then switches itself off. -
Page 19: Microwave
Operating the oven Oven Operation Oven functions Defrost/Drying For defrosting and drying herbs, fruit and vegetables. Microwave In microwave mode, the heat is created directly in the food. For heating ready meals and drinks, for defrosting meat or fruit and for cooking vegetables and fish. Combi Function For the style of heating for the oven function(s), the Microwave function can... - Page 20 Operating the oven Oven Operation 3. Using the button, set the desired cook time. The symbol for Cook Time flashes. – The cooking times can be set as follows: – from 0 to 2 min. in 5 second steps, – from 2 to 5 min. in 10 second steps, –...
-
Page 21: Combi Function
Operating the oven Oven Operation Combi Function You will find a selection of dishes in the chapter "Uses, Tables and Tips: Combi Function. 1. Switch off the appliance using the Stop button, if necessary. 2. Press the button repeatedly until the desired oven function ap- pears. -
Page 22: Microwave Quick Start
Operating the oven Oven Operation – While the time counts down, using buttons the cooking time can be increased or reduced. When the time has elapsed, a signal sounds for 2 minutes. The appliance switches itself off. The symbol for Cook Time flashes and the time display appears. -
Page 23: Information On Power Settings
Operating the oven Oven Operation When the time has elapsed, a signal sounds for 2 minutes. The appliance switches itself off. The symbol for Cook Time flashes and the time display appears. To turn off the signal: Press any button. Information on power settings The overview indicates at which power setting certain processes can be performed. -
Page 24: Inserting The Oven Shelf And Baking Tray
Operating the oven Oven Operation Inserting the oven shelf and baking tray Shelf runner safety and anti-tip device To increase shelf runner safety, all insertable components have a small curved indentation at the bottom on the right and left-hand edge. Always insert insertable components so that this indentation is at the back of the oven interior. - Page 25 Operating the oven Oven Operation Selecting a programme 1. Switch off the appliance using the Stop button, if necessary. 2. Press the Baking/Roasting Pro- grammes button then press the button repeatedly, until the desired programme appears in the display (P1 to P12). –...
-
Page 26: Memory Function
Operating the oven Oven Operation With some programmes, after the time has elapsed a Keep Warm function is started. A signal sounds and "HH" lights up in the dis- play. After the Keep Warm function has ended, a signal sounds for 2 minutes. The oven switches itself off. -
Page 27: Clock Functions
Operating the oven Oven Operation Clock functions Clock functions Clock displays Time Cook Time/End Time/Operating Time Clock functions Selector buttons Countdown To set a countdown. When it has counted down, a signal sounds. This function has no effect on the operation of the microwave and oven. Microwave Cook Time min. -
Page 28: Countdown
Operating the oven Oven Operation To set, change or find out the time (see section Before using for the first time). General instructions • After a clock function has been selected, the corresponding symbol flashes for about. 5 seconds. During this period, the desired times can be set or modified using the button. -
Page 29: Microwave Cook Time Min
Operating the oven Oven Operation After approx. 5 seconds the display shows the time remaining. The symbol for Countdown lights up. When the time has elapsed, a signal sounds for 2 minutes. "0.00" lights up and the symbol for Countdown flashes. -
Page 30: Cook Time
Operating the oven Oven Operation 3. When the Start button is pressed, the time set begins to count down. The symbol for Cook Time lights By repeatedly pressing the clock func- tions button the current time can be found out. While the time counts down, using the buttons the cooking time can be increased or... -
Page 31: End Time
Operating the oven Oven Operation 3. Using the button set the desired cooking time. 4. When the Start button is pressed, the time set begins to count down. The symbol for Cook Time lights By repeatedly pressing the clock func- tions button the current time can be found out. -
Page 32: Cook Time And End Time Combined
Operating the oven Oven Operation 3. Using the button, set the desired switch-off time. The symbols for End Time and Cook Time light up. The oven switches itself on automatically. By repeatedly pressing the clock functions button the current time can be found out. When the time has elapsed, a signal sounds for 2 minutes. -
Page 33: Other Functions
Operating the oven Oven Operation 1. Select oven function and tempera- ture. 2. Using the Cook Time function , set the time required for cooking the dish, e. g. 1 hour. 3. Using the End Time function , set the time at which the dish is to be ready, e. -
Page 34: Child Safety Device
Operating the oven Oven Operation 2. Press the clock functions buttons at the same time until the display goes out. As soon as the appliance is operated again, the display automatically switches itself on. When the appliance is next switched off, the display goes out again. To have the time permanently displayed again, you must switch the display on again. -
Page 35: Button Beep
Uses, Tables and Tips Button Beep Switching off button beep 1. Switch off the appliance using the Stop button, if necessary. 2. Press and hold the buttons at the same time, until a signal sounds (approx. 2 seconds). The button beep is now switched off. Switching on button beep Press and hold the buttons at... -
Page 36: General Instructions
Uses, Tables and Tips Oven shelf levels • With Ventitherm ® Fan Operated Cooking you can bake on up to 2 baking trays at the same time: 1 baking tray: e. g. oven level 2 1 baking tin: e. g. oven level 1 2 baking trays: e. -
Page 37: Baking Table
Uses, Tables and Tips • We recommend using the lower temperature the first time and then, if necessary, e. g. if a deeper browning is required or baking time is too long, selecting a higher temperature. • If you cannot find the settings for a particular recipe of your own, look for the one that is most similar. - Page 38 Uses, Tables and Tips Baking on one oven level Type of Cake / Pastries / Breads Ventitherm ® Fan Operated Cooking Oven level Temperature °C Time in hours: min. Cakes/pastries/breads on baking trays Plaited bread/bread crown 160-180 0:30-0:40 Christmas stollen 160-180 0:40-1:00 Bread (rye bread)
-
Page 39: Tips For Baking
Uses, Tables and Tips Baking on more than one oven level Type of cakes / pastries / Ventitherm ® Fan Operated Temperature Time in hours: breads in °C min. Cooking Oven level from the bottom 2 levels Small cake Shortcrust pastry biscuits 2 / 4 160-180 0:15-0:35... -
Page 40: Bakes And Gratins Table
Uses, Tables and Tips Baking results Possible cause Remedy Cake mixture/dough is unevenly Spread the mixture/dough evenly distributed on the baking tray Grease filter is inserted Removing the grease filter Cake is not done within Oven temperature too low Use a slightly higher oven the baking time given temperature setting Grease filter is inserted... -
Page 41: Roasting
Uses, Tables and Tips Food to be Oven functions Oven Temperature °C Cooking cooked level Fruit cake Ventitherm ® Fan as per manufac- as per manufac- Operated Cooking turer's instruc- turer's instruc- tions tions 1) Turn chips 2 or 3 times during cooking Roasting Oven functions: Ventitherm ®... - Page 42 Uses, Tables and Tips Food to be roasted Ventitherm ® Fan Operated Cooking Oven level Temperature °C Time in hours: min. Shoulder, neck, ham joint (1,000-1,500g) 170-190 1:30-2:00 Chops, Kasseler (smoked loin of pork) 180-200 1:00-1:30 (1,000-1,500g) Meat loaf (750-1,000 g) 180-200 0:45-1:00 Knuckle of pork (pre-cooked)
-
Page 43: Single Economy Grill
Uses, Tables and Tips Food to be roasted Ventitherm ® Fan Operated Cooking Oven level Temperature °C Time in hours: min. Saddle of hare, leg of hare (up to 1,000 g) 1 0:25-0:40 220-230 Saddle of venison (1,500-2,000 g) 210-220 1:15-1:45 Leg of venison (1,500-2,000 g) 200-210... -
Page 44: Defrosting
Uses, Tables and Tips Dish Temperature in ° Tray Oven Grilling Turn after ... shelf time in minutes minutes Oven level Chicken (900-1,000 g) 180-200 50-60 25-30 Stuffed rolled pork roast 180-200 90-95 (2,000 g) Pasta bake Gratinated potato bake 20-23 Gnocchi, gratinated 20-23... -
Page 45: Defrosting Table
Uses, Tables and Tips Defrosting Table Dish Defrosting Further de- Note time (min.) frosting time (min.) Chicken, 1,000 g 100-140 20-30 Place chicken on an upturned saucer in a large plate. Turn halfway through Meat, 1,000 g 100-140 20-30 Turn halfway through Meat, 500 g 90-120 20-30... -
Page 46: Making Preserves
Uses, Tables and Tips Food to be dried Temperature in ° Oven level Time in hours (guideline) Apricots 2 / 4 8-12 Apple slices 2 / 4 Pears 2 / 4 9-13 Making preserves Oven functions: Ventitherm ® Fan Operated Cooking •... -
Page 47: Microwave
Uses, Tables and Tips Temperature in Cooking time until Continue to cook at Preserve °C simmering in mi- 100 °C in minutes nutes. 160-170 50-60 5-10 Carrots 160-170 40-60 10-15 Mushrooms Cucumbers 160-170 50-60 Mixed pickles 160-170 50-60 Kohlrabi, peas, asparagus 160-170 50-60 15-20... -
Page 48: Suitable Cookware And Materials
Uses, Tables and Tips • Turn the food after half the defrosting time. If possible, divide and then remove pieces that have started to defrost. Defrosting butter, portions of gateau, quark • Do not defrost completely in the appliance, but leave to defrost at room temperature. - Page 49 Uses, Tables and Tips Cookware/Material Microwave Single economy Defrosting Heating Cooking grill oven Roasting film with microwave safe closure Roasting dishes made of metal, e. g. enamel, cast iron Baking tins, black lacquer or silicon-coated Baking tray Browning cookware, e. g. Crostino or Crunch plate Ready meals in packaging 1) With no silver, gold, platinum or metal plating/decorations...
-
Page 50: Microwave Cooking Table
Uses, Tables and Tips Microwave Cooking Table Defrosting Dish Microwave Size (g) Power Cook Standing Things to note (Watts) time time min. (min.) Meat Whole cuts of meat 10-12 10-15 Turn halfway through Steak 5-10 Turn halfway through; remove defrosted parts Mixed minced meat 10-15... - Page 51 Uses, Tables and Tips Defrosting Dish Microwave Size (g) Power Cook Standing Things to note (Watts) time time min. (min.) Quark 10-15 25-30 Remove aluminium parts, turn halfway through Butter 15-20 Remove aluminium parts, turn halfway through Cheese 30-60 Remove aluminium parts, turn halfway through Cream...
- Page 52 Uses, Tables and Tips Defrosting Dish Microwave Size (g) Power Cook Standing Things to note (Watts) time time min. (min.) Chocolate / Chocolate Stir halfway through coating Butter Stir halfway through Heating Baby food in jars Stir halfway through; check temperature! Baby milk (bottle, 180 1000 0:20-...
-
Page 53: Combi-Function Table
Uses, Tables and Tips Cooking Dish Microwave Size (g) Power Cook Standing Things to note (Watts) time time min. (min.) Vegetables, short cook- 12-16 Add approx. 50 ml wa- ter, cook covered, stir ing time, fresh halfway through Vegetables, short cook- 14-18 Add approx. - Page 54 Uses, Tables and Tips Dish Baking/ Oven Temp. Micro- Oven Time in Things to note roasting functions in °C wave level min. dishes Watt Duck, 2,000 Glassware on First 40-60 Turn after 15 oven shelf min. then cook at 180°C for 10 then min.
-
Page 55: Tips For The Microwave
Uses, Tables and Tips Dish Baking/ Oven Temp. Micro- Oven Time in Things to note roasting functions in °C wave level min. dishes Watt Roast beef, Glassware on 60-70 10 min. stand- 1,000 g oven shelf ing time, turn once, cook cov- ered Neck of Glassware on... -
Page 56: Programmes
Uses, Tables and Tips Dish Power Oven Oven Cook Standing Note (Watts func- level Time time (min.) tions min. Egg custard Glass 30-40 Turn dish once after half (12.3.1) base the time has elapsed Sponge mix Glass 8-10 (12.3.2) base Cooking meat Glass 20-22... - Page 57 Uses, Tables and Tips Pro- Func- Recipe weight Time ac- Keep gramme tion cording Warm Preset- min. max. to pre- function ting setting "HH" Fish 1,000 g 100 g 1,500 g 15 min. 20 sec- onds, Bread 500 g 100 g 1,500 g 6 min.
-
Page 58: Potato Gratin (Serves 4-5)
Uses, Tables and Tips Pro- Func- Recipe weight Time ac- Keep gramme tion cording Warm Preset- min. max. to pre- function ting setting "HH" P 12 Chicken 1,000 g 400 g 1,400 g 30 min. POTATO GRATIN (serves 4-5) Ingredients: •... -
Page 59: Cleaning And Care
Cleaning and care • 2 tablespoons oil • Salt, pepper, paprika and curry powder Preparation: Wash the chicken and dry it with kitchen paper. Mix the spices with the oil and use the mixture to coat the chicken evenly inside and out. -
Page 60: Oven Interior
Cleaning and care • For metal fronts, use normal commercially available cleaning agents. • Please do not use any scouring agents or abrasive sponges. Oven interior Clean the oven after every use. This is the easiest way to remove dirt which then cannot burn itself into the oven. -
Page 61: Replacing The Side Rails
Cleaning and care Replacing the side rails To insert rails, re-insert them into the mounts and lower them. Oven lighting WARNING! Risk of electric shock! Before replacing the oven light bulb: • Switching the oven off! • Take the fuses out of the fuse box or switch off. To protect the oven light bulb and the glass cover, lay a cloth on the floor of the oven. -
Page 62: If Something Is Wrong
If something is wrong… If something is wrong… Problem Possible cause Remedy The oven is not heating The oven has not been switched on Switch the oven on The clock has not been set Set the current time on the clock The required settings have not Check the settings been made... -
Page 63: Electrical Connection
Electrical Connection Electrical Connection The oven is designed to be connected to 230-240V~(50Hz) electricity supply. The oven has an easily accessible terminal block which is marked as follows: Letter L - Live terminal Letter N - Neutral terminal - Earth terminal CAUTION! This oven must be earthed! The cable used to connect the oven to the electrical supply must comply to the... -
Page 64: Installation Instructions
Installation instructions CAUTION! The new appliance may only be installed and connected by a registered installation engineer. Please comply with this instruction. If you do not, any damage resulting is not covered by the warranty. To prevent future hazards, damaged mains cables must be replaced by our Customer Service Department or by a registered service engineer Safety information for the installer •... - Page 65 min. 380-383 min. 380-383 min. min.
- Page 66 380-383 min. 560 min.
- Page 68 2x3,5x25...
-
Page 69: Disposal
Disposal Disposal The symbol on the product or on its packaging indicates that this product may not be treated as household waste. Instead it should be taken to the appropriate collection point for the recycling of electrical and electronic equipment. By ensuring this product is disposed of correctly, you will help prevent potential negative consequences for the environment and human health, which could otherwise be caused by inappropriate waste handling of this product. - Page 70 Guarantee/Customer Service • The appliance has not been serviced, maintained, repaired, taken apart or tam- pered with by any person not authorised by us. • Electrolux Service Force Centre must undertake all service work under this guar- antee • Any appliance or defective part replaced shall become the Company's property. •...
-
Page 71: European Guarantee
Customer Care Department Electrolux Major Appliances Addington Way Luton Bedfordshire, LU4 9QQ Tel: Electrolux 08705 950 950 (*) AEG-Electrolux 08705 350 350 (*) Zanussi-Electrolux 08705 727 727 (*) (*) Calls may be recorded for training purposes For Customer Service in The Republic of Ireland please contact us at the... -
Page 72: Www.electrolux.com
www.electrolux.com • The appliance is installed in accordance with all relevant regulations in force within your new country of residence. The provisions of this European Guarantee do not affect any of the rights granted to you by law. www.electrolux.com Albania +35 5 4 261 450 Rr. - Page 73 www.electrolux.com Luxembourg +352 42 431 301 Rue de Bitbourg, 7, L-1273 Hamm Magyarország +36 1 252 1773 H-1142 Budapest XIV, Erzsébet királyné útja 87 Nederland +31 17 24 68 300 Vennootsweg 1, 2404 CG - Al- phen aan den Rijn Norge +47 81 5 30 222 Risløkkvn.
-
Page 74: Service
Service Service In the event of technical faults, please first check whether you can remedy the problem yourself with the help of the operating instructions (section "What to do if…") If you were not able to remedy the problem yourself, please contact the Customer Service Department or one of our service partners. - Page 75 Index Index Accessories Functions Accessories Operation Additional functions Oven shelf Bakes and Gratins Programmes Baking 35 39 Baking tray Button Beep Ready Meals Repairs Roasting Child safety device Rotitherm Roasting Cleaning Initial cleaning Oven interior Safety Cleaning Selecting a programme Accessories Side rails Side rails...
- Page 76 www.aeg-electrolux.co.uk...
Need help?
Do you have a question about the KB9810EM and is the answer not in the manual?
Questions and answers