Angelcare AC117 Owner's Manual
Baby sound and movement monitor
Hide thumbs
Also See for AC117:
- Owner's manual (80 pages) ,
- Owner's manual (20 pages) ,
- Owner's manual (100 pages)
Advertisement
Quick Links
Advertisement

Related Manuals for Angelcare AC117


Summary of Contents for Angelcare AC117
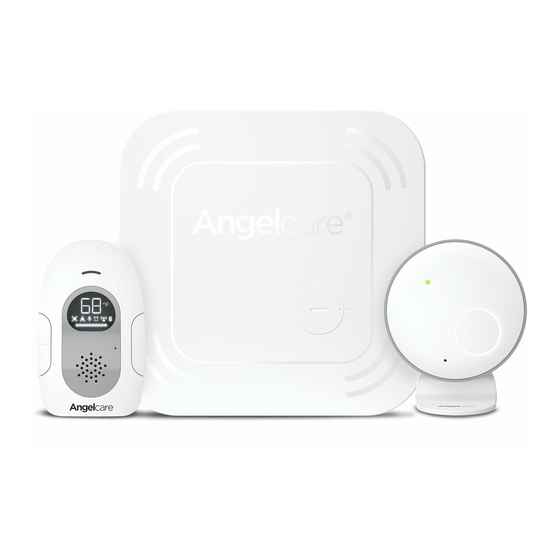
- Page 1 OWNER’S MANUAL AC117 Model AC115 Baby Sound and Movement Monitor...
-
Page 2: Table Of Contents
, stand behind all of our products. ® If you are not completely satisfied or have any questions, United States and Canada: Please contact us at: angelcare@cdecinc.ca Other countries: Please contact your local distributor. FCC AND IC REGULATIONS RF radiation exposure statement The Camera complies with FCC RF radiation exposure limits set forth for an uncontrolled environment. -
Page 3: Warnings
WARNINGS 1. T H I S P R O D U C T C A N N O T R E P L A C E assembly required. Exercise care when unpacking RESPONSIBLE ADULT SUPERVISION. This product and assembling the product and keep small parts is designed to aid in the monitoring of your child. - Page 4 Sensor Pad measuring at least 33 x 33 cm 15.15 Power Sources - Operate this product only monitor and 6 mm thick. Only use your Angelcare ® from the type of power source indicated on the in a stationary sleeping environment such as a crib type plate of the adaptor.
- Page 5 16.9 DO NOT attempt to recharge batteries 17.3 This device complies with part 15 of the FCC provided with or identified for use with this Rules. Operation is subject to the following two product that are not intended to be charged. The conditions: batteries may leak corrosive electrolyte or explode.
-
Page 6: Setup Requirements
(for Sensor Pad) Wireless Wired Movement Sensor Pad 6 Pre-threated cord covers with Split USB cable * Always place Angelcare logo side up * WHAT YOU WILL NEED (NOT INCLUDED): YOU MUST PREPARE: One hardboard (not included) Thickness: 1/4’’ (6 mm) Minimum dimensions: 13’’... -
Page 7: Charging The Parent Unit (10 Hours)
STEP 1 - CHARGING THE PARENT UNIT (10 HOURS) Battery compartment 1) Remove the batteries compartment on the backside. Insert the provided rechargeable batteries into the compartment. 2) Connect the USB plug to the Parent Unit. 3) Connect the power adapter with an electrical outlet. -
Page 8: Positioning The Movement Sensor Pad
WARNING STRANGULATION HAZARD. Children have STRANGLED in cords: • Keep adapter cords out of the reach of children (more than 3 feet [1 meter] away). • Because of the serious strangulation risk to infants and toddlers, parents and caregivers should never place the Nursery Unit within 3 feet (1 meter) of a crib. - Page 9 1) Remove the mattress from the crib. MATTRESS 2) Place the Sensor Pad-printed side up- in the center of the mattress. It should Angelcare be centered on the hardboard if your crib requires a hardboard support. 3) Replace the mattress.
- Page 11 WARNING • The Sensor Pad is not designed STRANGULATION HAZARD for use with adults, children or infants older than 24 months. • Remove all slack from Sensor Pad Cord. • Discontinue used of the Sensor Pad • When lowering the mattress support when child is older than 24 months.
- Page 12 Port Temperature Indicator STEP 4 - TURNING ON YOUR MONITOR YOU ARE NOW READY TO USE YOUR MONITOR The Angelcare ® monitor can be used with the pre-program factory settings or you can also customize your settings to your preference.
- Page 13 TURN ON YOUR MONITOR Press ON/OFF 1) Press the Parent Unit ON/OFF on the Parent button for 2 seconds. Unit 2) Press the Nursery Unit Power ON/OFF button for 2 seconds. NOTE: The screen of the Parent Unit will flashes the out-of-range icon till it displays the room temperature and function icons.
- Page 14 STEP 5 - TESTING AND GETTING TO KNOW YOUR MONITOR The Angelcare monitor can be used with the pre-program factory settings or you can also ® customize your settings to your preference. All changes and IMPORTANT adjustments made in When in MENU mode, sound...
- Page 15 SET THE TIC FUNCTION Allows you to detect baby’s movements as well as hear a TIC sound at each movement. (This function can ONLY be activated in conjunction with the Movement Function). IMPORTANT To activate the ‘’TIC’’ Function, the movement detection needs to be ON. 4) If you have activated the movement, the Parent Unit will allow you to set the ‘’TIC’’...
- Page 16 IF THE ALARM DOES NOT SOUND • Avoid contact with crib while Sensor Pad is in operation. • Place crib near a supporting wall. • Adjust Sensor Pad sensitivity level. • Turn OFF crib mobile, fans, loud music or anything else that may cause vibration. TO STOP THE ALARM Press PAUSE SENSOR PAD...
- Page 17 IMPORTANT • The Sensor Pad is not designed for use with adults, children or infants older than 24 months. • Once you are finished using the Sensor Pad, please remove it from the baby’s crib and store it away. 5.5 - SOUND TO ACTIVATE SOUND: 1) Press and hold the MENU Button then press the OK button till the...
- Page 18 5.6 - SOUND TRANSMISSION (VOX) Your monitor is ‘Sound Activated’. This means that it will transmit sounds only when it detects them. It will detect even the softest levels of crying. To save power, after 10 seconds, the sound transmission will stop if no sound is detected. Once sound is detected transmission will automatically activate.
- Page 19 TO ACTIVATE THE TEMPERATURE ALARM 1) Press and hold the MENU button then press OK button till the Temperature Indicator icon blinks. The Temperature Indicator (Low and High) will blinks. 2) Use the UP and DOWN arrows to turn temperature alarm ON or OFF. 3) Press OK button to confirm your choice.
-
Page 20: Activating And Deactivating Additional Functions
STEP 6 - ACTIVATING AND DEACTIVATING ADDITIONAL FUNCTIONS 6.1 - ACTIVATE OR DEACTIVATE TEMPERATURE INDICATOR ON NURSERY UNIT With this option the Nursery Unit Temperature Indicator will light up in colour when the temperature goes above or below your preferences. If the temperature goes above your set preferences and this option is turned ON, the light on the Nursery Unit’s will turn to red instead of the default white. - Page 21 6.3 - PAGER Allows you to locate the Parent Unit. TO LOCATE THE PARENT UNIT Press and hold Press and hold the Nursery Unit Pager the Pager button button on the side of the Nursery Unit. The Parent Unit will emit a paging sound.
-
Page 22: Troubleshooting
TROUBLESHOOTING TAKING CARE OF YOUR RECHARGEABLE BATTERIES • Ensure that you fully charge your batteries for 10 hours before their first use. • To maintain maximum battery life it is recommended that you fully discharge your batteries periodically. Battery performance can be diminished by leaving the batteries constantly charging. - Page 23 WEAK RECEPTION • Bring units closer together. • Change the position of one or both units. • Place units on a flat surface away from baby’s reach. • Replace the batteries or recharge the Parent Unit. STATIC, DISTORTION, INTERFERENCES (FROM OTHER MONITORS, WIRELESS PHONES, WALKIE-TALKIES, ETC...) •...
-
Page 24: Limited Warranty
Angelcare ® monitor is free from any accessories which are not Angelcare-branded, or material and workmanship defects for the term of any problems that result from usage that is not the warranty period (see warranty table below to in accordance with product instructions, failure determine the warranty for your country). - Page 25 SAR Information Statement Your baby monitor Parent Unit is a radio transmitter and receiver. It is designed and manufactured not to exceed the emission limits for exposure to radiofrequency (RF) energy set by the Federal Communications Commission of the the U.S. Government. These limits are part of comprehensive guidelines are based on standards that were developed by independent scientific studies.
- Page 28 www.angelcarebaby.com...
Need help?
Do you have a question about the AC117 and is the answer not in the manual?
Questions and answers