
Related Manuals for Angelcare AC1100-A


Summary of Contents for Angelcare AC1100-A
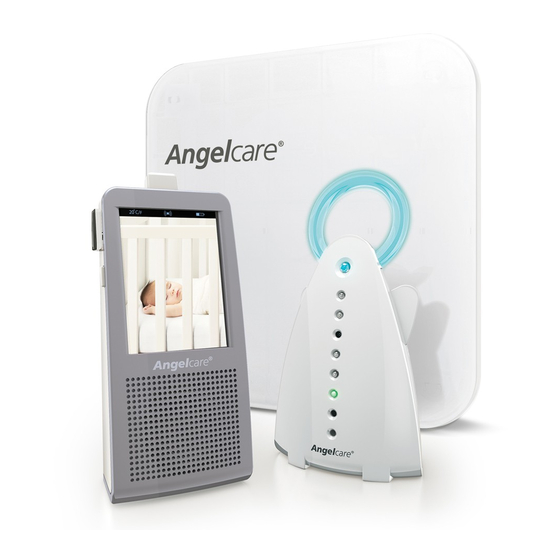
- Page 1 FOR YOUR PEACE OF MIND OWNER’S MANUAL VIDEO, MOVEMENT & SOUND MONITOR Model AC1100-A...
-
Page 2: Table Of Contents
Keep small parts away from children when assembling. We, at Angelcare , stand behind all of our products. ® If you are not completely satisfied or have any questions, United States and Canada: please contact us at: angelcare@cdecinc.ca Other countries: please contact your local distributor. -
Page 3: Warnings
WARNINGS 1. THIS PRODUCT CANNOT REPL ACE 8. Keep monitor AWAY from heat sources RESPONSIBLE ADULT SUPERVISION. This (such as stoves, radiators, etc.). product is designed to aid in the monitoring of your child. When using the monitor, you 9. ALWAYS place both the Nursery Unit must still provide the supervision necessary and the Parent Unit on a flat surface in for the continued safety of your child. - Page 4 15. IMPORTANT SAFETY INSTRUCTIONS 15.10 Accessories - Only use attachments/ accessories specified by the manufacturer. DO NOT place this product on an unstable 15.1 Read these instructions - All the safety cart, stand, tripod, bracket or table. The instructions should be read before the product may fall, causing serious injury product is operated.
- Page 5 Sensor Pad measuring at least 13” x 13” contact with them may be fatal. (33 x 33 cm) and 1/4 inch (6 mm) thick. Only use your Angelcare monitor in a ® stationary sleeping environment such as 15.20 WARNING Strangulation Hazard —...
- Page 6 16. IMPORTANT SAFETY INSTRUCTIONS RELATED TO USE OF BATTERIES 16.1 Use O N LY the t ype and size of 16.9 DO NOT attempt to recharge batteries batteries specified in the owner’s manual. provided with or identified for use with There is a risk of explosion if batteries are this product that are not intended to be replaced with an incorrect type.
- Page 7 WARNING (North America Only) 17.1 Modifications not authorized by the 17.4 This device complies with the part 15 manufacturer may void users authority to of the FCC Rules and the Industry Canada operate this device. licence - exempt RSS standards(s). Operation is subject to the following two conditions: 17.2 NOTE: This equipment has been tested (1) This device may not cause harmful...
-
Page 8: Ac1100-A Setup Requirements
VIDEO, MOVEMENT SETUP REQUIREMENTS & SOUND MONITOR Model AC1100-A INCLUDED: Rechargeable Nursery Unit Charging Cradle Belt Clip Parent Unit Sensor Pad with pre-installed cord covers 2 AC Adapters 3 Rechargeable AAA Batteries for Parent Unit WHAT YOU WILL NEED (NOT INCLUDED):... -
Page 9: Step 1 - Charging The Parent Unit (10 Hours)
STEP 1 - CHARGING THE PARENT UNIT (10 HOURS) IMPORTANT Never use regular alkaline batteries in the Parent Unit; they may explode. 1) Remove the Belt Clip. 2) Remove the battery door and insert the Rechargeable Batteries (included). 3) Connect the AC Adapter to the Charging Cradle and into an electrical outlet. -
Page 10: Step 2 - Installing The Sensor Pad
STEP 2 - INSTALLING THE SENSOR PAD Cord covers 1, 2, 3, 4: Position on floor Cord cover 4: Contains double sided tape to securely install beneath crib leg Cord cover 5: Position vertically between mattress support and floor Sensor Pad with pre-installed cord covers Cord cover 6: Place under the mattress... - Page 11 2.2 - SELECT THE CRIB LEG YOU WILL BE USING TO SECURE THE CORD COVERS RECOMMENDED 1) Use the crib leg by the wall closest to the Nursery Unit (Fig. 1). In cases where the Nursery Unit is across the room, use the leg closest to the Nursery Unit to position the covered wire (Fig.
- Page 12 6) Place the 6 cord cover approximately 3’’ (8 cm) from the edge of the mattress support. 7) Snap together the remaining cord covers that will run along the floor. 8) Remove any cord slack to make sure CLIC! no parts of the cord are loose. 9) Peel off the double-sided tape on the cord cover and place it securely under the crib leg.
-
Page 13: Step 3 - Setting Up The Nursery Unit
STEP 3 - SETTING UP THE NURSERY UNIT 1) Remove the battery door and insert 3 AAA Alkaline Batteries (not included). 2) Place the Nursery Unit at a minimum of 3 ft (0.9 m) away from the crib. 3) Connect the AC Adapter to the Nursery Unit and into an electrical outlet. -
Page 14: Step 4 - Turning On Your Monitor
STEP 4 - TURNING ON YOUR MONITOR 1) Press the Parent Unit ON/OFF button for 2 seconds until blue screen appears. 2) The Parent Unit will display Video mode screen. 3) Press the Menu icon to access main menu. 4) The Parent Unit will display Menu mode. -
Page 15: Step 5 - Testing And Getting To Know Your Monitor
STEP 5 - TESTING AND GETTING TO KNOW YOUR MONITOR The Angelcare monitor can be used with the pre-program factory settings or you can ® also customise your settings to your preference. IMPORTANT All changes and adjustments made When in Menu or Sub-menu modes,... - Page 16 TO STOP THE ALARM Press the Nursery Unit’s Main button Press the Parent Unit Movement Alarm icon Hold down left ‘wing’ button for two seconds to turn OFF the Unit TO ADJUST THE SENSOR PAD SENSITIVITY LEVEL: 1) Press Menu icon to access main menu.
- Page 17 5.2 - SOUND 1) Press Menu icon to access main menu. TO ACTIVATE SOUND: 2) Press sound icon to activate or deactivate sound. 3) Press OK icon to confirm. TO TEST SOUND: IF YOU HEAR NO SOUND: Ask someone to speak into the Nursery Unit or place the unit near a radio to ensure •...
- Page 18 YOU ARE NOW READY TO USE YOUR MONITOR The Angelcare monitor can be used with the pre-program factory settings ® or you can also customise your settings to your preference. DEFAULT SETTINGS Sound Mode: ON Speaker Volume: Level 3 (of 6)
-
Page 19: Step 6 - Activating And Deactivating Additional Functions
STEP 6 - ACTIVATING AND DEACTIVATING ADDITIONAL FUNCTIONS IMPORTANT All changes and adjustments made When in the Menu or Sub-menu in the main menu and modes, sound transmission between sub-menus will not be Parent and Nursery Units will be activated unless you temporarily deactivated. - Page 20 When in Setting mode no sound or alarms will transmit to the Parent Unit, except the Movement Alarm (if this function was already activated). 6.3 - HOLD Allows you to put your Angelcare Monitor on HOLD. 1) Press the Menu icon to access main menu.
- Page 21 6.4 - THERMOMETER TO CHANGE THE MEASUREMENT UNIT: 1) Press the Menu icon to access main menu. 2) Press the Temperature icon to access sub-menu. 3) Press the ˚C ˚F icon to change from ºC ºF Celsius to Fahrenheit. 4) Press OK to confirm. ºC ºC Celsius...
- Page 22 6.5 - VIDEO Allows you to turn video function ON or OFF. 1) Press the Menu icon to access main menu. 2) Press the Video icon to activate or deactivate the video function. 3) Press OK to confirm. 4) Press the Menu icon to return to main menu.
- Page 23 6.7 - INFRARED NIGHT VISION Allows you to capture image when lighting is unsufficient. TO ACTIVATE NIGHT VISION: Press the Night Vision icon to chose available modes: AUTO: The infrared LEDS will turn ON automatically when the lighting is not sufficient. The image transition takes 20 seconds ON: The infrared LEDS are ON at all times.
- Page 24 6.10 - ZOOM MODE Allows you to zoom in to twice the normal view. 1) Press the Zoom icon. 2) Press the directional arrows to zoom in on what you want to see more closely. 3) Press the Zoom icon again to return to normal view.
-
Page 25: Troubleshooting
TROUBLESHOOTING TAKING CARE OF YOUR RECHARGEABLE BATTERIES • Ensure that you fully charge your batteries for 10 hours before their first use. • To maintain maximum battery life it is recommended that you fully discharge your batteries periodically. Battery performance can be diminished by leaving the batteries constantly charging on the charging cradle. - Page 26 If you are not completely satisfied or have any questions: United States and Canada: please contact us at: angelcare@cdecinc.ca Other countries: please contact your local distributor. We may have a simple solution to your problem.
-
Page 27: Limited Warranty
® ® and sound monitor (model AC1100-A) is free from any material and workmanship defects, for a period of one (1) year from the date of the original purchase. If this monitoring system fails to function properly when used as directed under normal conditions within the one... -
Page 28: Technical Specifications
Unit and Nursery Unit is made on the 7.5V DC Adapter for Nursery Unit. 2.4GHz frequency. 3 AAA rechargeable batteries and 7.5V DC Hereby, Angelcare Monitors Inc, declares adapter for Charging Base for the Parent this baby monitor is in compliance with the Unit. -
Page 29: Français
www.angelcarebaby.com...
Need help?
Do you have a question about the AC1100-A and is the answer not in the manual?
Questions and answers