
Related Manuals for Accu-Scope EXC-350-PH


Summary of Contents for Accu-Scope EXC-350-PH
- Page 1 MANUAL EXC-350 MICROSCOPE SERIES 100 Lauman Lane, Suite A, Hicksville, NY 11801 Tel: (877) 877-7274 | Fax: (516) 801-2046 Email: Info@nyscopes.com www.microscopeinternational.com...
-
Page 3: Table Of Contents
....................13 APERTURE DIAPHRAGM ......................14 OIL OBJECTIVE ........................... 14 FILTER FUSE REPLACEMENT ....................14 CAMERA ADAPTER ..................... 15 SIMPLE POLARIZER ....................16 LED FLUORESCENCE .................... 17-18 TROUBLESHOOTING ....................19-21 MAINTENANCE........................22 SERVICE ..........................22 WARRANTY ........................22 ® ACCU-SCOPE... -
Page 4: Safety Notes
4. Store the instrument in a cool, dry environment. Cover the microscope with the dust cover when not in use. ® 5. ACCU-SCOPE microscopes are precision instruments which require periodic preventative maintenance to maintain proper performance and to compensate for normal wear. An annual schedule of preventative maintenance by qualified personnel is highly recommended. -
Page 5: Introduction
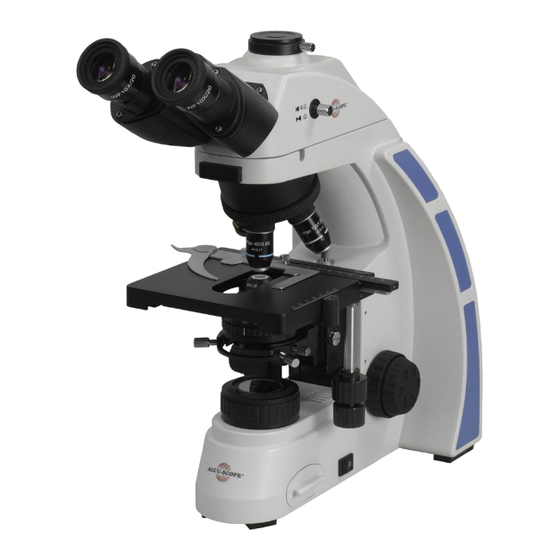
Your microscope will ® last a lifetime if used and maintained properly. ACCU-SCOPE microscopes are carefully assembled, inspected and tested by our staff of trained technicians in our New York facility. Careful quality control procedures ensure each microscope is of the highest quality prior to shipment. - Page 6 EXC-350 MICROSCOPE SERIES COMPONENTS DIAGRAM Lock Screw Trinocular Head Eyepiece Nosepiece Objective Focus Block Stage Y-Axis Adjustment Knob Condenser Fine Focusing Knob Field Iris Diaphragm Light Source Coarse Focusing Knob Power Switch X-axis Adjustment Knob ® ACCU-SCOPE...
- Page 7 Trinocular Head Eyepiece Fluorescence Light Adjustment Knob Adjustment Knob LED Fluorescence Illuminator LED Fluorescence Indicator Lock Screw Light Shield Nosepiece Objective Stage Focus Block Condenser Fine Focusing Knob Field Iris Diaphragm Coarse Focusing Knob Light Source Power Switch ® ACCU-SCOPE...
-
Page 8: Assembly Diagram & Procedure
When assembling the microscope, make sure that all parts are free of dust and dirt, and avoid scratching any parts or touching glass surfaces. ③ Eyepieces ② Objectives ① ⑤ Condenser Power Cord ④ Light Source ® ACCU-SCOPE... - Page 9 EXC-350 MICROSCOPE SERIES ASSEMBLY DIAGRAM EXC-350-470 Fluorescence Microscope Binocular Head ⑥ Eyepieces ③ ⑨ ① ② LED Fluorescence Illuminator Light Shield Power Cord ④ Objective ⑧ ⑤ Condenser ⑦ Light Source ® ACCU-SCOPE...
- Page 10 Fig. 3 Eyepieces ① Remove the eyepiece caps ② ③ Insert the eyepiece into the eyepiece tube until it touches the surface of the eyepiece tube Repeat above for the other eyepiece (see Fig. 3). ® ACCU-SCOPE...
- Page 11 90 ~ 240v when used with the appropriate line cord. An optional cord hanger can be installed on your microscope for simple and easy Photo 2 storage. (see Photos 1 & 2) Optional Cord Hanger Shown With Cord ® ACCU-SCOPE...
-
Page 12: Illumination
Repeat several times to check. NOTE: do not counter rotate the focusing knob as this will cause severe problems and damage to the ③ ① focusing system. (Fig. 8) Fig. 8 ® ACCU-SCOPE... -
Page 13: Interpupillary Distance
, then that is the number for the (Fig. 11). interpupillary distance. Range:50~75mm. Remember your interpupillary for future operation. NOTE: The eyepiece tubes can be rotated 180° to increase the eyepoint height by 34mm to accommodate the needs of different users. (Fig. 12) Fig. 12 ® ACCU-SCOPE... -
Page 14: Condenser
③ resolution are increased; however, the contrast and range of focus are diminished. For optimal viewing conditions set the condenser aperture diaphragm lever to match the Fig. 16 magnification of the objective in the optical path (Fig. 16). ® ACCU-SCOPE... -
Page 15: Oil Objective
Using & Installing A Filter A filter is used to make the background color more suitable for the application and as a method to increase the contrast. (Fig. 18) Filters are available in clear blue, frosted blue, green, yellow and white. ® ACCU-SCOPE... -
Page 16: Camera Adapter
Observe the image through the eyepieces and bring it into focus. Look at the camera image and adjust the focus of the camera image via the rotating ring ③ until it matches the focus as seen through the eyepieces. ® ACCU-SCOPE... -
Page 17: Simple Polarizer
Place the polarizer in the groove on top of the field iris diaphragm as shown. ② ① Rotation of the polarizer ④ will change the orthogonal status of polarization. NOTE: When the image is darkest as you viewed ③ ④ through the eyepieces, polarization has been achieved. Fig. 21 ® ACCU-SCOPE... -
Page 18: Led Fluorescence
“OFF” position. To connect the external transformer power supply, ② ① ① insert the one end of the transformer into the LED ② fluorescence illuminator socket . Insert the other end into an electrical outlet. (Fig. 24) Fig. 24 ® ACCU-SCOPE... - Page 19 ON (illuminator) and fluorescence observation is possible. When the LED fluorescence filter block adjustment knob is turned to BRIGHTFIELD, the indicator light on the front of the illuminator unit is OFF and brightfield observation is possible. ® ACCU-SCOPE...
-
Page 20: Troubleshooting
No immersion oil used Use immersion oil with100xR objective Air bubbles in immersion oil Remove bubbles Condenser aperture is closed Open or close properly or open too much Condenser is positioned too Position the condenser slightly lower than the upper limit ® ACCU-SCOPE... - Page 21 Turn the slide over so the slide when changed from low cover glass faces up power objective Cover glass is to thick Use a 0.17mm cover glass Diopter adjustment is not set Readjust the diopter settings properly as outlined in section 4.3 ® ACCU-SCOPE...
- Page 22 Slippage of focus when using Tension adjustment is set too Increase the tension on the the coarse focusing knob focusing knobs Fine focus is ineffective Tension adjustment is set too Loosen the tension on the high focusing knobs ® ACCU-SCOPE...
-
Page 23: Maintenance
SCOPE at (631) 864-1000. This warranty is limited to the continental United States of America. All items returned for warranty repair must be sent freight prepaid and insured to ACCU-SCOPE INC., 73 Mall Drive, Commack, NY 11725 – USA. All warranty repairs will be returned freight prepaid to any destination within the continental United States of America, for all foreign warranty repairs return freight charges are the responsibility of the individual/company who returned the merchandise for repair.
Need help?
Do you have a question about the EXC-350-PH and is the answer not in the manual?
Questions and answers