Sign In
Upload
Download
Table of Contents
Contents
Add to my manuals
Delete from my manuals
Share
URL of this page:
HTML Link:
Bookmark this page
Add
Manual will be automatically added to "My Manuals"
Print this page
×
Bookmark added
×
Added to my manuals
Manuals
Brands
Pantum Manuals
Printer
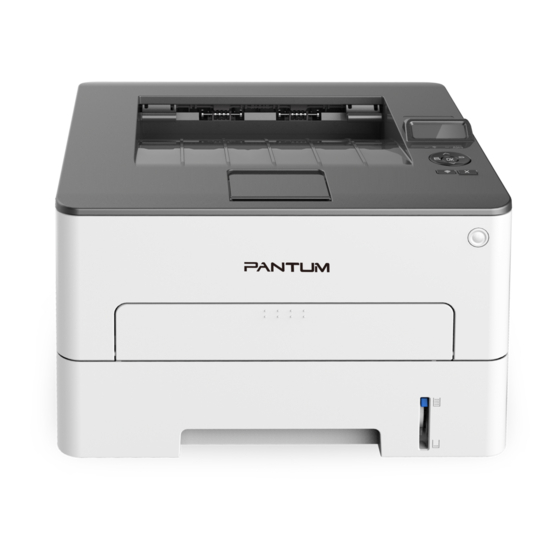
P3312DW
User manual
Pantum P3312DW User Manual
Monochrome laser printer
Hide thumbs
1
2
3
4
5
6
7
Table Of Contents
8
9
10
11
12
13
14
15
16
17
18
19
20
21
22
23
24
25
26
27
28
29
30
31
32
33
34
35
36
37
38
39
40
41
42
43
44
45
46
47
48
49
50
51
52
53
54
55
56
57
58
59
60
61
62
63
64
65
66
67
68
69
70
71
72
73
74
75
76
77
78
79
80
81
82
83
84
85
86
87
88
89
90
91
92
93
94
95
96
97
98
99
100
101
102
103
104
105
106
107
108
109
110
111
page
of
111
Go
/
111
Contents
Table of Contents
Troubleshooting
Bookmarks
Table of Contents
Table of Contents
Before Using the Printer
Product Series Introduction
Supplied Accessories
Product View
Laser Toner Cartridge
Control Panel
Overview of Control Panel
Indicator Function of Control Panel
Paper and Print Media
Paper Specification
Special Paper
Loading Paper
Loading into the Automatic Feeder Tray
Install Manual Feed Tray
Non-Printable Area
Paper Application Rules
Driver Installation and Uninstallation
How to Install Windows Printer Driver
One-Click Installation
Manual Installation
Method of Driver Unistallation
Mac System Driver Installation
Driver Installation
Add Printer to Mac System
Add up the Printer Via USB
Aadd up the Printer Via Wireline Connection
Add up the Printer Via Wireless Connection
Add Airprint Printer
Wired Network Setup (Applicable to Wired Network Models)
Set IP Address
Automatic Setting
Manual Setting
Wireless Network Setup (Applicable to Wi-Fi Models)
Basic Structure Mode
Wireless Network Setup Tools
Wi-Fi Protected Setup (WPS) Setup
How to Disable the Wi-Fi Network Connected
Wi-Fi Direct Mode
Preliminary Preparations
Wi-Fi Direct Connection
How to Disable the Wi-Fi Direct
Wireless Network Setup Faqs
Web Server
Visit the Embedded Web Server
Use Web Server to Manage Printer
IP Address Setup
Wireless Setup
Machine Setup
Print
Print Function
Print Settings
Cancel Printing
Printing Mode
Printing with the Automatic Feeder Tray
Printing with Manual Feed Tray
Automatic Two-Sided Printing
Duplex Printing Unit Setup
How to Carry out Auto Duplex Printing
Fine Mode Printing
Mute Printing
Auto Shut-Off Setting
Open Help Document
Mobile Print
Android Device Mobile Printing
Pantum
Mopria Mobile Print
NFC Function
IOS Device Mobile Printing
Pantum
Airprint Mobile Print
General Settings
System Setting
Language Setting
Sleep Time Setting
Toner Save
Mute Printing
Restore Factory Settings
Print a Page for Clean & Fix
Auto Shut-Off Setting
Network Settings
Network Information
Print Information Report
Routine Maintenance
Cleaning the Printer
Toner Cartridge and Drum Component Component Maintenance
About Toner Cartridge and Drum Component Component
Replace Toner Cartridge and Drum Component
Troubleshooting
Cleaning Jammed Paper
Paper Jam of Auto Feed Tray
Paper Jam of Manual Feed Tray
Middle Jam
Paper Jam in the Fuser Unit
Duplex Unit Jam
Software Failure
Common Troubleshooting
Common Problems
Image Defects
Menu Structure
Product Specifications
Overview of Thespecifications
Advertisement
Quick Links
1
Table of Contents
2
Control Panel
Download this manual
Table of
Contents
Previous
Page
Next
Page
1
2
3
4
5
Advertisement
Table of Contents
Troubleshooting
Troubleshooting
96
Common Troubleshooting
103
Need help?
Do you have a question about the P3312DW and is the answer not in the manual?
Ask a question
Questions and answers
Related Manuals for Pantum P3312DW
Printer Pantum P3060 Series Manual
Monochrome laser printer (115 pages)
Printer Pantum P3010 Series User Manual
Monochrome laser printer (108 pages)
Printer Pantum P3010 SERIES User Manual
Monochrome laser printer (95 pages)
Printer Pantum P3010 Series Maintenance Manual
Laser duplex printer (84 pages)
Printer Pantum P3010 Series Faq
Serial printers (81 pages)
Printer Pantum P3000 Series User Manual
High-speed monochrome laser printer (69 pages)
Printer Pantum P3000 Series Maintenance Manual
(94 pages)
Printer Pantum P3000 Series Faq
(36 pages)
Printer Pantum P3502DN User Manual
Monochrome single function laser printer (100 pages)
Printer Pantum P3500 Series Maintenance Manual
(137 pages)
Printer Pantum P3500 Series User Manual
Pcl monochrome single function laser printer (100 pages)
Printer Pantum P3500 Series Faq
(92 pages)
Printer Pantum P3500DN Faq
(36 pages)
Printer Pantum P3020 Series User Manual
Monochrome laser printer (95 pages)
Printer Pantum P3320 Series User Manual
Monochrome laser printer (95 pages)
Printer Pantum P3305DN Manual
Monochrome laser printer (115 pages)
This manual is also suitable for:
P3060 series
P3300 series
P2800dw series
P3010dw series
P3300dn series
P3300dw series
...
Show all
P3010 series
P3305dw
Table of Contents
Print
Rename the bookmark
Delete bookmark?
Delete from my manuals?
Login
Sign In
OR
Sign in with Facebook
Sign in with Google
Upload manual
Upload from disk
Upload from URL


Need help?
Do you have a question about the P3312DW and is the answer not in the manual?
Questions and answers