Pantum P3500 Series User Manual
Pcl monochrome single function laser printer
Hide thumbs
Also See for P3500 Series:
- Faq (92 pages) ,
- User manual (100 pages) ,
- Maintenance manual (137 pages)

Subscribe to Our Youtube Channel
Related Manuals for Pantum P3500 Series


Summary of Contents for Pantum P3500 Series
- Page 1 User Guide Pantum P3500 Series PCL Monochrome Single Function Laser Printer It is recommended to carefully read this Guide before using the printer...
-
Page 2: Legal Notice
Zhuhai Pantum Electronics Co.,Ltd. Version: V1.0 Disclaimer For a better user experience, Zhuhai Pantum Electronics Co.,Ltd. reserves the right to make changes to the User Guide. The information contained herein is subject to change without notice. -
Page 3: Safety Precautions
The following label is attached to the laser components inside the printer: Reclamation and recycling To protect the environment, our corporation has already established the system of reclamation and recycling for waste products. Please refer to the Pantum official website for product recovery at www.pantum.com. Safety Warning... - Page 4 22. This product is a kind of low-voltage equipment. When using this product below the specified voltage range, please refer to the product precautions or call Pantum Aftersales Service Centre, if the toner comes off the printed contents, or the equipment starts slowly;...
- Page 5 23. This product is sold as a complete machine. The consumers can go to Pantum Aftersales Service Centre to purchase parts they need. If the product sold is inconsistent with the package list, please go to the specified Aftersales Service Centre to solve the problem;...
-
Page 6: Legal Information
Member States relating to electromagnetic compatibility and safety of electrical equipment designed for use within certain voltage limits. The manufacturer of this product is: Zhuhai Pantum Electronics Co.,Ltd., No.3883, Zhuhai Avenue, Zhuhai, Guangdong, China 519060. A declaration of conformity to the requirements of the Directives is available upon request from the Authorized Representative. - Page 7 Table of Contents 1. Before Using the Printer .........................1-2 1.1. Packing List ..........................1-2 1.2. Product View ..........................1-3 1.3. Laser Toner Cartridge ......................1-5 1.4. Control Panel ...........................1-6 1.5. Print the Product Report ......................1-7 2. Paper and Print Media ........................2-2 2.1. Paper Specification ........................2-2 2.2.
- Page 8 8. Routine Maintenance........................8-2 8.1. Cleaning the Printer .........................8-2 8.2. Maintenance of Laser Toner Cartridge ..................8-3 8.2.1. About Laser Toner Cartridge ....................8-3 8.2.2. Replace Laser Toner Cartridge ..................8-4 9. Troubleshooting ..........................9-2 9.1. Clearing Jammed Paper ......................9-2 9.1.1. Paper Jam in the Tray ......................9-2 9.1.2.
-
Page 9: Before Using The Printer
Before Using the Printer Chapter 1. Before Using the Printer .........................1-2 1.1. Packing List ..........................1-2 1.2. Product View ..........................1-3 1.3. Laser Toner Cartridge ......................1-5 1.4. Control Panel ...........................1-6 1.5. Print the Product Report ......................1-7... -
Page 10: Before Using The Printer
When you open the package, make sure that the following parts are included in the carton: Parts Name Quantity Printer Laser Toner Cartridge USB Interface Cable Power Cord CD-ROM Quick Setup Guide Pantum Warranty • The Pantum Warranty may not be attached in some regions. Note:... -
Page 11: Product View
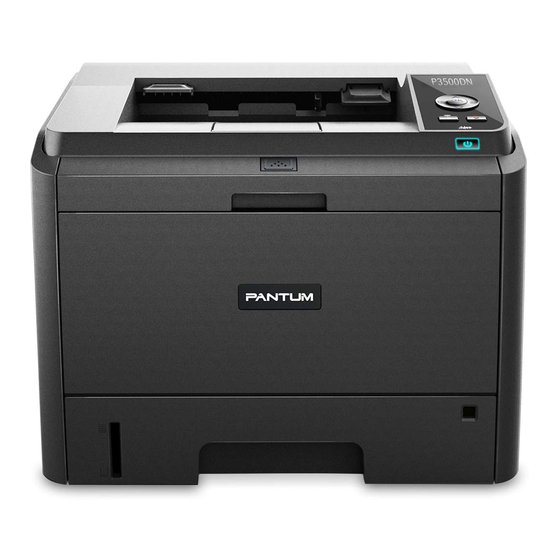
1.2. Product View Side view Output Bin For storing the printed paper To indicate the printer status and conduct the print settings Control Panel operation Output Tray To prevent the printed paper from falling Front Cover To open the front cover to take out the laser toner cartridge Multipurpose Input To open the front cover of the multipurpose input tray, and Tray... -
Page 12: Power Cord
Rear view USB Interface For directly connecting with the computer Network Interface For connecting the printer to the network Power Interface For connecting the power cord Rear Cover To be opened for checking the jammed paper For releasing jammed paper at the rear during duplex Duplex Printing Unit printing •... -
Page 13: Laser Toner Cartridge
• We do not recommend using consumables other than that of the original Pantum consumables. • Any damages caused by using non-Pantum original consumables are not covered by the Warranty. • The appearances of laser toner cartridges will vary with different types,... -
Page 14: Control Panel
1.4. Control Panel 1. Layout and Functions of Control Panel The layout of the printer control panel is shown below: Name Functions The display provides information about the printer and can be LCD Display used for setting up the Product Settings. Press this button to browse through each menu and its options. -
Page 15: Print The Product Report
2. Status Indicator The multi-colored LED indicator will display red, orange and green with the specific meanings as follows: Red indicates the emergence of a serious error, such as the laser toner cartridge is not installed, the laser toner cartridge does not match the printer, or the paper tray is out of paper;... -
Page 16: Paper And Print Media
Paper and Print Media Chapter 2. Paper and Print Media ........................2-2 2.1. Paper Specification ........................2-2 2.2. Loading Paper .........................2-4 2.2.1. Loading into Standard Input Tray ..................2-4 2.2.2. Loading into Multipurpose Input Tray .................2-6 2.2.3. Loading into Optional Tray ....................2-7 2.3. Non-printing Area ........................2-8... -
Page 17: Paper Specification
2. Paper and Print Media 2.1. Paper Specification Media type Plain, thin paper Auto*, A4, A5 Short Edge, A5 Long Edge, A6, JIS Media size B5, IS0 B5, B6, Letter, Legal, Executive, Folio, Oficio, Statement, 16K, Big 16K, 32K, Big 32K. Standard Input Tray Media weight... - Page 18 This may be due to incorrect operation, inappropriate temperature and humidity, or other factors beyond the control of Pantum. Before purchasing large quantities of print media, make sure that the print media meets the specifications specified in this User Guide.
-
Page 19: Loading Paper
Please observe the following standards: Types of Print Correct Practices Incorrect Practices Media Use labels with no exposed lining paper only. Labels shall be put flat when using. Use wrinkled, blistering or damaged Label Use labels of full sheet only. labels. - Page 20 3. Unfold the stacked paper before loading to avoid paper jam or paper feed error, and then load the paper into the tray with the print-side down; the standard input tray can be loaded with 250 pages (80 g/m²) at maximum. •...
-
Page 21: Loading Into Multipurpose Input Tray
2.2.2. Loading into Multipurpose Input Tray 1. Raise the output tray to avoid the printed paper from slipping and falling, or immediately remove the printed document after the printing is completed. 2. Open the Multipurpose Input Tray 3. Slide the paper guides of the multipurpose input tray to match both sides of the paper. Do not exert too much force, otherwise it will cause paper jam or paper skew. -
Page 22: Loading Into Optional Tray
2.2.3. Loading into Optional Tray The optional trays can be overlaid for this printer, with each tray loaded with 550 pages (80 g/ m² ) at maximum. If you need the optional trays, please contact the local distributor from whom you bought the printer. •... -
Page 23: Non-Printing Area
• The printer tray is designed with the "paper type dial" for commonly used paper Note: size, which can be adjusted as required. When the paper type used for printing is different from that the dial sets, the LCD display of the printer will show "Optl tray I, PaprSize Mismat."... -
Page 24: Installation And Uninstallation Of The Driver Software
Installation and Uninstallation of the Driver Software Chapter 3. Installation and Uninstallation of the Driver Software ..............3-2 3.1. Windows-based Driver ......................3-2 3.1.1. Introduction ........................3-2 3.1.2. Installation Steps ........................3-2 3.1.3. Driver Uninstallation ......................3-11 3.2. Installation of the Driver Software based on Mac System .............3-13... - Page 25 • User authentication will be performed before the program runs. If the user is an administrator, this interface will display. If the user is not an administrator, the prompt "Insufficient privileges. Please install the Pantum xxxx Series printer with administrator privileges" will pop up.
- Page 26 2) Installation Interface After the running of Autorun completes, the following installation interface appears: • The information shown on the interface may vary with different printer models. Note: Description of Options: • Installation Language: it is the language corresponding to the operating system by default, and users can select different languages according to their different needs.
- Page 27 Click "Back" to return to the original interface. 3) Installation Process Interface Select Install to enter the Driver Installation Process interface.
- Page 28 If Windows cannot verify the publisher of this driver software during the driver installation process, you will be prompted whether to still proceed with the installation. Then, you need to click Continue Anyway or Install this Driver Software Anyway, otherwise it will cause an unsuccessful installation (Different operating systems may pop up slightly different warning display interface).
- Page 29 2) Installation Configuration After the running interface, it will enter the Installation Configuration interface. Users can select the corresponding series name, language and installation method according to the printer model to be installed. Installation Instruction: USB Printer: applicable to the local installation of all models. Printers connected to the network: applicable to NET Model Network Installation;...
- Page 30 Printers connected to a new network: only applicable to the configuration of WiFi for models with WiFi function. 1. Wired NET Model Installation 1) The following interface will display, if users install the Wired NET Model: Users select the corresponding wired NET Model through "Select Printer", and the corresponding installation options are available through Installation mode.
- Page 31 3) Printer List After searching for printers, the program will automatically enter the "Select Printer" interface. Users can select the found printer or add printer by manually adding IP or Host Name. • When the installer prompts you to select a printer, you can select the Note: appropriate printer name from the Detected Printer;...
- Page 32 2. WiFi Model Installation 1) If users install the WiFi Model, the following interface will display: Users select the corresponding WiFi Model through "Select Printer", and the corresponding installation options are available through Installation mode. Generally, users select the third installation method at the first-time installation.
- Page 33 • At the first installation, user can also install WiFi Model through WiFi Note: Configuration interface and connect the printer to WiFi. Please refer to Chapter 4 for the specific setting steps of the WiFi configuration tools. During the driver installation, if "Windows cannot verify the publisher of this driver software" pops up to ask users whether to continue installation or not, users should click on "Install this driver software anyway".
-
Page 34: Driver Uninstallation
3.1.3. Driver Uninstallation 1) Select Uninstallation Mode. Click Start > All Programs to find the "Pantum" folder, and then click the name of the product to be uninstalled to enter the uninstallation interface. Or click Start > Control Panel, and then click Uninstall Programs to find the product to be uninstalled, with the uninstallation interface shown as follows. - Page 35 Click OK in the message box, the message box interface will disappear. If any task remains in the print queue, a warning will pop up, saying "The Pantum P3500 Series Laser Printer is in use. Please uninstall the driver after the printing is completed." See the figure below: 4) Complete Interface.
-
Page 36: Installation Of The Driver Software Based On Mac System
3.2. Installation of the Driver Software based on Mac System Introduction Mac driver installer is made by using the PackageMaker software that comes with the Mac System. The installation style is basically consistent with the installation of the ordinary software under Mac. The installation is divided into the following steps: introduction, license, destination volume, installation type, installation, and summary. - Page 37 3. Click Continue, it will pop up the "To continue installing the software, you must agree to the terms of the software license agreement." dialog box. Click Agree to accept the License Agreement and continue the installation. 4. Installation Type Display the installation-related information, as shown below.
- Page 38 5. Installation The installation progress is shown below: 6. Summary Installation completes, as shown below: 3-15...
-
Page 39: Network Configuration
Network Configuration (For printer models that Chapter support wired/wireless network features) 4. Network Configuration (For printer models that support wired/wireless network features) ....4-2 4.1. Wired Network Configuration (For printer models that support wired network features) ..4-2 4.2. Wireless Network Configuration (For printer models that support wireless network features) ..4-2 4.2.1. -
Page 40: Network Configuration (For Printer Models That Support Wired/Wireless Network Features)
4. Network Configuration (For printer models that support wired/wireless network features) 4.1. Wired Network Configuration (For printer models that support wired network features) Printers that support wired network printing can be connected to the LAN or WAN, thereby the printer will work through a wired network connection. In this setting, the printer is directly connected to the network and can be set to allow all computers on the network to print directly on the printer, and achieve network sharing print. -
Page 41: Setting Up Through Wifi Configuration Tool
WiFi configuration tool is a computer software that helps users to set the printer SSID, encryption method and password. Use USB cable to connect the printer with the computer, then launch the Pantum wireless network configuration tool on your computer and conduct wireless network configuration on the printer. - Page 42 • After launching the configuration tool, the Network List interface appears with Note: the information found by the program, e.g., the name of the wireless network, which is sorted by SSID. Users can select an item in the list, and then double- click or click Next to enter the Information Input interface. • "Enter SSID Manually": click to switch to the Enter SSID Manually interface, i.e., Step 3. • "Refresh": Searching for wireless network information again. • "Next": Enter the Information Input interface. • "Cancel": The prompt of cancellation appears after clicking it. As shown below (click "OK" to exit, otherwise stay at the original interface). 3) Enter SSID Manually Click "Enter SSID Manually" to switch to the interface of manually entering the SSID. Enter the SSID for the printer to be connected in the "SSID" bar. Click Print Wireless Network Information Page to print the list of wireless networks detected by the printer.
- Page 43 • If the printer with current configuration has ongoing printing work, the following Note: error prompting window will pop up. 4) Information Input Configuration Entering the Information Input interface, users can set relative information of the wireless network. • Safe Mode is currently available in three types: None, WEP, and WPA/WPA2. Note: When it is None, the password entry field will be hidden, which means no password is needed while connecting the SSID provided.
- Page 44 If the printer with current configuration has ongoing printing work, the following error prompting window will pop up. 5) Configuration Completed After completing the above steps, the Wireless Network Configuration Result interface pops up. The configuration result will be displayed. If the configuration of the printer’s wireless network is successful, the following interface will pop up:...
- Page 45 The following message will appear if the printer is not connected to the computer: Please use the USB cable provided to connect your printer with the computer. Click "Next" and the program will automatically search for the printers connected to the PC currently.
- Page 46 The following message will appear if the printer fails to apply the configuration by using the wireless network provided: The printer cannot connect to any wireless networks with the wireless credentials provided. To reenter the credentials, please click Previous. The following message will appear if the printer can apply the configuration by using the wireless network provided, but the PC does not support the wireless network: "The printer can successfully connect to a wireless network with the wireless credentials provided.
- Page 47 4.2.2.2. Mac System Configuration The following operating systems are supported: Mac OS 10.6, 10.7, 10.8, 10.9, and 10.10. 1) Detect Wireless Network Card WiFi configuration tool can search the wireless network automatically by using a wireless card in the computer. If the computer does not have a wireless card, the option of "Enter SSID Manually"...
- Page 48 • After launching the configuration tool, the Network List interface appears with Note: the information found by the program, e.g., the name of the wireless network, which is sorted by SSID. Users can select an item in the list, and then double- click or click Next to enter the Information Input interface.
- Page 49 SSID: enter the service set identifier of the network for the printer to be connected, with the maximum length of 32 characters. Print Wireless Network Information Page: allow you to print the list of wireless networks detected by the printer. Next: enter the Information Input interface.
- Page 50 • Safe Mode is currently available in three types: None, WEP, and WPA/WPA2. Note: When it is None, the password entry field will be hidden, which means no password is needed while connecting the SSID provided. The range for WEP entry is 1-26 characters, and that of WPA/WPA2 is 8-64 characters.
- Page 51 The following message will appear if the printer is not connected to the computer: Please use the USB cable provided to connect your printer with the computer. Click "Next" and the program will automatically search for the printers connected to the PC currently.
- Page 52 The following message will appear if the printer fails to apply the configuration by using the wireless network provided: The printer cannot connect to any wireless networks with the wireless credentials provided. To reenter the credentials, please click Previous. The following message will appear if the printer can apply the configuration by using the wireless network provided, but the PC does not support the wireless network: The printer can successfully connect to a wireless network with the wireless credentials provided.
-
Page 53: Setting Up Through Web Server
If the printer can apply the configuration with the wireless network provided, and the PC supports the wireless network, the following message will appear: The printer can successfully connect to a wireless network with the wireless credentials provided. 4.2.3. Setting up through Web Server You can use the embedded Web server of the printer to conduct the wireless network configuration. -
Page 54: Turn On/Off Wireless Device
3. Click "Wireless Network" to enter the Wireless Network Configuration interface. 4.2.4. Turn on/off Wireless Device If you want to disconnect the printer with the wireless network, you can turn off the wireless feature of the printer via the Menu button on the control panel. 1) Press "Menu"... -
Page 55: Set Network Printer
4.3. Set Network Printer User can control the network settings through the embedded Web Server of the printer or the Printer Control Panel. 4.3.1. Web Server Settings 4.3.1.1. View Web Server or Change Network Settings You can use the embedded Web server to view or change IP settings. 1. - Page 56 2. There are Network Settings and Printer Settings in the "Settings" column. For Network Settings, users can complete the settings of the Networking Protocol, wireless network, WiFi hotspot, etc.; for Printer Setting, can complete the settings of Printing Preferences, e-mail and other relative configuration information.
- Page 57 • The default username of the printer is "admin", and the initial password is Note: "000000". 2. Click the "User Management" tab to perform the corresponding operations. 3. Enter the new password in the Password box and Confirm Password box. 4.
-
Page 58: Control Panel Settings
Manual Setting Enter the IP address in the Web browser's address bar to open the embedded Web server. 1. Click Settings in the navigation bar to open the Settings page; 2. Select Network Settings - IPV4 Settings; 3. Set IP Address Assignment Mode (Manual), IP Address and Subnet Mask. Other items are optional;... - Page 59 4) Press direction key "▲" or "▼" to select the "2.Wireless Conf" and press "OK"; Press direction key "▲" or "▼" to select "1.Wireless NetW" or "2.WPS PIN mode". 4.3.2.2. Network Information Users can check the network status through Network Information. 1) Press "Menu"...
- Page 60 4) Select the "1.Wired Info" option and press "OK"; Press direction key "▲" or "▼" to select "1.IP Address", "2.Subnet mask", or "3.Gateway". 5) Select the "2.Wireless Info" option and press "OK"; Press direction key "▲" or "▼" to select "1 .Connect state", "2.IP Address", "3.Subnet mask", "4.Gateway", "5.Channel", or "6.SSID".
-
Page 61: Mobile Print
Mobile Print Chapter 5. Mobile Print.............................5-2 5.1. WiFi Hotspot Connection Method ....................5-2 5.2. WiFi Printing Operations ......................5-2 5.2.1. For Android Devices ......................5-2 5.2.2. For Apple IOS Devices .......................5-2... - Page 62 2. Enable the wireless feature on the mobile device, and connect it with the WiFi hotspot of Pantum printer (the hotspot may display as Pantum-AP-XXXXXX). If there are more than one Pantum printers with WiFi feature, while selecting the printer hotspot, you may firstly print the Network Configuration Information Page report through the control panel to check the SSID hotspot names in it, so that you can connect the mobile device to the corresponding hotspot signal.
- Page 63 3. Select photos you need to print, the following interface pops up: 4. Click the " " icon on the bottom left corner, the following interface pops up: 5. Click "Print" on the bottom left corner, the following interface pops up:...
- Page 64 6. Click "Select Printer" to select the corresponding printer. 7. Select the number of copies. 8. Click "Print" to start printing.
-
Page 65: System Settings
System Settings Chapter 6. System Settings..........................6-2 6.1. Language Setting ........................6-2 6.2. Sleep Time Setting ........................6-2 6.3. Toner Save Setting ........................6-3 6.4. Restore Factory Settings ......................6-5... - Page 66 6. System Settings This Chapter mainly introduces some general settings. 6.1. Language Setting "Language Setting" is used to select the language to be displayed on the control panel. The default language is Chinese. 1) Press "Menu" to enter the Menu Settings interface. 2) Press "OK"...
-
Page 67: Toner Save Setting
4) Press direction key "▲" or "▼" to select "1min", "5min", "15min", "30min", "60min", or "8hrs". • Pressing any button or sending any print job will wake it up when the printer is Note: in Sleep mode. 6.3. Toner Save Setting Users can select Toner Save Setting to lower the cost of printing. - Page 68 4) Press direction key "▲" or "▼" to select the "1.Turn Off" option and press "OK". When symbol "*" appears after "1.Close", it indicates that the toner save setting is off; or press direction key "▲" or "▼" to select the "2.Open" option and press "OK". When symbol "*" appears after selecting the "2.Open"...
-
Page 69: Restore Factory Settings
6.4. Restore Factory Settings "Restore Factory Settings" is used to restore the default settings of the printer. 1) Press "Menu" to enter the Menu Settings interface. 2) Press "OK" to select the "1.System Setting" option. 3) Press direction key "▲" or "▼" to select the "4.Restore Set" option and press "OK". - Page 70 Print Chapter 7. Print ..............................7-2 7.1. Print Function ...........................7-2 7.2. Tray Setup ..........................7-3 7.2.1. Tray Dial Settings .......................7-3 7.2.2. Tray Settings through Control Panel .................7-4 7.3. Open Help Document ......................7-5 7.4. Printing Mode ...........................7-5 7.4.1. Printing with Standard Input Tray ..................7-6 7.4.2.
-
Page 71: Print
7. Print 7.1. Print Function The following print functions can be achieved through the settings of various properties in the Printing Preferences. Functions Diagram Automatic Duplex Print Collate Print Reverse Print N-in-1 Poster Print (For Windows system only) Zoom Print Custom Size •... -
Page 72: Tray Setup
7.2. Tray Setup 7.2.1. Tray Dial Settings Both the standard input tray and the optional tray have paper type dials, and we will take the standard tray as an example to illustrate the settings below. • Users can set the paper type dial according to their specific needs so that the Note: paper is fed from the specific tray. -
Page 73: Tray Settings Through Control Panel
7.2.2. Tray Settings through Control Panel • Users can perform the paper size settings on the control panel for the standard Note: tray, the multipurpose tray and the optional tray. Here we take the standard input tray as an example. 1) Press "Menu"... -
Page 74: Printing Mode
7.3. Open Help Document You can open the "Printing Preferences" and click the "Help" button (for Windows system only). The Help document contains the User Guide where you can find the information on print settings. 7.4. Printing Mode This printer can perform the printing operation with the standard input tray, the multipurpose input tray and the optional tray. -
Page 75: Printing With Standard Input Tray
7.4.1. Printing with Standard Input Tray Ensure that certain amount of media is loaded into the standard input tray before printing. • For precautions on loading paper, see Note: Chapter 7.4.2. Printing with Multipurpose Input Tray When loading paper into the multipurpose input tray, the printer will automatically print with the paper in the multipurpose input tray. -
Page 76: Printing With Optional Tray
7.4.3. Printing with Optional Tray 7.4.3.1. Installation of Optional Tray 1. Please ensure the correct placement of the printer and the optional trays, as shown below. 2. Plug the power cord into the printer to turn on the power. • Please cut off the power supply of the printer when install or remove the optional Note: tray. - Page 77 4. When there is no paper in the multipurpose input tray and the standard input tray, or the paper source is set as "Optional Tray I/II" by users, the printer will get paper from the optional tray to finish the print job. •...
-
Page 78: Automatic Duplex Print
7.4.3.2. Removing the Optional Tray 1. Press and hold the power button of the printer to turn off the power. 2. Lift the printer up with two hands to remove the optional tray. • Make sure the power of the printer is turned off when removing the optional tray. Note: 7.5. - Page 79 When you put paper in the multipurpose input tray, the printer will give priority to use the print paper in the multipurpose input tray. • The multipurpose input tray can achieve automatic duplex print, but it can be Note: loaded with 60 pages at maximum, and the recommended types of print paper should be used.
- Page 80 3. Select Pantum printer with the appropriate model. 4. Click Preferences or Properties button for the configuration of printing. 5. Select Basic tab in the Duplex Printing area, and select Long Edge or Short Edge as the binding method. 7-11...
- Page 81 6. Click OK to complete the print settings, so as to achieve the automatic duplex print. • It is recommended to raise the paper platform to prevent the printed paper from Note: sliding out of the output tray. If you choose not to raise the paper platform of the output tray, we recommend that you immediately remove the printed paper output from the printer.
-
Page 82: Routine Maintenance
Routine Maintenance Chapter 8. Routine Maintenance........................8-2 8.1. Cleaning the Printer .........................8-2 8.2. Maintenance of Laser Toner Cartridge ..................8-3 8.2.1. About Laser Toner Cartridge ....................8-3 8.2.2. Replace Laser Toner Cartridge ..................8-4... -
Page 83: Cleaning The Printer
8. Routine Maintenance 8.1. Cleaning the Printer • Please use mild detergents. Note: • Some parts of the printer are still hot within a short time after using. When opening the front cover or rear cover to clean the parts inside the printer, please do not touch the parts in the shaded area as shown in the following figure. -
Page 84: Maintenance Of Laser Toner Cartridge
8.2.1. About Laser Toner Cartridge 1. Use and Maintenance of Laser Toner Cartridge For better print quality, please use the original Pantum laser toner cartridge. When using the laser toner cartridge, please pay attention to the following: • Unless you want to use it immediately, otherwise, do not remove the laser toner cartridge from the package. -
Page 85: Replace Laser Toner Cartridge
8.2.2. Replace Laser Toner Cartridge Note: Before replacing the laser toner cartridge, please pay attention to the following: • The laser toner cartridge surface may have toner. Please remove it carefully to avoid spilling. • Put the removed laser toner cartridge on a piece of paper to avoid the toner from accidentally spilling. - Page 86 4. Remove the protective cover, and put the laser toner cartridge into the printer along the guides, and close the cover tightly. • Check whether there is any seal before installing the toner cartridge into the Note: printer; if there is any, please tear off the seal and then install the cartridge. 5.
-
Page 87: Troubleshooting
Troubleshooting Chapter 9. Troubleshooting ..........................9-2 9.1. Clearing Jammed Paper ......................9-2 9.1.1. Paper Jam in the Tray ......................9-2 9.1.2. Paper Jam in the Manual Input Tray .................9-3 9.1.3. Paper Jam in the Optional Tray ..................9-4 9.1.4. Internal Paper Jam ......................9-5 9.1.5. Paper Jam in the Fuser Unit .....................9-6 9.1.6. -
Page 88: Clearing Jammed Paper
9. Troubleshooting Please read this section carefully. It can help you solve common malfunctions in the printing process. If the problems appeared cannot be solved, please timely contact Pantum After- sales Service Center. Prior to handling common malfunctions, firstly check the following situations: •... -
Page 89: Paper Jam In The Manual Input Tray
2. Gently draw the jammed paper straight out. 3. After removing the jammed paper, reload the tray into the printer, then the printer will automatically resume printing. 9.1.2. Paper Jam in the Manual Input Tray 1. Gently draw the jammed paper out. 2. -
Page 90: Paper Jam In The Optional Tray
9.1.3. Paper Jam in the Optional Tray If the paper is jammed in the optional tray, please operate according to the following steps based on the prompts on the LCD display of the control panel to remove the jammed paper. 1. -
Page 91: Internal Paper Jam
If no paper can be seen in this area, please stop and go to the next step: 1. Open the Standard Input Tray. 2. Remove the jammed paper from the standard input tray. 3. Put the tray back into the printer after removing the jammed paper. 9.1.4. -
Page 92: Paper Jam In The Fuser Unit
1. Open the front cover. 2. Straightly draw out the laser toner cartridge. (To avoid the exposure of the cartridge affecting the print quality, wrap the laser toner cartridge with a black plastic bag or cover it with paper). 3. Gently draw the jammed paper straight out. 4. -
Page 93: Duplex Unit Jam
3. Gently draw the jammed paper out. 4. Remove the jammed paper and close the fuser decompression unit and the rear cover, then the printer will automatically resume printing. 9.1.6. Duplex Unit Jam 1. Remove the duplex printing unit from the back of the printer. 2. -
Page 94: Software Failure
9.2. Software Failure Trouble Solution Pantum 3500 Series Printer Driver cannot be Reinstall the printer driver. found in the printer and fax folders. Ensure that the USB interface cable and the power cord are both properly connected. The printer is in Ready mode but does not If the failure still exists after restarting the perform any print job. - Page 95 The print media is damp or sticks It is suggested that you use the together. recommended print media. Internal parts failure. Separate the print media or use better and dry print media. • If the problem remains, please contact Pantum Customer Service. Note:...
-
Page 96: Image Defects
9.3.2. Image Defects Trouble Cause Solution • Toner is low. • Please properly use the print • The print media does not meet media within the specification usage specifications, such as the range. • Set the print resolution, density, media is damp or too rough. •... - Page 97 • The laser toner cartridge is dirty. • Clean the laser toner cartridge • The internal part of the laser toner or replace it with a new one. • Please contact Pantum cartridge is damaged. • The fuser component is damaged. Customer Service to repair or replace the fuser component.
- Page 98 • The above troubles can be handled by cleaning or replacing the laser toner Note: cartridge. If the problem remains, please contact Pantum Customer Service. Company Name: Magnell Associate, Inc. (DBA NEWEGG.COM) Office address: 16839 E. Gale Ave. , City of Industry, CA 91745...
Need help?
Do you have a question about the P3500 Series and is the answer not in the manual?
Questions and answers
WANT TO SELECT ENGLISH ON THE PRINTER ITSELF