Table of Contents
Advertisement
Quick Links
Step 2
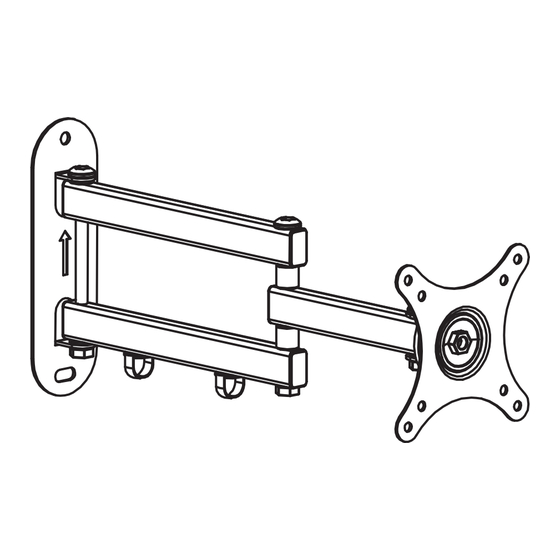
Check the tightness of panel by left and right rotation
Rotate the panel by hand as shown in the figure, if turning
easily, tighten the nut with the wrench(F); if turning hard,
no need to use the wrench(F).
Step 3
Attach VESA Plate to the mounting holes of the monitor
H
Installation of cable clips,cable arrangement
Step 4
and joint adjustment
F
F
C or D
G
Insert the two wire clips (E)
into the hole in the lower
side of the square tube to
complete the cable
arrangement.
Use the wrench (G,F) to
adjust the looseness of the
joint.
E
Installation Instruction
。
Carefully open the carton, remove contents and lay out on cardboard or
other protective surface to avoid damage.
Check package contents against the Supplied Parts List in the next page
to assure that all components wete received undamaged. Do not use
damaged or defective parts.
Carefully read all instructions before attempting installation.
IMPORTANT SAFETY INFORMATION
Install and operate this device with care. Please read this instruction before
beginning the installation, and carefully follow all instructions contained
herein. Use proper safety equipment during installation.
Please call a qualified installation contractor for help if you:
If you don't understand thesedirections or have any doubts about the
safety of the installation.
If you are uncertain about the nature of your wall, consult a qualified
installation contractor.
Do not use this product fof any purpose or in any configuration not
explicitly specified in this instruction. We hereby disclaims any and all
liability for injury or damage arising from incorrect assembly, incorrect
mounting, or incorrect use of this product.
www.suptekmount.com
MAX
75X75
13kg
15" - 27"
100X100
(28lbs)
Mounting pattern
Maxximum Load
Suggested
Distance from
Screen Sizes
the wall
UNPA CKING INST RUCTIONS
MA2720 English
63-381MM
(2.5'-15')
Advertisement
Table of Contents

Related Manuals for Suptek MA2720


Summary of Contents for Suptek MA2720
- Page 1 Step 2 MA2720 English Check the tightness of panel by left and right rotation www.suptekmount.com Installation Instruction Rotate the panel by hand as shown in the figure, if turning easily, tighten the nut with the wrench(F); if turning hard, no need to use the wrench(F).
- Page 2 Supplied Parts List Step 1 Install the Wall Plate to the Wall Brick Mount (2)Plastic Anchors-A (2)Self-Drilling Screw -B (4)M4*10 Screw-C (4)M5*16 Screw-D 55mm (2)Cable Clips-E 5 Washer-H (1)Wrench-F (1)S5 Allen Key-G (4) 50mm (1)Bracket-I Wood Mount CAUTION! This TV mount must be securely attached to the vertical wall.
Need help?
Do you have a question about the MA2720 and is the answer not in the manual?
Questions and answers