
Related Manuals for Lissmac MULTICUT 400 D


Summary of Contents for Lissmac MULTICUT 400 D
- Page 1 OPERATING MANUAL FLOOR SAW MULTICUT 400 D MULTICUT 400 P LISSMAC Maschinenbau GmbH Lanzstrasse 4 D-88410 Bad Wurzach Phone +49 (0) 7564 / 307 – 0 Fax +49 (0) 7564 / 307 – 500 lissmac@lissmac.com www.lissmac.com 1/72...
- Page 2 2/72...
- Page 3 Imprint The operating manual is valid for: LISSMAC floor saw MULTICUT 400 D MULTICUT 400 P Headquarters: LISSMAC Maschinenbau GmbH Lanzstrasse 4 D - 88410 Bad Wurzach Phone: +49 (0) 7564 / 307 – 0 Fax: +49 (0) 7564 / 307 – 500 lissmac@lissmac.com...
- Page 4 Handling instructions to the operator The warning notes contained are not exhaustive. Lissmac cannot predict every possible hazard. The suitable safety rules and precautions are to be followed as with any other machine, in regards to the working method and operation.
- Page 5 The following warning and safety instructions are used: Read the operating manual Wear hearing protection Wear eye protection Wear gloves Wear protective helmet Wear dust mask Wear suitable work clothing Attachment points for crane transport Remove the ignition key before working on the device Cutting hazard at the rotating tool Do not relocate the machine with rotating tool Extremely flammable fuel vapours...
- Page 6 Explosion hazard Danger of drawing in due to open belt drive Risk of cutting injuries and amputation due to rotating cutting tools Do not use high pressure cleaners No unauthorised persons allowed Smoking prohibition Harmful substances: Fine silica dust No maintenance activities allowed when the motor is running Instruction for damage prevention.
- Page 7 Further documentation of the corresponding manufacturer of the individual components of the machine is available to complete this Operating Manual: Internal combustion engine operating manual LISSMAC does not accept any responsibility or liability for the completeness of the additional documentation. Changes and reservations We have taken every effort to ensure that this operating manual is correct and up to date.
- Page 8 Notes: 8/72...
-
Page 9: Table Of Contents
Table of contents 1. Features & benefits ......................10 2. General safety instructions .................... 11 2.1. Purpose; intended use .....................11 2.2. Organisational measures ....................12 2.3. Choice of personnel and personnel qualifications; fundamental obligations ....13 2.4. Safety notes regarding the operating phases ..............13 2.5. -
Page 10: Table Of Contents 1. Features & Benefits
1. FEATURES & BENEFITS The requirements arising from practice were taken into account in the development of these versatile power packs. The diesel floor saws, proven and tested by professionals, are convincing thanks to their excellent price-performance ratio, robust technology and simple operation. ... -
Page 11: General Safety Instructions
Intended Use The LISSMAC floor saw is a type of floor cutting grinder and is designed exclusively for wet cutting joints in concrete or asphalt. Cutting requires a tool in the form of a diamond saw blade. The joint cutter may only be operated by one person. -
Page 12: Organisational Measures
2.2. Organisational measures This Operating Manual must be kept within easy reach for everyone at the place of use. Supplements to the operating manual include general statutory and other binding regulations for preventing accidents and protecting the environment and must be obeyed. Such regulations may also deal with, for example, the handling of hazardous substances, the wearing of personal protective equipment and with road traffic regulations. -
Page 13: Choice Of Personnel And Personnel Qualifications; Fundamental Obligations
2.3. Choice of personnel and personnel qualifications; fundamental obligations Operators must be aged 18 or above and they must be mentally and physically capable of operating the floor saw. All persons must be instructed in the operation and be expressly assigned by the employer with the operation of the floor saw. - Page 14 2.4.2. Commissioning When fitting the saw blade, protect your hands from sharp edges. Make sure the substrate that is used for cutting meets the load-bearing capacity. All obstacles must be removed from the cutting area and good lighting must be provided. Visual check of the entire floor saw for any damage and defects.
-
Page 15: Note Relating To Special Types Of Danger
2.4.4. Relocating the floor saw The floor saw may only be relocated when the saw blade is stationary. Before leaving the operating position on the floor saw, the internal combustion engine must be switched off and the saw blade must be stationary. A rotating saw blade poses a high risk of injury. -
Page 16: Transport
2.5.2. Electrical power Only use original fuses with the prescribed amperage. The floor saw must be switched off immediately in the event of faults. Electrical work may only be carried out by certified and qualified technical personnel. Regularly inspect and test the electrical equipment of the machinery. Defects such as loose connections or damaged cables must be remedied immediately. -
Page 17: Packing And Storage
2.7. Packing and Storage In order to ensure sufficient protection during dispatch and transport, the machine and its components were packed carefully. The machine should be checked for damage upon receipt. The packing of the device consists of recyclable materials. Place them into the containers provided for recycling so that they can be recycled. -
Page 18: Device Description
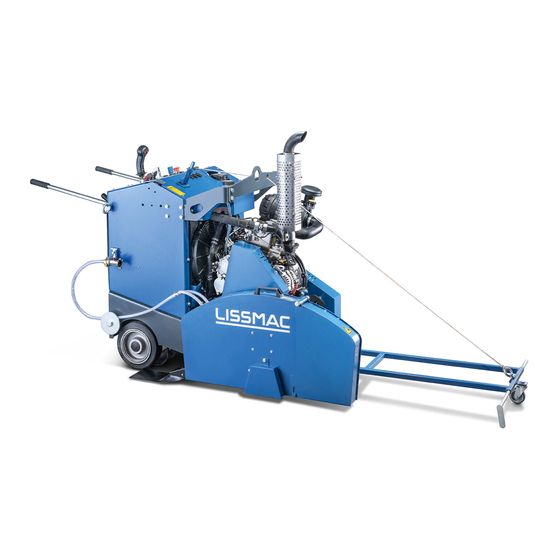
3. DEVICE DESCRIPTION 3.1. Names of the machine parts Handlebars Drive axle (hydrostat) Control panel Water connection with ball valve Diesel tank Air filter Hitch point for the crane, manual transmission Motor (diesel/petrol) Steering rod Blade guard (required accessory) 18/72... -
Page 19: Back And Interior
3.2. Back and interior To open the back wall Unlock the back wall at the top with a square key and open out downwards. Pump and reservoir for hydraulic unit for Hydrostat-gear oil reservoir (20W50) saw blade lifting (HV68) Drive/freewheel selector lever Battery Adjusting screw The correct hydraulic oil level can only be read when the machine is completely lowered. - Page 20 3.3. Control panel MC 400 D NOTE Operation of the machine Before you start the floor saw, you must familiarise yourself with the operation first. The personnel assigned with activities at the machine must have read the operating manual before starting work, and here particularly the chapter safety notes.
- Page 21 3.4. Control panel MC 400 P NOTE Operation of the machine Before you start the floor saw, you must familiarise yourself with the operation first. The personnel assigned with activities at the machine must have read the operating manual before starting work, and here particularly the chapter safety notes.
-
Page 22: Technical Data
3.5. Technical data MULTICUT 400 D MULTICUT 400 P Max. cutting depth 315 mm Max. saw blade diameter 800 mm Saw blade holder 25.4 mm Saw blade speed 1490 1/min 1600 1/min Weight 458 kg 416 kg 3-cylinder PERKINS 2-cylinder KOHLER... -
Page 23: Sound Power Level
The values given are the noise exposure at the operator’s workstation, and the sound-power level of the floor saw. The emission sound pressure at the workstation is L 92 dB(A). The guaranteed sound power level is: MULTICUT 400 D 96 dB(A) MULTICUT 400 P 96 dB(A) The values have been determined by sound emission measurement. -
Page 24: Exhaust Fumes
3.8. Exhaust fumes WARNING Poisonous exhaust gases The exhaust gases of the internal combustion engine contain carbon monoxide. Carbon monoxide is an invisible, odourless, tasteless gas which can lead to loss of consciousness and suffocation. It can quickly accumulate in narrow spaces and stay there for hours, even after the engine has been turned off. Never operate machines with internal combustion engines in closed or confined spaces ... -
Page 25: Transport
4. TRANSPORT 4.1. Transport position WARNING Danger of crushing due to unsecured machine Injuries due to the unintentional change of the position of the machine or the falling of parts. Only transport the floor saw in transport position. Secure the floor saw at the load-securing points. NOTICE Machine transport Significant inclines must be avoided when transporting the floor saw. -
Page 26: Relocating Using A Crane
4.2. Relocating using a crane WARNING Swinging loads Danger of injury due to falling parts. Do not stay under hoisted machines or parts. Only use undamaged hoisting devices with the sufficient load bearing capacity and length. The machine must only be moved in the transport position. ... -
Page 27: Securing The Machine For Transport
4.3. Securing the machine for transport WARNING Injuries due to sliding or tilting of the machine People can be crushed by accidental position changes of the machine. Only ever transport the machine in transport position. Secure the machine at the suitable attachment points. ... -
Page 28: Commissioning
5. COMMISSIONING 5.1. Refuelling WARNING Extremely flammable fuel vapours Danger of burns or severe injuries from fire or explosion. Smoking is strictly forbidden during the process. Remove all inflammatory sources. Do not overfill tank or spill fuel. NOTICE Fuel storage Fuel must only be stored in approved containers. -
Page 29: Water Separator Mc400D
5.2. Water separator MC400D Hand pump and water The hand pump allows fuel to be fed from the tank separator to the fuel pump. This may be necessary after long downtime. The water separator should be checked regularly (every 50 operating hours). Drain any water which may be present into a suitable container and dispose in accordance with the regulations. -
Page 30: Saw Blade Installation/Change (Tool)
5.4. Saw blade installation/change (tool) WARNING Risk of cutting and crushing injuries due to rotating parts Rotating saw blade or flange can catch and sever clothes or body parts. Switch off the engine and remove the ignition key. Before working on the machine, all parts must be stationary. ... - Page 31 NOTICE Saw blade installation When installing the saw blade, make sure that the flange surfaces are clean. The saw blade must be in direct contact with the flange. Use the direction arrow to adjust the direction of rotation of the saw blade to the desired direction of rotation of the saw blade shaft (synchronous or counter cut).
-
Page 32: Checking The Drive Belt Tension
5.5. Checking the drive belt tension WARNING Cutting and crushing injuries due to rotating belts Body parts and clothing can be retracted on contact with the belt drive. Danger of cuts and squeezing injuries up to amputations. Removing or opening the belt cover or engaging in the rotating belt drive is prohibited These tasks must only be carried out when the pulley is at a standstill and the drive motor is ... -
Page 33: Retightening The V-Belts
5.6. Retightening the V-belts Tensioning the cutting 1. Loosen the bolt (8). shaft belt 2. Turn the tensioning screw (9) clockwise. 3. Screw up the bolt (8) tightly. Tensioning the drive 1. Loosen the bolts (5). belt 2. Release lock nut. 3. -
Page 34: Changing The V-Belts
5.7. Changing the V-belts WARNING Cutting and crushing injuries due to rotating belts Body parts and clothing can be retracted on contact with the belt drive. Danger of cuts and squeezing injuries up to amputations. Removing or opening the belt cover or engaging in the rotating belt drive is prohibited ... - Page 35 3. Release the locking screws (5) and use the tensioning screw (6) to slacken the belt. 4. Remove the V-belt for the drive (7). 5. Release screw (8) and turn the belt pulley downwards using the screw (9). 6. The drive belts are now slackened and can be taken out. 7.
-
Page 36: Operation
6. OPERATION 6.1. Safety • The floor saw may only be operated by one person. General rules Ensure that other people vacate the work area, or set up a barrier. • The operator must not leave the machine while the engine is running. •... - Page 37 WARNING Danger due to rotating saw blade Serious cuts due to rotating saw blade or ejected parts. Only cut with the blade guard in closed position. Keep a safe distance. Never touch the rotating saw blade. Wear personal protective equipment. ...
-
Page 38: Start Preparations
6.2. Start preparations Start conditions In order to use the floor saw safely and properly, the following conditions must be met: The floor saw has been checked for damage, loose screw connections and for the completeness of the attached parts. ... -
Page 39: Starting And Stopping The Motor
6.5. Starting and stopping the motor Starting the diesel Lift the blade – No floor contact! motor Throttle to idle position Forward motion lever in neutral position Set ignition key to ignition. Preheat the motor for 3-10 seconds depending on the outdoor temperature (maximum 60 sec). Start the motor. -
Page 40: Setting Toe In
6.6. Warning lights NOTICE Always observe fault signals The warning lights notify you of an fault in the system. The indicated fault must be resolved immediately to prevent damage to the machine. Battery / alternator fault Lights up upon ignition and turns off when the motor is running. Display while the motor is running = defective alternator. -
Page 41: Cutting With The Floor Saw
6.8. Cutting with the floor saw WARNING Destruction of the saw blade due to lack of cooling water If the saw blade is not supplied with sufficient cooling water for wet cutting, there is a risk of overheating and segments may break out. The grinding dust is not sufficiently bound. ... - Page 42 Cutting 1. Motor is running and has warmed up 2. Let down the steering rod with the cable (18) and position the floor saw. 3. Set the motor speed setter to maximum speed (9). 4. Activate the water supply. 5. Lower the saw blade using the joystick (7) until the blade scratches the surface and set the cutting depth display (6) to zero.
-
Page 43: Repositioning The Floor Saw
6.9. Repositioning the floor saw WARNING Risk of injury due to rotating saw blade By touching the rotating saw blade clothes can be pulled in and limbs severed. Any movement of the machine outside the area where cutting work is to be performed must be ... -
Page 44: Switching Off The Floor Saw
6.11. Switching off the floor saw Switching off the floor Move forward motion lever to neutral position. Lift the saw blade out of the joint using the joystick switch. Engage the parking brake. Shut off the water supply. ... -
Page 45: Changing From Right To Left Cut
6.12. Changing from right to left cut WARNING Cutting injuries and danger of drawing-in at the rotating saw blade Touching the rotating saw blade can lead to cutting injuries, the severing of limbs and burns. Removing or opening the blade guard or interfering with the rotating saw blade is prohibited. ... -
Page 46: Widening The Blade Holder
6.13. Widening the blade holder If several or wider saw blades are to be used, the clamping zone must be widened. Preparation Take off the blade guard Remove the flange bolt using the on-board tool and remove the thrust washer. Conversion ... - Page 47 6.14. Fuses MC 400 D Standard motor vehicle blade fuses are used, type C according to ISO 8820-3 (ATO, blade-type). Always replace fuses with ones of the same type only. Fuses Rated current: Function Mount 40 A Main fuse 25 A Motor fuse 10 A Socket...
- Page 48 6.16. Battery 12V 45Ah - 420A starting current (replacement only by same type) Check the battery voltage regularly and recharge or replace the battery when necessary. WARNING Risk of explosion and chemical burns Explosive oxyhydrogen gas is produced when charging the battery. Battery acid is corrosive. Keep ignition sources away.
- Page 49 6.17. Air filter: Changing the filter cartridge The air filter filters the ambient air and prevents foreign matter from penetrating into the combustion chamber. Over time, dust accumulates on the air filter and reduces the through-flow of air. This reduces its efficiency, which can lead to damage to the motor. Therefore, we recommend that you check the air filter regularly, replacing it as necessary.
-
Page 50: Cutting With The Blade Guard Opened
6.18. Cutting with the blade guard opened WARNING Cutting with the blade guard opened Serious injury from rotating saw blade or ejected material. Keep the cutting area of the machine free Never touch the rotating saw blade Wear a safety helmet, work shoes and safety goggles ... -
Page 51: Maintenance
7. MAINTENANCE WARNING Danger of injury due to rotating parts. Serious injury from rotating saw blade or belt drive. Maintenance and repairs must only ever be carried out when the machine is switched off. Maintenance and repairs may only be carried out by qualified personnel. ... - Page 52 MC 400P Petrol The floor saw must be refuelled with unleaded, sulphur-free petrol in accordance with DIN EN 228 (RON 95 octane). The motor can also be operated with E10 fuel. E15, E20 and E85 are NOT permissible. The requirements and the quality standards are included in the operating manual of the fuel engine. Motor oil for petrol The motor is filled with SAE 10W-30 engine oil by the manufacturer.
-
Page 53: Maintenance Mc 400 D
7.2. Maintenance MC 400 D Before use Conduct a visual inspection for obvious damage and defects Check the protective device Check the engine oil level Check the air filter service display Check the cooling water level Check the V-belt tension After every use Thoroughly clean the floor saw Lubricate the cutting shaft bearing... -
Page 54: Maintenance Mc 400 P
7.3. Maintenance MC 400 P Before use Conduct a visual inspection for obvious damage and defects Check the protective device Check the engine oil level Check the air filter service display Check the V-belt tension After every use Thoroughly clean the floor saw Lubricate the cutting shaft bearing Every 50h Lubricate the lubricating points... -
Page 55: Checking The Oil Level
7.4. Checking the oil level Check the oil level daily before starting work. MC400D MC400P Sequence Check the oil level with the oil dipstick (1). If necessary, open the flap (2) and fill up with oil through the opening under it. Do not spill any oil. -
Page 56: Bleeding The Hydrostatic Drive
7.5. Bleeding the hydrostatic drive The hydrostatic drive must be bleed: - during initial commissioning at the customer's premises - After long transport - After longer standstill > 1 month - In case of malfunction of the traction drive WARNING Pull-in and crushing hazard Serious injury through contact with rotating wheels and open belt drives and risk of loss of stability due to improper jacking. -
Page 57: Draining The Motor Oil
7.6. Draining the motor oil NOTICE Dispose of motor oil safely Prevent environmental pollution and observe the country-specific regulations. A collecting vessel must be placed underneath when draining the motor oil. Dispose of old motor oil correctly with your disposal contractor so that it does not harm the ... -
Page 58: Lubrication Points
7.7. Lubrication points The internal combustion engine must be turned off before starting any maintenance or repair work. Secure the machine against being accidentally switched on again. Maintenance and service work must only be carried out by qualified technical personnel. Secure the machine with a crane when working under the machine. -
Page 59: Storage Conditions
7.8. Storage conditions MC 400D The machine must be stored in a clean, dry, frost-free place. Disconnect the negative pole of the battery. During long downtimes, the crankshaft of the motor must be turned by at least 180° every 6 months to redistribute the valve-spring tension The motor oil should be drained for storage of over 6 months. -
Page 60: Maintenance Plan
7.10. Maintenance plan This section is to serve as evidence for the maintenance and service book already supplied. All maintenance and service work must be registered as evidence. Machine/type: Serial number/year of manufacture: Date Maintenance or service work carried out Date/signature 60/72... -
Page 61: Tools
For the best results, the parameters must be correct. With this diagram, the optimum cutting performance can be determined. The prices of the tools can be determined in the LISSMAC sales booklet. This sales booklet can be obtained at any time from the manufacturer. -
Page 62: Warranty
9. WARRANTY The warranty for this machine is 12 months. Warranty is only provided for the wear parts listed below if the wear is not due to operation. Wear parts are parts which undergo operation-dependent wear during the intended use of the machine. These parts have varying service lives, depending on the intensity with which they are used. - Page 63 LISSMAC floor saw COMPACTCUT 400 D and MULTICUT 400 P. This declaration only refers to the machine in the condition in which it was sold; parts retrofitted by the end user and / or retrospective intervention is not covered by this declaration. We hereby confirm and take sole responsibility that this machine complies with the relevant provisions of Directive 2006/42/EC and 2000/14/EC.
- Page 64 64/72...
-
Page 65: Circuit Diagram
10. CIRCUIT DIAGRAM 65/72... - Page 66 66/72...
- Page 67 67/72...
- Page 68 68/72...
- Page 69 69/72...
- Page 70 70/72...
- Page 71 71/72...
- Page 72 72/72...
Need help?
Do you have a question about the MULTICUT 400 D and is the answer not in the manual?
Questions and answers