Table of Contents
Advertisement
Master Control . . . . . . . . . . . . . . . . . . . . . . . . . . . . . . . . . . . . . . . . . . . . .
Opening the Master Control . . . . . . . . . . . . . . . . . . . . . . . . . . . . . . . . . . . . .
Local Configuration Instructions . . . . . . . . . . . . . . . . . . . . . . . . . . . . . . . . . . . .
Remote Configuration Instructions . . . . . . . . . . . . . . . . . . . . . . . . . . . . . . . . . . .
Closing the Master Control . . . . . . . . . . . . . . . . . . . . . . . . . . . . . . . . . . . . .
Articulated Arm. . . . . . . . . . . . . . . . . . . . . . . . . . . . . . . . . . . . . . . . . . . . .
Opening an End of the Articulated Arm . . . . . . . . . . . . . . . . . . . . . . . . . . .
Closing an End of the Articulated Arm . . . . . . . . . . . . . . . . . . . . . . . . . . .
System Functions. . . . . . . . . . . . . . . . . . . . . . . . . . . . . . . . . . . . . . . . . . .
Tubehead - Horizontal Drifting . . . . . . . . . . . . . . . . . . . . . . . . . . . . . . . . . . .
Horizontal Arm - Horizontal Drifting . . . . . . . . . . . . . . . . . . . . . . . . . . . . . .
Articulated Arm - Horizontal Drifting . . . . . . . . . . . . . . . . . . . . . . . . . . . . . .
Articulated Arm - Vertical Drifting . . . . . . . . . . . . . . . . . . . . . . . . . . . . . . . .
Outer Section. . . . . . . . . . . . . . . . . . . . . . . . . . . . . . . . . . . . . . . . . . . . . . . . . . . .
Inner Section . . . . . . . . . . . . . . . . . . . . . . . . . . . . . . . . . . . . . . . . . . . . . . . . . . . .
Articulated Arm - Inspection . . . . . . . . . . . . . . . . . . . . . . . . . . . . . . . . . . . . 11
032-0207-EN Rev 0
. . . . . . . . . . . . . . . . . . . . . . . . . . . . . . . . . . . . . . . . . . . . .
. . . . . . . . . . . . . . . . . . . . . . . . . . . . . . . . . . . . . . . . . . . .
Printed on: 20 Apr 2012, 11:34:10 am; Printed by: UWE.ZELLER
2
2
2
6
8
9
9
10
2
2
2
4
5
7
7
9
11
i-i
Advertisement
Table of Contents

Related Manuals for Gendex Expert DC


Summary of Contents for Gendex Expert DC
-
Page 1: Table Of Contents
1- Opening and Closing Procedures Master Control ..........Opening the Master Control . - Page 2 4- Configuration Settings Switch Settings ..........SW2 - Setting for X-Ray Output .
-
Page 3: 1- Opening And Closing Procedures
1- Opening and Closing Procedures WARNING Before starting any procedure, review the safety information provided ® in the Gendex expert DC User Manual. 032-0207-EN Rev 0 Printed on: 20 Apr 2012, 11:34:10 am; Printed by: UWE.ZELLER... -
Page 4: Master Control
Opening the Master Control Master Control Opening the Master Control Tools Required: No. 2 Phillips Screwdriver There are 2 configurations for the Master Control: • Local - Master Control Touch Panel is mounted directly to the Master Control • Remote - Master Control Touch Panel is mounted on a wall plate 1. - Page 5 Opening the Master Control (Continued) a. Pull out at the top of the Master Control Touch Panel. Figure 1-1 Removing the Master Control Touch Panel b. Disconnect the control cable and the exposure switch coil-cord or wall switch cord. Figure 1-2 Disconnecting the Cable and Cord c.
- Page 6 Opening the Master Control (Continued) 3. Remove the small top cover by pulling up at the corner. Figure 1-3 Removing the Top Cover 4. Grip the outer cover at the top and at the bottom rear hand-grip cutout and carefully pull it off. Figure 1-4 Removing the Outer Cover 5.
- Page 7 Opening the Master Control (Continued) 7. Unscrew the Strain Relief to remove the control cable and coil-cord from the door. Figure 1-5 Removing the Control Cable and Coil-Cord 8. Remove the two Phillips head screws and open the door carefully. Figure 1-6 Opening the Door 032-0207-EN Rev 0...
-
Page 8: Remote Configuration Instructions
Opening the Master Control Remote Configuration Instructions To open the Master Control in systems with the Master Control Touch Panel mounted on a wall plate (Remote configuration): 1. Pull out at the top of the blank panel. Figure 1-7 Removing the Blank Touch Panel 2. - Page 9 Opening the Master Control (Continued) 5. Grip the outer cover at the top and at the bottom rear hand-grip cutout and carefully pull it off. Figure 1-9 Removing the Outer Cover 6. Lay the covers aside to be re-installed later. 7.
-
Page 10: Closing The Master Control
Closing the Master Control Closing the Master Control Tools Required: No. 2 Phillips Screwdriver 1. Close the door and reinstall the two Phillips screws. 2. Reinstall the outer cover and the top cover. 3. For Local configurations, continue to step 4. For Remote configurations, skip to step 5. -
Page 11: Articulated Arm
Opening an End of the Articulated Arm Articulated Arm Opening an End of the Articulated Arm 1. Turn OFF the power switch. 2. Disconnect the external power source: – FOR A SYSTEM WITH A LINE CORD (120 V ac only), unplug the line cord. -
Page 12: Closing An End Of The Articulated Arm
Closing an End of the Articulated Arm (Continued) 3. Separate and remove the plastic Trim Covers from the end of the section of the Articulated Arm. Set the Trim covers aside. Inner Trim Covers Outer Trim Covers Figure 1-12 Articulated Arm Trim Covers Closing an End of the Articulated Arm 1. -
Page 13: 2- Checks
To avoid any potential hazard to operators or patients, any unusual operation, problems with mechanical functions, or presence of debris, should be reported to Gendex immediately. If problems persist, advise the owner NOT TO USE THE SYSTEM. 032-0207-EN Rev 0... -
Page 14: System Functions
• Troubleshooting information (page 5-1) • Electrical block diagrams (page 5-20). Contact GENDEX Technical Support if additional information is required. IMPORTANT! ____ 1. Tubehead - Check for oil leaks or other evidence that could indicate internal damage. Replace the Tubehead if necessary. - Page 15 (Continued) ____ 5. Master Controls - With the power switch in the ON position, verify that a Time Selection value indicates on the Master Control Touch Panel display. Also check the function of the selector switches for the Anatomical Time Selection, Imaging Type Selection and Patient Selection.
- Page 16 This page intentionally left blank 032-0207-EN Rev 0 Printed on: 20 Apr 2012, 11:34:10 am; Printed by: UWE.ZELLER...
-
Page 17: 3- Adjustments And Maintenance
Before making any adjustments, first verify that the unit is properly leveled on the wall; then make adjustments as necessary. WARNING Before starting any procedure, review the safety information provided ® in the Gendex expert DC User Manual. 032-0207-EN Rev 0 Printed on: 20 Apr 2012, 11:34:10 am; Printed by: UWE.ZELLER... -
Page 18: Adjustments
Tubehead - Horizontal Drifting Adjustments Tubehead - Horizontal Drifting The Tubehead will drift from the correct horizontal position if the four hex locking nuts are not adjusted properly. This can happen when the supplied 8" (20 cm) cone is replaced with the longer, heavier 12" (30 cm) cone. Note! The adjustment of the four hex locking nuts does not lock the Tubehead in place but provides proper friction to allow the Tubehead to be rotated and... - Page 19 Tubehead - Horizontal Drifting (Continued) 4. Tighten the locking nuts: a. Rotate the Tubehead to its maximum position (until it stops). b. Locate the first hex locking nut, and tighten it with the 4.5 mm hex wrench. Figure 3-2 Two of the Four Hex Locking Nuts c.
-
Page 20: Horizontal Arm - Horizontal Drifting
Horizontal Arm - Horizontal Drifting Horizontal Arm - Horizontal Drifting Tools Required: 4 mm Allen Wrench WARNING Ensure that you follow the procedure referenced in the following step. This equipment must always be electrically disconnected from the mains electrical supply (external power source) before beginning any procedure. -
Page 21: Articulated Arm - Horizontal Drifting
Articulated Arm - Horizontal Drifting Articulated Arm - Horizontal Drifting Tools Required: 4 mm Allen Wrench 1. Turn OFF the power switch. 2. Disconnect the external power source: – FOR A SYSTEM WITH A LINE CORD (120 V ac only), unplug the line cord. - Page 22 Articulated Arm - Horizontal Drifting (Continued) 4. Locate the Friction screw. Using a 4 mm Allen wrench, tighten or loosen as necessary to get the proper amount of friction or drag to prevent horizontal drifting. Figure 3-5 Adjusting the Friction Screw 5.
-
Page 23: Articulated Arm - Vertical Drifting
Articulated Arm - Vertical Drifting Articulated Arm - Vertical Drifting Outer Section Figure 3-6 shows the location referred to as the outer section of the Articulated Arm (the section nearest the Tubehead). Figure 3-6 Locating the Outer Section of the Articulated Tools Required: 7 ½"... - Page 24 – Rotate clockwise to increase the upward force on the arm. – Rotate counterclockwise to decrease the upward force on the arm. If you need to turn the screw more than three times, contact Gendex Note! Technical Support.
-
Page 25: Inner Section
Articulated Arm - Vertical Drifting Inner Section The inner section of the Articular Arm is the section nearest the fork of the Tubehead. Figure 3-8 Locating the Inner Section of the Articulated Tools Required 7 ½" (190 mm) long 5/16" (8 mm) Allen Wrench - or - 8”... - Page 26 Articulated Arm - Vertical Drifting (Continued) Note! For the following step, a minimum 7 ½" (190 mm) long wrench is required. A T-handled wrench is recommended. If a standard Allen wrench is used, additional leverage may be needed to turn the nut. 3.
-
Page 27: Maintenance
Articulated Arm - Inspection Maintenance Articulated Arm - Inspection ® To ensure smooth functioning of the Gendex expert DC Articulated Arm, the following procedure must be performed periodically. Tools Required Small flat-head screwdriver Supplies Required "Tri-Gel" lubricant (Gendex part number 1603-... - Page 28 Note! SEALANT-this may void the warranty. 5. If the arm is squeaking, lubricate the shoulder of the pins where they meet the pantograph link with "Tri-Gel" lubricant (Gendex part number 1603-0001). 6. Exercise the arm for several cycles. 7. Check the arm for balance and smooth operation. If drifting is observed, follow the adjustment procedure that corresponds to the type of drifting.
-
Page 29: 4- Configuration Settings
This chapter describes the procedures to properly set the SW2 switch and the AC Input Select Jumper. WARNING Before starting any procedure, review the safety information provided ® in the Gendex expert DC User Manual. 032-0207-EN Rev 0 Printed on: 20 Apr 2012, 11:34:10 am; Printed by: UWE.ZELLER... -
Page 30: Switch Settings
All other functions will appear normal. Note! It is recommended that this procedure be performed only by a qualified Gendex service agent. WARNING Ensure that you follow the procedure referenced in the following step. This equipment must always be electrically disconnected from the mains electrical supply (external power source) before beginning any procedure. -
Page 31: Sw2 - Setting For Optional 12" (30 Cm) Cone
Switch SW2. Note! It is recommended that this procedure be performed only by a qualified Gendex service agent. 1. Turn the system on and note the initial displayed exposure time. WARNING Ensure that you follow the procedure referenced in the following step. -
Page 32: Jumper Settings
JP1 - Setting for 120 V ac Jumper Settings JP1 - Setting for 120 V ac Note! The unit is shipped with the jumper configured for 220 V ac. Systems using 120 V ac with the line cord option requires moving the “AC Input Select” jumper from the 220 V setting to the 120 V setting, and cutting the JP1 jumper to enable the neutral line fuse. - Page 33 JP1 - Setting for 120 V ac (Continued) 4. To enable the neutral line fuse, cut jumper JP1 on the Converter Board (124-0292G1), as shown in Figure 4-4. 5. Follow the steps outlined in Closing the Master Control on page 1-8 to close the Master Control Figure 4-4 Cutting Jumper JP1...
- Page 34 JP1 - Setting for 120 V ac This page intentionally left blank 032-0207-EN Rev 0 Printed on: 20 Apr 2012, 11:34:10 am; Printed by: UWE.ZELLER...
-
Page 35: 5- Problem Resolution
® in the Gendex expert DC User Manual. Follow these steps before contacting Gendex for additional support. 1. Verify all electrical connections, including the plug connections between the Articulated Arm and the Horizontal Arm, are good. Poor connections can occur when dressing the cables up into the Horizontal Note! Arm. - Page 36 OFF or easily discerned, have pluggable terminal strip a qualified electrician not connected check the power line F5-F6 fuse blown Contact GENDEX Technical Support for further assistance F1 fuse blown Contact GENDEX Technical Support for further assistance Display flashes "Err0"...
- Page 37 Table 5-1 Common Symptoms and Possible Remedies (Continued) Symptom Additional Symptoms Possible Cause Remedy Display flashes "Err1" Ready light is OFF, other Mains voltage Re-configure the and the Ready light is display functions appear configuration jumper jumper per the normal improperly positioned page 4- instructions on...
- Page 38 Table 5-1 Common Symptoms and Possible Remedies (Continued) Symptom Additional Symptoms Possible Cause Remedy Display flashes Operation may appear P6 feedback plug open Verify and correct the "Err3"and the Ready normal for several circuit wire termination to the light is OFF minutes, or until an plug as necessary.
- Page 39 Master Control Touch Panel will clear the flashing. Bad connector terminal crimp, loose connector terminal, or a broken cable wire; contact GENDEX Technical Support for further assistance. Symptom may be Preheat pot Pressing any key intermittent misadjusted...
- Page 40 OFF (Continued) exposures of the day switch on the Master Control Touch Panel will clear the flashing. Contact GENDEX Technical Support for further assistance. Display on the Time selected does not Normal operation -- Quickset Tubehead...
- Page 41 Table 5-1 Common Symptoms and Possible Remedies (Continued) Symptom Additional Symptoms Possible Cause Remedy Display on the Individual lights may or Horizontal Arm J17 is Ensure that the arm Quickset Tubehead may not be working misconnected connections are Control is not lit properly securely made, and correctly...
-
Page 42: Converter Board (Part No. 124-0292)
Converter Board - LEDs Converter Board (part no. 124-0292) Converter Board - LEDs D51, D52, D53 D107 Figure 5-1 Location of the Converter Board LEDs (Continued) 032-0207-EN Rev 0 Printed on: 20 Apr 2012, 11:34:10 am; Printed by: UWE.ZELLER... - Page 43 Converter Board - LEDs (Continued) Table 5-2 Converter Board LEDs Description Color Normal State Explanation Number Green P15 V isolated Output voltage is present Green -15 V output voltage is present Green 15 V output voltage is present Green 5 V output voltage is present Green P15 output voltage is present Green...
-
Page 44: Converter Board - Test Points
Converter Board - Test Points Converter Board - Test Points TP27 TP23, TP24 TP22 TP35 D107 TP21 TP25 Figure 5-2 Location of Converter Board Test Points (Continued) 5-10 032-0207-EN Rev 0 Printed on: 20 Apr 2012, 11:34:10 am; Printed by: UWE.ZELLER... - Page 45 Converter Board - Test Points (Continued) Table 5-3 Convert Board Test Points Description Test Return Description Type Nom. Value Notes Point TP21 TP26 P15VISO Output Analog 14 to16 V TP22 TP35 -15 V Output Analog -14 to -16 V TP23 TP35 15 V Output Analog...
-
Page 46: Converter Board - Connectors And Jumpers
Converter Board - Connectors and Jumpers Converter Board - Connectors and Jumpers D107 P1 Plugs into J1 Figure 5-3 Location of Converter Board Connectors and Jumpers (Continued) 5-12 032-0207-EN Rev 0 Printed on: 20 Apr 2012, 11:34:10 am; Printed by: UWE.ZELLER... - Page 47 Converter Board - Connectors and Jumpers (Continued) Table 5-4 Converter Board (part no. 124-0292) Connectors Connector Description Line Voltage Configuration (P1 plugs into J1 for 120 or 230 V ac) HVDC Transformer Drive Output AC Input 120/230 V ac Filament Drive Output HV Feedback Input Control Board Interconnect page 5-12...
-
Page 48: Logic Board (Part No. 124-0293)
Logic Board - LEDs Logic Board (part no. 124-0293) Logic Board - LEDs D110 Figure 5-4 Location of Logic Board LEDs (Continued) 5-14 032-0207-EN Rev 0 Printed on: 20 Apr 2012, 11:34:10 am; Printed by: UWE.ZELLER... - Page 49 Logic Board - LEDs (Continued) Table 5-6 Logic Board LEDs Description Lamp Number Color Normal State Error State Explanation A fault has occurred A latched fault has occurred A momentary fault exists Mains overvoltage fault Overcurrent fault Mains undervoltage fault D110 Green On mA feedback is over 8V...
-
Page 50: Logic Board - Test Points
Logic Board - Test Points Logic Board - Test Points TP16 TP14 TP18 TP41 TP32 TP34 TP12 TP28 TP17 TP37 TP30 TP29 TP43 TP33 TP31 TP39 TP10 TP42 Figure 5-5 Location of Logic Board Test Points (Continued) 5-16 032-0207-EN Rev 0 Printed on: 20 Apr 2012, 11:34:10 am;... - Page 51 Logic Board - Test Points (Continued) Table 5-7 Logic Board Test Points Description Test Return Description Type Nom. Range Notes Point Values TP37, 41 or 42 5V Reference Analog 4.75 to 5.25 V TP37, 41 or 42 2.5V Reference Analog 2.4 to 2.6 V TP10 TP37, 41 or 42...
-
Page 52: Logic Board - Connectors And Jumpers
Logic Board - Connectors and Jumpers Logic Board - Connectors and Jumpers JP22 JP23 JP22 JP23 JP20 JP20 JP21 JP21 Figure 5-6 Location of Logic Board Connectors and Jumpers (Continued) 5-18 032-0207-EN Rev 0 Printed on: 20 Apr 2012, 11:34:10 am; Printed by: UWE.ZELLER... - Page 53 Logic Board - Connectors and Jumpers (Continued) Table 5-8 Logic Board (part no. 124-0293) Connectors Designator Description Converter Board Interconnect Tubehead Interface PCB Interface Assembly (Master Control Touch Panel serial bus) Table 5-9 Logic Board (part no. 124-0293) Jumpers Designator Description JP20 Negative Preheat Offset (must be open for normal operation)
-
Page 54: Electrical Block Diagram
Logic Board - Connectors and Jumpers Electrical Block Diagram Figure 5-7 Electrical Block Diagram 5-20 032-0207-EN Rev 0 Printed on: 20 Apr 2012, 11:34:10 am; Printed by: UWE.ZELLER... -
Page 55: 6- Replacement Parts
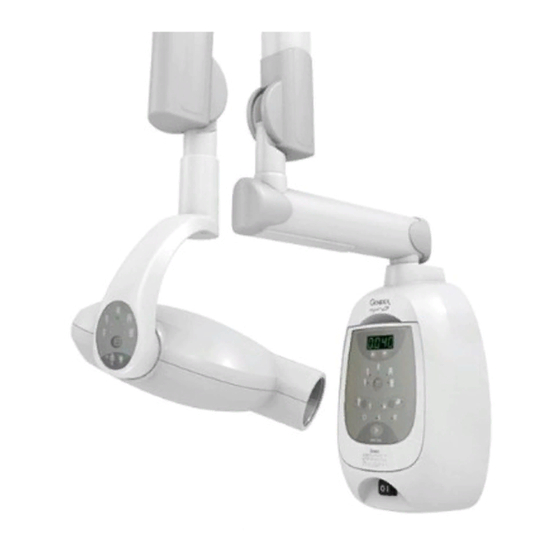
6- Replacement Parts WARNING Before starting any procedure, review the safety information provided ® in the Gendex expert DC User Manual. Articulated Arm and Tubehead Horizontal Arm Master Control Master Control Touch Panel ® Figure 6-1 Gendex expert DC Assemblies 032-0207-EN Rev 0 Printed on: 20 Apr 2012, 11:34:10 am;... -
Page 56: Assemblies
Articulated Arm and Tubehead Assemblies Articulated Arm and Tubehead Figure 6-2 Articulated Arm and Tubehead Diagram 032-0207-EN Rev 0 Printed on: 20 Apr 2012, 11:34:10 am; Printed by: UWE.ZELLER... - Page 57 Articulated Arm and Tubehead Table 6-1 Articulated Arm and Tubehead Part Description Item Part No. Description 112-1194G1 Assy, Articulated Arm Converter Side 112-1197G1 Assy, Articulated Arm, Tube Side 112-1198G1 Assy, Keypad Yoke, Expert 110-0209G1 Assy, Tube Head, Final, Expert (includes top and bottom cover) 303-0135P1 Cover, Tube Head, Bottom, Expert...
-
Page 58: Horizontal Arm
Horizontal Arm Horizontal Arm Figure 6-3 Horizontal Arm Diagram Table 6-2 Horizontal Arm Description Item Part No. Description Assy, Horizontal Arm, Expert, 75" (191cm) 112-1193G1 reach Assy, Horizontal Arm, Expert, 65" (165cm) 112-1193G2 reach Assy, Horizontal Arm, Expert, 55" (140cm) 112-1193G3 reach 09-06-080012-05... -
Page 59: Master Control
Master Control Master Control Figure 6-4 Master Control Diagram Table 6-3 Master Control Parts Description Item Part No. Description 112-0991G1 Assy, Converter with Bearings 124-0292G1 Assy, PCB, Converter 46-170021P53 Fuse, 10A 126-0377G1 Assy, Cable, CPU to Power 124-0293G1 Assy, PCB, Control & CPU (Table continued on the next page) 032-0207-EN Rev 0 Printed on: 20 Apr 2012, 11:34:10 am;... - Page 60 Master Control Table 6-3 Master Control Parts Description (Continued) Item Part No. Description 126-0449G1 Assy, Power Switch & Cable, 20A, 250VAC 303-0132P1 Cover, Top, Main, Expert 112-1206G1 Assy, Cover, Outer, Main, Expert 303-0133P2 Cover, Remote Filler, Expert 112-1191G1 Assy, USB Connector, Wall Mount 112-1205G1 Assy, Door, Wall Mount 427-0027P4...
-
Page 61: Master Control Touch Panel
Master Control Touch Panel Master Control Touch Panel Figure 6-5 Master Control Touch Panel Diagram Table 6-4 Master Control Touch Panel Item Part No. Description 632-0097P1 Keypad, Remote, Expert 303-0129P2 Cover, Remote, Front, Expert 124-0255G1 Assy, Interface P.C.B. 303-0130P1 Cover, Remote, Rear, Expert 422-0098P2 Screw, Phil Pan HD, HI-LO, #6x3/8 x4 114-0458G1... - Page 62 Master Control Touch Panel This page intentionally left blank 032-0207-EN Rev 0 Printed on: 20 Apr 2012, 11:34:10 am; Printed by: UWE.ZELLER...
Need help?
Do you have a question about the Expert DC and is the answer not in the manual?
Questions and answers