Table of Contents
Advertisement
Quick Links
Advertisement
Table of Contents

Related Manuals for Gendex Orthoralix 9200


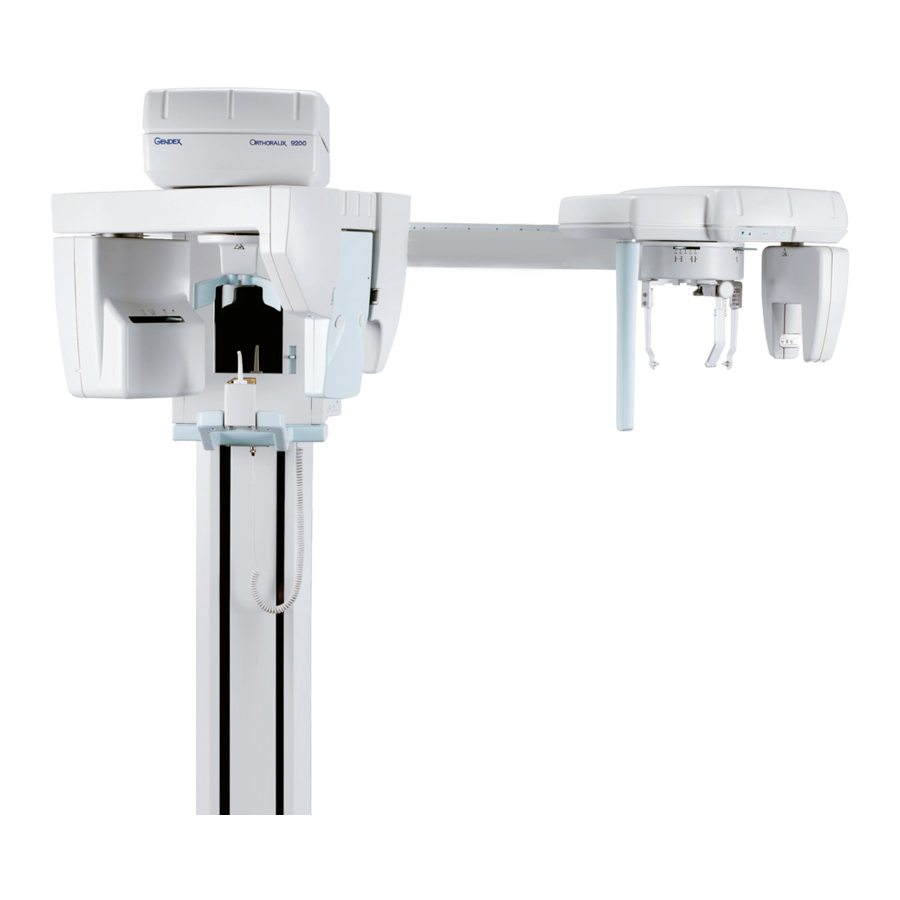
Summary of Contents for Gendex Orthoralix 9200
- Page 1 Ceph Installation Manual Ceph Installation...
-
Page 3: Table Of Contents
Table of Contents Chapter 1 - Ceph Upgrade Prerequisites ...................... 1-1 Installation ......................1-1 Ceph Wiring ......................1-4 Ceph Collimator Alignment ................. 1-5 Secondary Collimator Alignment ................. 1-7 String Alignment ......................1-7 Vertical Alignment of the Secondary Collimator ............1-9 Install Primary Collimator ................. 1-10 Check X-ray Alignment with Static Exposure ............. - Page 4 Table of Contents 032-0296-EN Rev 0...
-
Page 5: Chapter 1 - Ceph Upgrade
Ceph Upgrade Chapter Prerequisites Before starting the installation, make sure the Pan primary collimator alignment is correct. Installation The following instructions are for the installation of the Ceph onto a 9200 DDE. The same procedure is followed for both the new installation of a 9212 DDE and the addition of a Cephalostat to an existing 9200 DDE. - Page 6 9200 Ceph Installation Manual Remove control panel cover and carefully unplug the two touch pad control connections. NOTE: Do not disconnect ground wire. 5. Place the cover on top of the overhead. WARNING The Ceph requires a two person lift. Failure to comply may cause bodily injury. Two adults are required to position and assemble this unit.
- Page 7 Ceph Upgrade Level the Ceph arm front to back while bolting in place (four screws). NOTE: To facilitate leveling and minimize later alignment, have an assistant support the Ceph assembly up and towards the rear of the Pan while tightening the mounting bolts. Load all Ceph weights into same place in column, one large then both taped packets.
-
Page 8: Ceph Wiring
9200 Ceph Installation Manual Ceph Wiring 1. In the overhead, unplug the existing connections for X37 and pigtail connections and replace these connections with the new arm cable X37 and pigtail. 2. Connect X8 Ethernet cable. 3. Connect X14 arm cable. Install ferrite filter on X-37 and X-8 cables which are provided in the accessory... -
Page 9: Ceph Collimator Alignment
Ceph Upgrade Ceph Collimator Alignment NOTE: The ceph plates are NOT installed. 1. Move the collimator lever to the first ceph position, LL Max (H-22). 2. Remove the front tubehead cover to uncover the collimator assembly. NOTE: The brass plate into the Ceph collimator location is not yet installed. - Page 10 9200 Ceph Installation Manual Loosen 4 screws on secondary collimator plate and adjust plate to the center of the screws in the slotted mounting holes. Secure two screws. 9. Loosen 2 screws on the Opto switch flag and position flag to center screws to center screws in the slotted mounting holes.
-
Page 11: Secondary Collimator Alignment
Ceph Upgrade Secondary Collimator Alignment String Alignment A 70” piece of string or dental floss is required for this procedure. 1. Tape one end of the string to the tubehead focal spot located on the back tubehead cover (raised bump). String through the secondary collimator. - Page 12 9200 Ceph Installation Manual Right click the Pan icon in the task bar. 10. Left click Service. Click “Stop” 12. Click “Static image” 13. Without the primary, align the secondary collimator with the beam and sensor. 14. After making minor adjustments to bring the beam into the proper position, tighten all four collimator plate screws.
-
Page 13: Vertical Alignment Of The Secondary Collimator
Ceph Upgrade Vertical Alignment of the Secondary Collimator 1. A vertical adjustment (up and down) is made by loosening the four screw that fix the collimator to the bar. 2. When the adjustment is made be sure not to over tighten the screws. -
Page 14: Install Primary Collimator
9200 Ceph Installation Manual Install Primary Collimator 1. With the cover plate removed, install the brass collimator plate. 2. Move the plate all the way to the right as a starting point. 3. Confirm that the Ceph collimator lever is set on H-22. COLLIMATOR LEVER 4. - Page 15 Ceph Upgrade Check the vertical alignment by loosening the two screws that fix the lead collimator to the brass plate. 9. Move the collimator vertically to center the beam. 1mm =10 mm at the sensor. 10. When tightening the screws (DO NOT OVER TIGHTEN).
-
Page 16: Check X-Ray Alignment With Static Exposure
(B) supplied on the front part of the DMU (A) in order to cover completely the digital sensor, by using adhesive tape. 5. Switch on the PC where the Orthoralix 9200 DDE is connected. 6. Right click the DDE icon in the system tray; four options are displayed: •... -
Page 17: Ear Post Alignment
Ceph Upgrade Ear Post Alignment 1. Install the ceph head positioner parts 2. Use the bottom set of holes on the side guides only for a pedo practice. In the lateral position place level under ear posts. Set Ceph earposts to the 160 position. 032-0296-EN Rev 0 1-13... - Page 18 9200 Ceph Installation Manual 5. Make vertical alignment first, then the horizontal alignment. 6. This is an acceptable alignment. 7. Congratulations you have completed the Ceph Installation. 1-14 032-0296-EN Rev 0...
- Page 20 Hatfield, PA 19440 USA D-88400 Biberach, Germany Customer Service: 1-800-323-8029 Tel: +49 7351 56 0 Fax: 1-847-550-1322 Fax: +49 7351 56 1488 Technical Support: 1-800-769-2909 e-mail: info@kavo.de Fax: 1-847-718-0716 www.gendex.com ©2010 Gendex Dental Systems, 032-0296-EN Rev 0 2010 September 15...
Need help?
Do you have a question about the Orthoralix 9200 and is the answer not in the manual?
Questions and answers