Table of Contents
Advertisement
Quick Links
Important: Read and save these instructions.
•
Thank you for purchasing this humidifying air purifier.
•
Please read the operation manual carefully and follow it for correct use.
•
Please read the "Safety Precautions" section before use.
•
Please keep the operation manual in a safe place for later reference.
•
For FCC compliance information, please see the last page of this manual.
5
5
* Learn more about the 5 Year Unit Replacement Limited Warranty at www.daikinpureair.com
IO-MCKB70YSAU
DAIKIN HUMIDIFYING AIR PURIFIER
INSTALLATION &
OPERATION MANUAL
www.daikinpureair.com
FLOOR STANDING TYPE
MODEL
MCKB70YSAU
The two-dimensional bar code is
a manufacturing code.
It is not a customer bar code.
Advertisement
Table of Contents

Subscribe to Our Youtube Channel
Related Manuals for Daikin MCKB70YSAU


Summary of Contents for Daikin MCKB70YSAU
- Page 1 DAIKIN HUMIDIFYING AIR PURIFIER INSTALLATION & OPERATION MANUAL Important: Read and save these instructions. FLOOR STANDING TYPE MODEL • Thank you for purchasing this humidifying air purifier. • Please read the operation manual carefully and follow it for correct use.
-
Page 3: Table Of Contents
Read First Contents Read First Safety Precautions ............Precautions During Use ..........Names of Parts and Operations ........Preparation Before Operation ......... 13 Attaching the carbon filter ..........13 AUTO Operation ............. 16 Operation Air Purifying Operation ........... 17 Changing the Airflow Rate ..........17 Humidifying and Air Purifying Operation ...... -
Page 4: Safety Precautions
Read First Safety Precautions „Observe these precautions in order to prevent property damage or injury. „The consequences of incorrect use are categorized as follows: WARNING CAUTION DANGER Failure to follow these Failure to follow these Indicates an imminently instructions properly may result instructions properly may hazardous situation which, if in property damage or personal... - Page 5 Read First WARNING Observe in order to prevent fire, electric shock or severe injury. „Do not use in the following places • Places where oil or flammable gases are used or may leak. (Fire or smoke may result from ignition or suction toward the unit, or injury may result from degradation or cracking of plastic) •...
- Page 6 Read First Safety Precautions WARNING Observe in order to prevent fire, electric shock or severe injury. „Immediately turn off and unplug the unit if there are any signs of abnormality and malfunction Examples of abnormality and malfunction • The unit does not operate even if the switch is turned on. •...
- Page 7 Read First CAUTION Observe in order to prevent electrical leakage, injury or property damage. • Frequently ventilate the room when using the unit together with combustion-based heating devices. –Usage of this product is not a substitute for ventilation. (Potential cause of carbon monoxide poisoning) This product cannot eliminate carbon monoxide.
-
Page 8: Precautions During Use
Read First Precautions During Use Other considerations „ Do not use this product for special purposes such as „ Be careful of freezing. in the preservation of works of art, academic texts/ (Malfunction may result) materials, etc. Discard any water in the water tank and humidifying tray (Degradation of preserved items may result) if there is any risk of freezing. -
Page 9: Names Of Parts And Operations
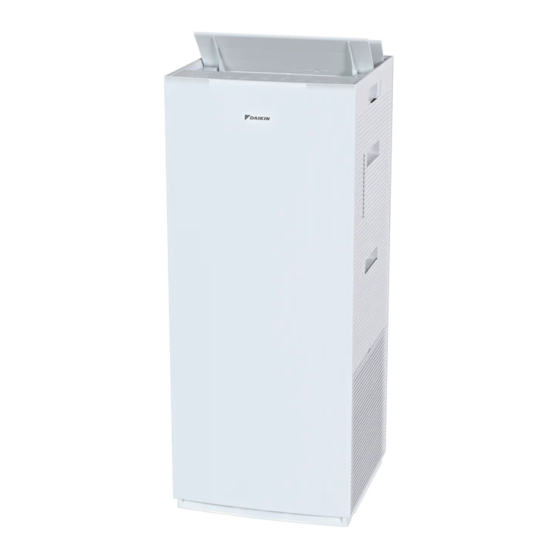
Read First Names of Parts and Operations CAUTION Do not lift up the unit holding the grip on the water tank or humidifying tray. (Injury may result from the unit falling) Front Back Air outlet Louver Operating/ (Hand-operated) Indicator panel ►Page 9-12 Grip (for carrying the unit) - Page 10 Read First Names of Parts and Operations Operating/Indicator panel Filter replacement lamp (orange) Lights up approx. 1 month before the dust collection filter needs to be replaced, and blinks when it is time to replace the dust collection filter. Water supply lamp (Red) •...
- Page 11 Read First HUM monitor lamp about ambient humidity (white) (rough estimate) Indicates room humidity within the range 20% to 90%. At times the humidity level indicated on the unit may differ (1% increments) from other hygrometers. When the humidity level is below 20%, “20” is displayed, and when •...
- Page 12 Read First Names of Parts and Operations Operating/Indicator panel LOCK function Humidity setting lamps (white) Indicate the humidity setting in 3 levels (Low, Standard, Hold down for about 2 seconds to set. High). (The same applies when you want to cancel.) LOCK function lamp (white) Humidifier lamp (white) Lamp will be lit when the lock function is active.
- Page 13 Read First FAN lamps (white) Indicate the active airflow rate setting in 4 levels (Quiet, Low, Standard, Turbo). MODE lamps (white) Indicate the MODE in operation. AUTO operation lamp (white) Lights up during AUTO operation. ►Page 16 AUTO button Optimum operation will be performed according to the condition of the room.
-
Page 14: Preparation Before Operation
Read First WARNING Preparation Before Operation Be sure to stop the operation and remove the power supply plug before installation. (Electric shock or injury may result) Attention Checking accessories • To avoid staining of walls, position the unit in accordance with the positioning measurements in the illustration. - Page 15 Read First Remove the filter fixing unit. Attach the humidifying tray. 1 Slide the fixing tab on the filter fixing unit to side to unlock. Install the water tank. ►Page 15 • To perform the Humidifying Operation, carry out Preparing the water tank before installing the Fixing tab water tank.
- Page 16 Read First WARNING Preparation Before Operation Be sure to stop the operation and remove the power supply plug before installation. (Electric shock or injury may result) Slowly pour water into the spout of the water Fill the water tank with tap water. tank with a jug.
-
Page 17: Auto Operation
Operation WARNING Operation Do not turn off the unit by removing the power supply plug during operation. (Fire due to overheating or electric shock may result) Louver If you want to change the airflow Approx. 70° direction Please open the louver by hand before operation. Approx. -
Page 18: Air Purifying Operation
Operation Attention Do not move the unit, or attach or remove components to/from the unit while it is in operation. Operation Water leakage, breakage or malfunction may result. Air Purifying Operation Press • Press again to turn OFF. If Humidifying and Air Purifying Operation was running within the past 1 hour, humidifying filter drying operation may be ►Page 18 performed. -
Page 19: Humidifying And Air Purifying Operation
Useful Functions Humidifying and Air Purifying Operation ►Page 14, 15 Fill the water tank with water. Attention Press • Make sure that the humidifying filter unit is attached when performing this operation. Press to switch the humidity setting. • Change the water in the humidifying tray and water tank every day. -
Page 20: Uv On/Off
Useful Functions WARNING Operation Do not operate with the filter fixing unit, carbon filter, dust collection filter and other components removed. (Deep ultraviolet leakage may harm your eyes and skin) UV ON/OFF The unit can be set to emit UV rays either automatically or manually during AUTO operation, Air Purifying Operation, Humidifying and Air Purifying Operation, or mode operation. - Page 21 Useful Functions MODE Usage and Function When you want to adjust the airflow rate automatically The airflow rate is automatically adjusted (between “Quiet”, “Low”, “Standard” and “High*”) according to the degree of air impurity and humidity (during Humidifying Operation). The air purifying capacity improves as the airflow rate increases. AUTO FAN ►Page 21, 22 If the operating sound bothers you, the airflow rate range can be changed.
-
Page 22: Dust/Particle Sensor Sensitivity Setting
Advanced Settings Changing the setting Function Operation can be performed either during According to the current setting, Dust/Particle Sensor operation or while operation is stopped. the FAN lamp will turn from blinking to lit up. Sensitivity Setting Press for about (Low/Normal/High) 5 seconds, and when a Setting at time of purchase: Normal... - Page 23 Advanced Settings Press to change the setting* Press Each press cycles between “Low”, A short beep sounds, and the set FAN “Normal” and “High”. lamp will blink. “Low” “Normal” “High” “Low” “Normal” “High” While the lamp is blinking, unplug the power supply plug, wait at least 5 Press to change the setting*...
-
Page 24: Humidifying Filter Drying Operation
Advanced Settings Changing the setting Function Operation can be performed either The humidifier lamp blinks, then Humidifying Filter Drying during operation or while operation lights up. is stopped. Operation Press for about (ON/OFF) [Blinking → Lit up] 5 seconds, and when a According to the current setting, Setting at the time of purchase: ON the FAN lamp will be displayed as... - Page 25 Advanced Settings Press to change the Press A short beep sounds, the humidifier setting* lamp blinks, and the FAN lamp changes Each press cycles between “ON” and to the following display according to the “OFF”. setting. While the lamp is blinking, unplug the power supply [Blinking] plug, wait at least...
-
Page 26: Maintenance
Maintenance WARNING • Be sure to stop operation and unplug the power supply plug before performing maintenance. (An electric shock or injury may result) Maintenance • Do not use gasoline, benzine, thinner, polishing powder, paraffin, alcohol, etc. (Cracking, electric shock, and ignition of fire may result) •... - Page 27 Maintenance Water tank For details on maintenance, refer to ►Page 27 Inside the water tank Water tank surface Every day for Humidifying Operation If dirt on the surface becomes an issue Wash with water Wipe Humidifying filter unit For details on maintenance and removal/attachment, refer to ►Page 28, 29 About every 1 week Soak...
- Page 28 Maintenance Maintenance Water tank ►Page 15 Inside the water tank Every day for Humidifying Operation Valve part Wash with water • Clean the water tank by shaking a small amount of water inside with the lid of the water tank closed. After cleaning, open the lid of the water tank and discard the water.
- Page 29 Maintenance WARNING Be sure to stop operation and unplug the power supply plug before performing maintenance. (An electric shock or injury may result) How to remove the humidifying tray and humidifying filter unit Humidifying tray Wash with water Remove the water tank. ►Page 15 Wash with water about 1 time every 3 days, or if...
- Page 30 Maintenance When dirty, the humidifying tray and humidifying filters may emit Maintenance bad odors. Be sure to clean them periodically. Humidifying Filter Unit Soak If water scales are not removed and the unit continues to be operated, reduced humidifying capacity and water leakage may result.
- Page 31 Maintenance WARNING Be sure to stop operation and unplug the power supply plug before performing maintenance. (An electric shock or injury may result) Humidifying filters Replacement About replacement timing About purchase and disposal ►Page 40 • Replacement timing depends on usage patterns and the •...
- Page 32 Maintenance Attention Be sure to operate with the dust collection filter and carbon filter attached. Maintenance If the unit is operated without the filters attached, malfunction may result. Dust collection filter Replacement About replacement timing About purchase and disposal ►Page 40 •...
-
Page 33: When Not Using The Unit For A Prolonged Period
Maintenance When Not Using the Unit for a Prolonged Period Remove the power supply plug. When not using Humidifying Operation (off-season, etc.) Discard any residual water in the water tank Remove the power supply plug. and humidifying tray and then clean the components. -
Page 34: States Of The Hum Monitor Lamp And Their Meanings
Troubleshooting States of the HUM Monitor Lamp and Their Meanings If the HUM monitor lamp blinks and an error code appears, unplug the power supply plug, wait at least 5 seconds, and then reinsert the power supply plug and operate. If an error code still appears, handle it by following the setting procedure. 3 long beeps Error code... -
Page 35: Faqs
Troubleshooting FAQs Please check first before contacting us. Q: Is it possible to see if UV rays are being emitted while the UV function is ON? For safety, the unit is structured so that UV rays cannot be seen. Q: The sensitivity of the dust/particle sensor seems to be poor... If the dust/particle sensor lens is dirty, the sensitivity may become poor, so clean it regularly. -
Page 36: Troubleshooting
Troubleshooting Troubleshooting „ Please check the following before requesting repairs or making an inquiry. If there is still an abnormality, contact your dealer or the customer service center. Not a problem Check This case is not a problem. Please check again before requesting repairs. „... - Page 37 Troubleshooting „ In the event of malfunction during operation If the indicator lamps on the unit indicator panel light up abnormally during operation due to a lightning strike etc., and operation becomes impossible, remove the power supply plug, wait at least 5 seconds then reinsert the power supply plug and start operation again. Phenomenon Check points The dust/particle sensor lamp...
- Page 38 Troubleshooting Troubleshooting Phenomenon Check points There is an odor coming from the air • Are the carbon filter, humidifying filters, or humidifying tray dirty? outlet ¼ Clean these parts. ►Page 26, 28, 29 • Even if the humidifying filters are not dirty, substances that cause odor may be attached.
- Page 39 Troubleshooting „ In the event of malfunction during operation If the indicator lamps on the unit indicator panel light up abnormally during operation due to a lightning strike etc., and operation becomes impossible, remove the power supply plug, wait at least 5 seconds then reinsert the power supply plug and start operation again. Phenomenon Check points The HUM monitor lamp always...
- Page 40 Troubleshooting Troubleshooting „ Other Phenomenon Check points The fan stops during operation • During ECONO MODE or AUTO operation, when Monitoring mode is ►Page 20 entered, the fan turns on and off repeatedly. • Are you operating with the pre-filter, dust collection filter, humidifying filter unit, humidifying tray, and water tank removed? If you forget to attach a component, the fan may stop to protect the electrical components.
-
Page 41: Specifications
Troubleshooting Specifications Model name MCKB70YSAU Power supply Single phase 120V 60Hz Humidifying and Air Purifying Air Purifying (at indoor temp.: 68ºF (20ºC), Operation mode indoor humidity: 30%) Turbo Standard Quiet Turbo Standard Quiet Airflow rate (CFM) [m³/h] [420] [210] [132]... -
Page 42: Fcc Compliance Information
Daikin North America LLC, except to the extent This equipment generates, uses and can radiate radio frequency required for installation or maintenance of recipient’s energy and, if not installed and used in accordance with the equipment.
Need help?
Do you have a question about the MCKB70YSAU and is the answer not in the manual?
Questions and answers