
Related Manuals for KegLand KL20671


Summary of Contents for KegLand KL20671
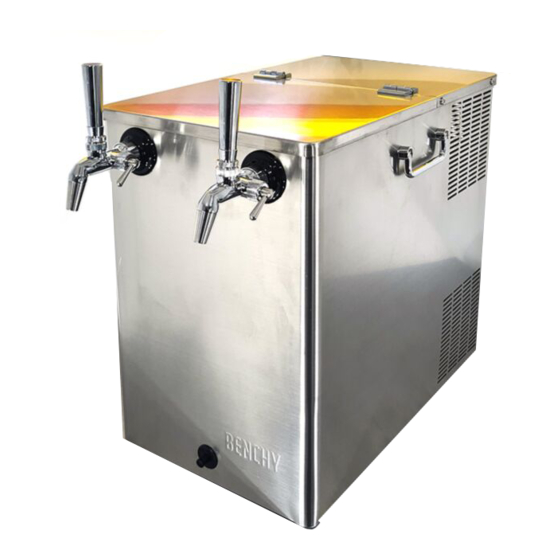
- Page 1 Benchy Sparkling - Instruction Manual KL20671 Instruction Manual KegLand Distribution PTY LTD www.KegLand.com.au www.KegLand.com.au Last Updated 3/06/2022 6:03 PM Page 1 of 16...
- Page 2 DO NOT EXCEED GAS PRESSURE AND WATER PRESSURE STATED ON THE DATE PLATE WARNING ONLY CLEAN PRODUCT LINES WITH COLD TO WARM WATER. DO NOT USE HOT WATER TO CLEAN THE PRODUCT LINES. www.KegLand.com.au Last Updated 3/06/2022 6:03 PM Page 2 of 16...
-
Page 3: Table Of Contents
Expected time to carbonate after initial setup ..................14 Plumbing options without access to a mains water supply ..............14 Benchy Sparkling Under Counter Plumbing Diagram ................15 Warranty (Australia) ..........................16 www.KegLand.com.au Last Updated 3/06/2022 6:03 PM Page 3 of 16... -
Page 4: Important Warnings
I have not exceeded the pressures which are stated on the data plate on the unit. I have read and followed the instruction manual in its entirety and will now conduct a leak test prior to leaving the unit unattended. www.KegLand.com.au Last Updated 3/06/2022 6:03 PM Page 4 of 16... -
Page 5: Fill The Reservoir
The reservoir can easily be accessed flipping the service hatch on the top of unit. Add water to the reservoir using a jug or funnel as shown below until the cooling coils are completely submerged. Check for any leaks after fil www.KegLand.com.au Last Updated 3/06/2022 6:03 PM Page 5 of 16... -
Page 6: Benchy Sparkling - Bench Top Setup
A sharp Stanley knife or a 2 in 1 tube cutter (KL07689) will also be required to shorten the length of the sparkling water OUT and cold still water OUT tubing. www.KegLand.com.au Last Updated 3/06/2022 6:03 PM Page 6 of 16... -
Page 7: Shanks And Taps Installation
Note: The NukaTap FC needs to be very tight to form a seal. 5. Redirect the SPARLING OUT and CHILLED OUT hosing and push firmly into the duotight fittings on the 100mm duotight long shanks. www.KegLand.com.au Last Updated 3/06/2022 6:03 PM Page 7 of 16... -
Page 8: Redirecting The Sparkling Out And Chilled Out Hosing
To correctly insert the tubing into the duotight fitting refer to the push in fittings instructions below. Remove hosing from SPARKLING OUT AND CHILLED OUT push in fittings Benchy Sparkling - under bench dispensing plumbing www.KegLand.com.au Last Updated 3/06/2022 6:03 PM Page 8 of 16... - Page 9 Benchy Sparkling - Instruction Manual Redirect hosing to from CHILLED OUT and SPARKLING OUT into the push in fittings on the long shanks Benchy Sparkling - benchtop dispensing plumbing www.KegLand.com.au Last Updated 3/06/2022 6:03 PM Page 9 of 16...
-
Page 10: Removal Of Evabarrier Tubing From Push In Fittings
3. Check for a good connection by gently pulling back on the tube. If the tube comes out of the push in fitting, reinsert into the fitting ensuring the tube is pushed far enough into the fitting. www.KegLand.com.au Last Updated 3/06/2022 6:03 PM Page 10 of 16... -
Page 11: Benchy Sparkling - Under Counter Setup
The Benchy Sparkling can also be used to dispense only sparkling water if preferred. To achieve this, simply plug the chilled still water OUT push in fitting with an 8mm plug which is provided with the Bench Sparkling. www.KegLand.com.au Last Updated 3/06/2022 6:03 PM Page 11 of 16... -
Page 12: Mains Water Installation - Bench Top And Under Counter Setups
(KL07047). Push your water line securely into the water inlet push in fitting on the Benchy Sparking (Outlet 4 in Figure 1). www.KegLand.com.au Last Updated 3/06/2022 6:03 PM Page 12 of 16... -
Page 13: Co 2 Gas Cylinder And Regulator Installation - Bench Top And Under Counter Setups
Step 2. Fill the reservoir with water until the cooling coils are submerged. Step 3. Set the pressure on the regulator to 1.5 times the dispensing pressure by turning the adjustment knob on the regulator clockwise. www.KegLand.com.au Last Updated 3/06/2022 6:03 PM Page 13 of 16... -
Page 14: Adjusting The Reservoir Set Temperature
Benchy Sparkling. To change the reservoir set temperature refer to the following instruction manual. KegLand STC1000 Instructions Benchy Sparkling Initial Startup Procedure Ensure the mains water supply and CO2 gas supply are turned off and the Benchy Sparkling is connected to your dispensing taps. -
Page 15: Benchy Sparkling Under Counter Plumbing Diagram
Benchy Sparkling - Instruction Manual Benchy Sparkling Under Counter Plumbing Diagram www.KegLand.com.au Last Updated 3/06/2022 6:03 PM Page 15 of 16... -
Page 16: Warranty (Australia)
If you purchased your unit from an international distributor, you will be required to go through their warranty claims process. For a full terms and conditions, please visit our website here -> Terms & Conditions www.KegLand.com.au Page 16 of 16 Last Updated 3/06/2022 6:03 PM...
Need help?
Do you have a question about the KL20671 and is the answer not in the manual?
Questions and answers