Table of Contents

Subscribe to Our Youtube Channel
Summary of Contents for Gymstick GT1.0
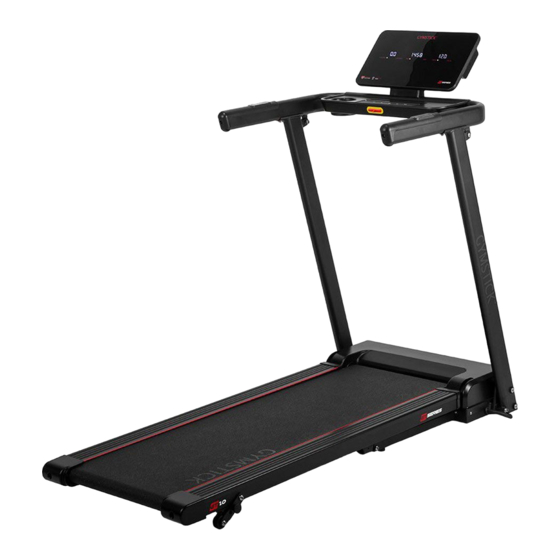
- Page 1 GT1.0 TREADMILL USER MANUAL IMPORTANT: Read all instructions carefully before using this product. Retain this owner’s manual for future reference. The specifications of this product may vary from this photo, subject to change without notice.
-
Page 2: Table Of Contents
BEFORE YOU BEGIN Thank you for choosing the Gymstick GT1.0 Treadmill. We take great pride in producing this quality product and hope it will provide many hours of effective exercise to make you feel better, look bet- ter and enjoy life to its fullest. -
Page 3: Safety Instructions
• The maximum weight capacity for this product is 100kgs. WARNING! BEFORE BEGINNING THIS OR ANY EXERCISE PROGRAM, CONSULT YOUR PHYSICIAN FIRST. THIS IS ESPECIALLY IMPORTANT FOR INDIVIDUALS OVER THE AGE OF 35 OR PERSONS WITH PRE-EXISTING HEALTH PROBLEMS. GT1.0 TREADMILL... -
Page 4: Assembly Instruction
ASSEMBLY INSTRUCTION When you open the carton, you will find the below spare parts: DES. Specification Nos. DES. Specification Nos. Motorized treadmill Safety key Console base Console GT1.0 TREADMILL... - Page 5 ASSEMBLY INSTRUCTION STEP 1 GT1.0 TREADMILL...
- Page 6 ASSEMBLY INSTRUCTION STEP 2 GT1.0 TREADMILL...
- Page 7 ASSEMBLY INSTRUCTION STEP 3 GT1.0 TREADMILL...
- Page 8 ASSEMBLY INSTRUCTION STEP 4 GT1.0 TREADMILL...
- Page 9 ASSEMBLY INSTRUCTION STEP 5 GT1.0 TREADMILL...
- Page 10 ASSEMBLY INSTRUCTION STEP 6 GT1.0 TREADMILL...
-
Page 11: How To Move Treadmill
HOW TO MOVE THE TREADMILL GT1.0 TREADMILL... -
Page 12: Important Electrical Information
2. NEVER operate the treadmill using a generator or UPS power supply. 3. NEVER remove any cover without first disconnecting power. 4. NEVER expose the treadmill to rain or moisture. This treadmill is not designed for use outdoors, near pools or in any other high humidity environment GT1.0 TREADMILL... -
Page 13: Computer Operation Instructions
7.1 Press MODE button to enter TIME, DISTANCE, CALORIES setting. - Press SPEED+/- to set the workout target value. - Press START button, treadmill will run after 3 seconds. - Press SPEED+/- to adjust the speed and incline. GT1.0 TREADMILL... - Page 14 2. Attach the magnet end of the safety pulling rope to the computer and also attach the clip of the safety pulling rope to your clothing. 3. To end your workout safely, press the STOP button or pull out the safety pulling rope, then the treadmill will stop immediately. GT1.0 TREADMILL...
-
Page 15: Preset Training Programs
“END” to stop slowly. PROGRAM EXERCISE CHART Each program is divided into 10 time segments and each segment has the preset speed accordingly. Setting time/10=working time of each section TIME PROGRAM SPEED SPEED SPEED SPEED SPEED SPEED SPEED SPEED SPEED GT1.0 TREADMILL... -
Page 16: Maintenance And Care
Continue this process until belt is at the correct tension. Make sure to adjust both sides equally to ensure correct belt alignment. Refer to figure C. GT1.0 TREADMILL... -
Page 17: Lubricating The Treadmill
3. To better maintain the treadmill and prolong its lifespan, it is suggested that maintenance be done on a regular basis. The following time table is recommended: Light user less than 3 hours/week every six months Medium user 3-5 hours/week every three months Heavy user more than 5 hours/week every two months GT1.0 TREADMILL... -
Page 18: Troubleshooting
Check that the incoming power supply is the correct Incoming voltage is lower voltage. than 50% of the required E02: Burst clash protection Check the control board, voltage. replace if damaged. Check motor, replace if damaged. GT1.0 TREADMILL... - Page 19 Inspect moving parts of the E10:Motor Abnormality is stuck and therefore the treadmill to ensure that they motor is unable to rotate are operating correctly. properly. Replace the motor if necessary. Lubricate the treadmill. GT1.0 TREADMILL...
-
Page 20: Exploded Drawing 1
EXPLODED DRAWING 1 GT1.0 TREADMILL... - Page 21 EXPLODED DRAWING 2 GT1.0 TREADMILL...
-
Page 22: Parts List
Motor Belt Screw ST4.2*12 Left End Cap USB board Right End Cap USB power wire Black Cushion Screw ST2.9*8 Black Cushion Power amplifier board Audio input and output Foot Pad board Power amplifier power Ring-shape wire plug wire GT1.0 TREADMILL... - Page 23 Button board Safety key top signal wire Safety key bottom signal wire Button board connecting wire DC motor AC single wire Blue 200 AC single wire Brown 200 off button Running board Magnet ring Magnet core Power wire GT1.0 TREADMILL...
-
Page 24: Implied Warranty
• Normal wear and tear of the wear parts The device is intended only for home use. Manufactured for: Gymstick International Oy Ratavartijankatu 11 15170 Lahti, FINLAND Devices marked with this symbol must be disposed of separately from your household waste, as they contain valuab- le materials which can be recycled.


Need help?
Do you have a question about the GT1.0 and is the answer not in the manual?
Questions and answers