Table of Contents
Advertisement
Quick Links
Advertisement
Table of Contents

Related Manuals for Gymstick RUN 3.0


Summary of Contents for Gymstick RUN 3.0
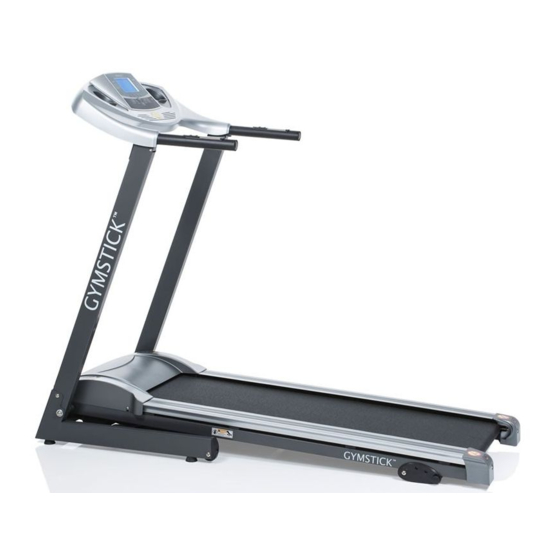
- Page 1 RUN 3.0 TREADMILL USER MANUAL...
-
Page 2: Table Of Contents
Read all instruction carefully before use this product. Retain this owner’s manual for the future’s reference Contents Safety precautions ---------------------------------------------------------------- 3 Assembly instructions ------------------------------------------------------------ 4 Folding instructions --------------------------------------------------------------- 5-6 Technical parameters ------------------------------------------------------------ 8 Grounding method ---------------------------------------------------------------- 8 Operation guide ------------------------------------------------------------------- 9-12 Learning Guide -------------------------------------------------------------------- 13-14 Warm-up instructions ------------------------------------------------------------- 15 Maintenance guide --------------------------------------------------------------- 16... -
Page 3: Safety Precautions
Safety precautions Warning: Now here we suggest that you should consult with your physician or health professional before starting your workout, especially for the age up to 35 old or once-health problem people. We take no responsible for any troubles or hurts if you don’t following our specification. Treadmill will be carefully assembled and covered the motor shield, then connect to the power. -
Page 4: Assembly Instructions
Assembly Instructions When you open the carton, and you will find the below parts in the carton PART LIST Specification Nos. DES. Specification . NO. DES. Main Frame Lock washer 5# Allen Wrench Bolt M8*45 M8*16(1pc, Bolt Safety lock preassemble) Oil bottle FIXING TOOLS: 5# Allen Wrench 5mm 1pc... -
Page 5: Folding Instructions
Folding Instructions STEP 1 : Open the carton, get out the above spare parts, and put the Main Frame onto the level ground. STEP 2 : 1、 Remove 1pc\bolt M8*16(51) from the computer frame, Holding the computer frame, use the 5# Allen wrench,Lock the base and right upright tube tight by bolt M8*16(51) and lock washer(64)See as left... - Page 6 STEP 4 Attach the safety key (71) on the computer and start your exercise. Folding Instruction Pulling up: Pull up the main frame, until hearing the sound that th ATTENTION: Please make sure all parts have been fixed properly. Before you use the treadmill, please read the instruction carefully...
- Page 7 Folding Instructions Pulling up: Pull up the base frame at position A, till hearing the sound that pressure bar B is locked into the round tube Pulling down: Support place A with hand, kick the place of air pressure bar, then the base frame will fall down automatically ( Please keep anybody and any...
-
Page 8: Technical Parameters
Technical Parameters BUILT UP 1587*696*1255 POWER As the rating label showing SIZE(mm) FOLDABLE Maximum output 850*696*1460 As the rating label showing SIZE(mm) power RUNNING 400*1200 1.0-16KM/H BOARD SPEED RANGE SIZE(mm) MAX USER 46KG NET WEIGHT 100KG WEIGHT THREE LCD WINDOW Speed, Time, Distance, Calories, Pulse WITH BLUE BACKGROUND... -
Page 9: Operation Guide
Operation Guide 1 OVERVIEW SHOWING SPEED:Display the speed, TIME:Display the time DIST. Display the distance CAL. Display the calories PULSE:Display the heart rate 3 BUTTON FUNCTION ‘PROG’ : Program select key. In order: Manual Mode—P1-P2-----P12-FAT ‘MODE’ : Count Down Mode Select key. In order: Manual Mode-Time counts down-Distance count down-Calorie count down ‘START’... - Page 10 : Press the button to adjust the speed fast or slow.When SPEED▲、▼ ‘ ’ stop,adjust the parameter )’ : Press the button to adjust the speed quickly. 3,6,9,12 ‘SPEED( The left armrest buttons: start and stop button. The right armrest buttons: speed adjusting button. 4.
- Page 11 6.1 input parameter display and setting limits Parameter defa Settings range category remark don't (-1-) 0(male) 0-1 0= male 1=female Years (-2) 10-99 Body heig (-3) 170cm 100-240CM Body weig (-4) 70KG 20-160KG 6.2 Body fat index comparison Body fat index Obesity level (BMI)...
- Page 12 9.Exercise parameter and setting Mode Program Default Showing range Setting range Default 1.0KMH—16K Speed (KM/H) -------- -------- -------- Time (MIN:SEC) 0:00—99:59 30:00 30:00 5:00---99:00 0.00KM—99.9 Distance (KM) 1.00KM -------- 0.5KM—99.5KM Calories 0Kcl—999Kcl 50Kcl -------- 10Kcl—995Kcl Programs table: Time To set time / 20 time = running time of each period Program 10 11 12 13 14 15 16 17 18 19 20 SPEED...
-
Page 13: Learning Guide
Learning Guide PREPARATION If you are over 35 years old or not very healthy, also it`s your first time do exercise, please consult with your doctor or professional person. Before you use the motorized treadmill, please learn how to control the machine first, know well how to start, stop, adjust the speed and so on. - Page 14 Speed 1-3.0KM/H not well physical Speed 3.0-4.5KM/H less movement and workout Speed 4.5-6.0KM/H normal walking Speed 6.0-7.5KM/H Fast walking Speed 7.5-9.0KM/H Jogging Speed 9.0-12.0KM/H intermediate speed walking Speed 12.0-14.5M/H well experiences of running Speed 14.5-16.0KM/H excellent runner SAFETY TRAINING MEASURE Attention:The velocity of movement ≤6KM/H, the normal walking;The velocity of movement ≥8.0KM/H the runner.
-
Page 15: Warm-Up Instructions
Warm-up Instructions Before exercise, it is better to do stretching exercises. Warm muscles stretch more easily, so the first of 5 ~ 10 minutes to warm up. Then in accordance with the following methods to stop and do stretching exercises - do five times, each leg every time 10 seconds or more time to do it again after the end of the exercise 1. -
Page 16: Maintenance Guide
Maintenance Guide Warning: ALWAYS UNPLUG THE TREADMILL FROM THE ELECTRICAL OUTLET BEFORE CLEANING OR SERVICING THE UNIT. Clean: General cleaning the unit will greatly prolong the treadmill. Keep treadmill clean by dusting regularly. Be sure to clean the exposed part of the deck on either side of the walking belt and also the side rails. -
Page 17: Running Belt Adjustment
Running Belt Adjustment 1, It’s suggested to switch off the power for 10 minutes after keep running 2 hours, so that it’s good for maintain the treadmill. 2, To avoid the mat from slipping during running, the belt should be not too loose; for avoiding the more abrasion between the roller and belt and maintain the machine’s good running the belt should be not too tight. -
Page 18: Exploded Diagram
Exploded Diagram... -
Page 19: Parts List
Parts list DESCRIPTION REMARK DESCRIPTION REMARK Main frame Start/stop Pulse Base frame Control circuit board Computer bottom Left upright tube wire Right upright tube Computer up wire Motor bracket Rubber pad 2 Computer bracket Magnetic Ring Rubber pad Blue Single-Line Rotating tube Hexagon cap screw M8*25... -
Page 20: Trouble Shooting Guide
Computer circuit Screw ST4.2*20 board Computer Screw ST2.9*6.5 blind nuts Sensor Lock Washer Lock Washer Pulse bottom wire Speed +/1 pulse Pulse up wire S=13,14,15 Allen Wrench Computer up wire Light support Trouble Shooting Guide Fault Code Main Reason Solution 1.... -
Page 21: Gradient Adjustment
Gradient Adjustment nsert each fixing pin (#23) into the holes of the rear Adjustable Wheel (#16). There are three OTICE holes of the different inclination of the treadmill. The Read this manual before assembly beginners should start on Position (#A) ... -
Page 22: Implied Warranty
• Non-compliance of the operating instructions Wear parts and expendable parts are also not covered. The device is only intended for home use. The warranty does not apply to commercial use of any kind. Manufactured for: Gymstick International Oy Ratavartijankatu 11 15170 Lahti, FINLAND...
Need help?
Do you have a question about the RUN 3.0 and is the answer not in the manual?
Questions and answers