
Subscribe to Our Youtube Channel
Related Manuals for Gymstick RUN 10.0


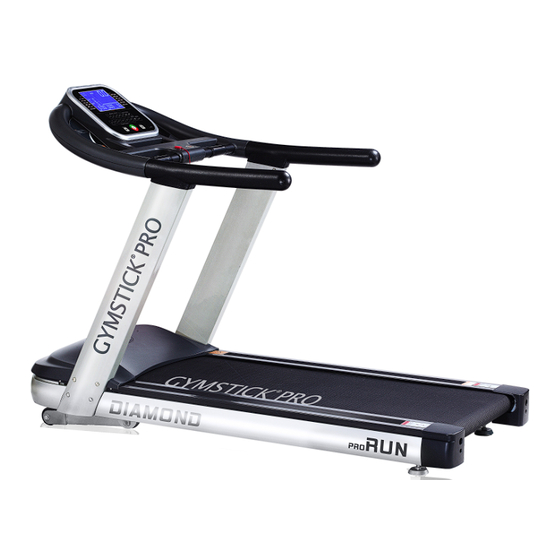
Summary of Contents for Gymstick RUN 10.0
- Page 1 RUN 10.0 TREADMILL USER MANUAL Read all instructions carefully before using this product. Retain this owner’s manual for future reference.
-
Page 2: Table Of Contents
ENGLISH CONTENTS SAFETY INFORMATION ....................1-2 EXPLODE-VIEW ......................3 PART LIST……………………………………………………………………………………..4-5 ASSEMBLY INSTRUCTIONS ..................6-7 INSTALLING YOUR TREADMILL ................8 MONITOR INSTRUCTION MANUAL................9-12 MAINTENANCE ......................13-14 TROUBLE SHOOTING ....................15-16 WARRANTY TERM ......................17 ATTENTION! Consult your doctor before commencing any exercise program. This is especially important for people over 35 years of age or those people with pre-existing health problems. The heartbeat sensor is not a medical instrument. -
Page 3: Safety Information
SAFETY INFORMATION Before using the equipment, carefully read this manual and keep handy for future consultation. The owner is responsible for guaranteeing that all equipment users are adequately informed of the safety precautions. ELECTRICAL SAFETY To reduce the risk of burns, fire, electrical shocks or personal injury, see the following precautions: Remove the treadmill plug from the socket when not in use. - Page 4 CONSERVATION / CLEANING Do not expose the equipment to natural elements such as: sunlight, rain, sea mist, dust, dew, etc. Only use a water dampened cloth to clean your equipment. Never use abrasives, alcohol or solvent for cleaning. Periodically double the treadmill and clean the floor, this will help prolong the useful life of the product. Incorrect conservation / maintenance can damage the product, and can result in the loss of guarantee.
-
Page 5: Explode-View
EXPLODED VIEW... -
Page 6: Part List
PART LIST Description Description Main frame Spring cushion Incline frame End cover (right) Upright post right End cover (left) Upright post left Handle pulse button Motor base frame Ferrit Computer frame Controller Allen C.K.S full thread screw M10X20 Power cord Allen C.K.S half thread screw M10X70X20 Wire red Allen socket full thread screw M8X20... - Page 7 THE CONTENTS OF THE BOX: Stand post ( left) Stand post (right) Console Main frame 说明书 Console connection manual Silicon oil Safety key Screw kits strap(left and right) HARDWARE KIT: Inner hex bolt (M10x20) 18pcs Cross allen wrench 1pcs T Allen wrench 1pcs 个 Inner hex bolt (M8x35) 4pcs Spring washerΦ8 4pcs...
-
Page 8: Assembly Instructions
ASSEMBLY INSTRUCTIONS Monitor Handle pulse Handle bar Upright post Motor cover up Running belt Motor cover lower Side rail Rear cover Step 1: Take out the machine from box, connect the upright post cable and assemble the upright post to the frame, then fix it with 10pcs M10*20 screw. - Page 9 Step 2: Fix the signal wire with the computer bractor, Use M8*15 screw fix well. Step 3: Connect the cable at the right side of the console to the upright post cable, assemble the console onto the upright posts, then fix with 8pcs M10*20 screw. Step 4: Push the upright post cover upwards, make sure the console is well connected with the upright posts, fix it with 4pcs ST4*16 screw.
-
Page 10: Installing Your Treadmill
INSTALLING YOUR TREADMILL To make exercising an enjoyable activity, the treadmill must be installed in a comfortable and pleasant setting. This treadmill is designed to take up as little space as possible and to adapt to a domestic setting. Do not place the treadmill near water or in a very damp environment. Make sure that the electric cable is not in a heavy traffic area or under carpets or furniture. -
Page 11: Monitor Instruction Manual
MONITOR INSTRUCTION MANUAL APPEARANCE Screen Incline “+” Incline Shortcut Key Incline “-” Speed “+” Speed “-” Speed Shortcut Key Program Start/Stop Mode FUNCTION AND KEY INSTRUCTION 1. Start: start after 5 seconds. 2. LCD screen display running information. Program and handle pulse are the same screen. If no handle pulse and without any program, it shows “P”, when it is under a program, it will show the program. - Page 12 F: Incline -: When the motor is running, press “incline – “the incline will be decreased. G: Mode: 3 modes: H-1: time count down mode; H-2: distance count down mode;h-3: calories count down mode. Both of them can be set by using the speed “+” /or “_”, after setting, then start the machine by using the start/stop key H: Speed quick button –...
- Page 13 PROGRAMS Section 16 Sections Program 9 10 SPEED INCLINE SPEED INCLINE SPEED INCLINE SPEED INCLINE SPEED INCLINE 5 10 11 8 SPEED 10 10 9 INCLINE SPEED 10 12 12 10 INCLINE 10 12 13 13 SPEED 8 10 11 12 INCLINE 8 10 13 SPEED...
- Page 14 Body fat function Choose the program ”FAT”. 1. SET PERSONAL INFO: I. [GENDER]: ▲ Press PROGRAM to do adjustment into F-1. ▲Press the SPEED + - to adjust the gender. ▲ Press MODE again to confirm the adjustment. II. [AGE]: ▲...
-
Page 15: Maintenance
MAINTENANCE CLEANING Remove dust from the treadmill with a vacuum cleaner or a lightly dampened cloth. Periodically fold the treadmill and clean the floor which will help to prolong the useful life of the product. Never use solvents on the treadmill or the belt. Solvents can compromise belt and deck lubrication. CENTERING AND ADJUSTING THE BELT When walking or running you may trend to exert more strength in one leg than the other. - Page 16 LUBRICATING THE DECK A well lubricated deck will ensure treadmill high performance and will reduce wear to the components. This treadmill was pre-lubricated at the factory. However, to improve performance it may need periodical lubrication. To check lubrication level, just lift up the belt and reach your hand in as far to the center as you can. If you hand shows signs of silicone there is no need for additional lubrication.
-
Page 17: Trouble Shooting
TROUBLE SHOOTING WHEN TO CALL FOR HELP This treadmill is designed with user safety as the number one priority. In the event of electrical failure, the treadmill will shut off automatically to prevent user injury and to prevent damage to expensive components such as the motor. - Page 18 Connect it and start again, after it studied, it will be The incline motor is not well studied Bad communication of transformer Check if transformer and controller is well connected Incline motor sensor is defective TROUBLESHOOTING YOUR TREADMILL: This treadmill is designed to be reliable and easy to use. However, if you experience a problem, please reference the trouble shooting guide listed below: PROBLEM: The treadmill can not work.
-
Page 19: Warranty Term
Wear parts and expendable parts are also not covered. The device is only intended for semi- commercial use. The warranty does not apply to full commercial use of any kind. Manufactured by: Gymstick International Oy Ratavartijankatu 11 15170 Lahti, FINLAND...
Need help?
Do you have a question about the RUN 10.0 and is the answer not in the manual?
Questions and answers