Table of Contents

Related Manuals for Gymstick GT7.0


Summary of Contents for Gymstick GT7.0
- Page 1 GT7.0 TREADMILL USER MANUAL IMPORTANT: Read all instructions carefully before using this product. Retain this owner’s manual for future reference. The specifications of this product may vary from this photo, subject to change without notice.
-
Page 2: Table Of Contents
BEFORE YOU BEGIN Thank you for choosing the Gymstick GT7.0 Treadmill. We take great pride in producing this quality product and hope it will provide many hours of effective exercise to make you feel better, look better and enjoy life to its fullest. -
Page 3: Safety Instructions
SAFETY INSTRUCTIONS Basic precautions should always be followed, including the following safety instructions when using this equipment: Read all instructions before using this equipment. • Never leave the treadmill unattended. Unplug the unit from the power outlet when it is not in use. •... -
Page 4: Assembly Instruction
ASSEMBLY INSTRUCTION • Lift up and remove the box that surrounds the Treadmill. • Check the following items are present. If any of the parts are missing, contact with the dealer. Note: Each step number in assembly instructions tells you what you will be doing. Read and understand all instructions thoroughly before assembling the treadmill. - Page 5 ASSEMBLY INSTRUCTION MAIN PARTS MOTOR COVER CONSOLE MOTOR MOTOR BELT RUNNING BELT RUNNING DECK SIDE RAIL INCLINE MOTOR FRONT ROLLER REAR ROLLER REAR COVER HARDWARE BAG Allen C.K.S half thread screw (M8*60*20 x 4pcs) Allen C.K.S full thread screw (M8*15 x 8pcs) Allen C.K.S full thread screw (M8*20 x 2pcs) Philips C.K.S.
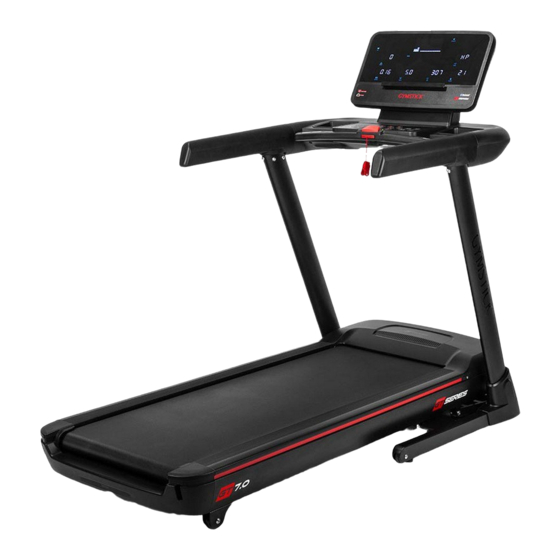
- Page 6 ASSEMBLY INSTRUCTION TREADMILL OVERVIEW Console Safety key Handle bar Upright post Motor Cover Running belt Rear cover Side rail TECHNICAL INFORMATION Maximum load 130kg Dimension (folded) 1402 x 925 x 1541mm Dimension (unfolded) 1925 x 925 x 1470mm Running surface 1530 x 550mm Speed 0.5 - 20.0km/h...
- Page 7 ASSEMBLY INSTRUCTION STEP 1 Take out the machine from box and put it on the flat floor. (As shown),remove all PE bags and bags wrapped on the machine. STEP 2 Connect communication wire of the console with the right upright post. Insert the left and right upright post on the base frame, and then fix the each upright post with 2pcs M8*60*20 screw and 1pc M8*20 screw.
- Page 8 ASSEMBLY INSTRUCTION STEP 3 Fold up the treadmill, (Note: Before fixing the base frame cover, please ensure the screws for base frame and upright post are fixed completely.) Put the base frame covers in the left and right side of upright post, then clip-on the covers together.
- Page 9 ASSEMBLY INSTRUCTION STEP 5 Put the display on the console, and lock the two parts together with 4pcs M8*16 screw. STEP 6 Place the rear cover on the rear of console, and fix it with 4pcs M8*16 screw. LAST STEP Check all screws were fixed rightly.
-
Page 10: Setting Up Your Treadmill
SETTING UP YOUR TREADMILL To make exercise a desirable daily activity for you, the treadmill should be placed in a comfortable and con- venient setting. This treadmill is designed to use minimal floor space and to go nicely in your home. •... -
Page 11: Important Electrical Information
IMPORTANT ELECTRICAL INFORMATION WARNING! This treadmill requires a right power source in order to properly operate. For your safety, as well as the safety of others, please verify that the power source is correct before plugging the equipment. Any incorrect power source could cause significant damage to the equipment and or user. -
Page 12: Getting Started
GETTING STARTED TURN POWER ON Put the power cord into the electrical outlet with 10A. Flip this switch to the “ON” position. The screen shines with prompt sound. SAFETY KEY AND CLIP The safety key is designed to cut the main power to the treadmill should your fall. Therefore, the safety key is designed to bring the treadmill to an immediate stop. - Page 13 GETTING STARTED TREADMILL USE INSTRUCTION 1. Power on, the treadmill will start to the lowest position, check the machine is normal. 2. Attach the safety lock clip to the skirt of the sportsman’s chest. 3. Before running, must confirm the stability of the treadmill and function is normal. It is strictly prohibited to stand on the run belt start, should stand on the side bar, handle bar, once confirm everything well then start running.
-
Page 14: Console Operation Instructions
CONSOLE OPERATION INSTRUCTIONS KEY DEFINITION & DISPLAY INSTRUCTION 1. START/PAUSE key: When the treadmill is stopped, press the START key to turn on the treadmill. Press START key when running, it will pause. 2. STOP key: when the treadmill is running, stop the treadmill slowly by pressing the STOP key. 3. - Page 15 CONSOLE OPERATION INSTRUCTIONS shutdown safety precautions. In any state, as long as the safety key is out of position, treadmill to stop running, console keyboard prohibits operation, re-put the safety key, the screen enter into the system default working state. MP3 OPERATION INSTRUCTION (optional) The console is with built-in double channel audio, switching regulated power Supply, connect the adapter wire of audio with the audio source and MP3 input port of the console, then MP3 starts to...
- Page 16 CONSOLE OPERATION INSTRUCTIONS c) In time countdown mode, press ‘ MODE’ to enter distance countdown mode, the distance window shines.Initial distance is 1.0 km, press speed key ‘+’ and ‘0 ’to set the distance and range. Setting range: 1.0-99.0KM, work for 1.KM. d) When in distance countdown mode, press ‘...
- Page 17 CONSOLE OPERATION INSTRUCTIONS HRC PROGRAM 1. HRC defaults to three parts, HRC1 limits the speed of 9 km / h, HRC2 limits the speed of 11 km/h, HRC3 is limited to 13 km/h 2. HRC set method,sequence, parameter range, press the program key to display HRC, press the mode to confirm and enter the next setting, press the speed key to adjust, set the last parameters to start.
- Page 18 CONSOLE OPERATION INSTRUCTIONS SPEED / INCLINATION CHART PROG SPEED INCLINE SPEED INCLINE SPEED INCLINE SPEED INCLINE SPEED 10.0 10.0 10.0 INCLINE SPEED 10.0 10.0 11.0 INCLINE SPEED 11.0 10.0 11.0 INCLINE SPEED 10.0 11.0 INCLINE SPEED 10.0 11.0 12.0 12.0 INCLINE SPEED 10.0...
- Page 19 CONSOLE OPERATION INSTRUCTIONS SPEED / INCLINATION CHART INCLINE SPEED 12.0 12.0 12.0 12.0 12.0 12.0 12.0 12.0 INCLINE SPEED 13.0 13.0 13.0 13.0 13.0 13.0 13.0 13.0 INCLINE SPEED 11.0 11.0 11.0 11.0 INCLINE SPEED 11.0 11.0 11.0 11.0 11.0 INCLINE SPEED 11.0...
-
Page 20: Maintenance And Care
MAINTENANCE AND CARE General cleaning will help prolong the life and performance of your treadmill. Keep the unit clean and maintained by dusting the components on a regular basis. Clean both sides of the running belt to prevent dust from accumulating underneath the belt. Keep your running shoes clean so that dirt from your shoes does not wear out the running board and belt. - Page 21 MAINTENANCE AND CARE CENTERING THE RUNNING BELT: Place the treadmill on level ground and set it at 6-8kph to check if the Running Belt drifts. 1. If the Running Belt moves to the right, turn the adjusting bolt on the right side ¼ turn clockwise, then turn the left adjustment bolt ¼...
- Page 22 LUBRICATING THE TREADMILL IMPORTANT NOTE: The treadmill is factory-lubricated. However, it is recommended to check the lubrication of the treadmill regu- larly, to ensure an optimal operation of the treadmill. RUNNING BELTS & TREADMILL LUBRICANT: Lubricating the running board and running belt is essential as the friction between the two affects the life span and function of the treadmill, therefore it is suggested that the running board and belt be inspected regularly.
-
Page 23: Troubleshooting
TROUBLESHOOTING TREADMILL Problem Reason How to settle the problem A : Did not connect the power supply Connect the power supply or switch on B: Safety key did not put on right position Well put the safety key on the correct position Treadmill stop working Reconnect the transformer or replace the... -
Page 24: Exploded Drawing
EXPLODED DRAWING GT4.0 TREADMILL... -
Page 25: Parts List
PARTS LIST NAME QUANTITY Base frame Platform frame Incline frame Upright post (L) Upright post (R) Console frame Display frame Motor installation panel Outer telescopic tube Pedal Hex half head screw M12×Φ14×35×19 Allen C.K.S. half thread screw M8×40×20 Allen C.K.S. half thread screw M8×45×20 Allen C.K.S. - Page 26 PARTS LIST Flat washer Φ8 Flat washerΦ10 Flat washerΦ14 Spring washerΦ8 Spring washerΦ5 Hex locked nut M8 Hex locked nut M10 Feet pad adjustmentΦ35×37×12×M8 Plastic flat washerΦ24×Φ16×t2.0 Taper feet pad Φ23×Φ18×Φ5×11 Cushion 35×35×t5.0×Φ8 Cushion Φ30×30×M6×6 Serrated lock washers Φ5 Incline axle Φ25×Φ17×Φ10×6×1 Side rail guider Φ25×Φ5×4.5 Wire protector Front roller...
- Page 27 PARTS LIST End cap Motor cover Main frame front cover Powder Metallurgy set Curved pipe plug Hollow tubes plug Column spring Inner telescopic tube -1 Wheel Wheel Magnetic ring console set Speed sensor Wire Wire Wire Handle pulse wire controller Safety key Power cord Power cord...
-
Page 28: Implied Warranty
• Normal wear and tear of the wear parts The device is intended only for home use. Manufactured for: Gymstick International Oy Ratavartijankatu 11 15170 Lahti, FINLAND Devices marked with this symbol must be disposed of separately from your household waste, as they contain valuab- le materials which can be recycled.
Need help?
Do you have a question about the GT7.0 and is the answer not in the manual?
Questions and answers