Table of Contents

Related Manuals for Gymstick GT4.0


Summary of Contents for Gymstick GT4.0
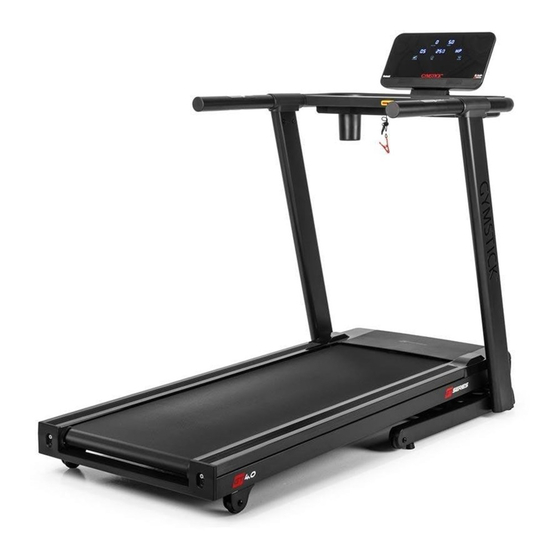
- Page 1 GT4.0 TREADMILL USER MANUAL IMPORTANT: Read all instructions carefully before using this product. Retain this owner’s manual for future reference. The specifications of this product may vary from this photo, subject to change without notice.
-
Page 2: Table Of Contents
BEFORE YOU BEGIN Thank you for choosing the Gymstick GT4.0 Treadmill. We take great pride in producing this quality product and hope it will provide many hours of effective exercise to make you feel better, look better and enjoy life to its fullest. -
Page 3: Safety Instructions
• The maximum weight capacity for this product is 120kgs. WARNING! BEFORE BEGINNING THIS OR ANY EXERCISE PROGRAM, CONSULT YOUR PHYSICIAN FIRST. THIS IS ESPECIALLY IMPORTANT FOR INDIVIDUALS OVER THE AGE OF 35 OR PERSONS WITH PRE-EXISTING HEALTH PROBLEMS. GT4.0 TREADMILL... -
Page 4: Assembly Instruction
MAIN BODY UPRIGHT POST (R/L) HARDWARE KIT CONSOLE SAFETY KEY SILICONE BOTTLE MANUAL ALLEN SCREW (M8x50x20) 4PCS L-SHAPE SPANNER S5 1PCS HEXAGON SOCKET HEAD BOLT (MX20) 4PCS L-SHAPE SPANNER S6 1PCS TAB BOLT 1PCS INNER HEXAGON BOLT (M8x20) 4PCS GT4.0 TREADMILL... - Page 5 Maximum load 120kg Dimension (folded) 1104 x 815 x 1450mm Dimension (unfolded) 1711 x 815 x 1389mm Running surface 1420 x 500mm Speed 1.0 - 18.0km/h REMARK: We reserve the right to amed the product without prior notice. GT4.0 TREADMILL...
- Page 6 Use a M8*20 with inner hexagon bolts from top to bottom for locking! Note: when installing the right riser, pay attention to properly connecting the communication line between the riser and the base, and avoid clamping it! GT4.0 TREADMILL...
- Page 7 After aligning the hole position from inside to outside use the M8*20 Allen C.K.S. full thread screw to lock in! STEP 4 Lift up the console and fix it from the left side of the watch with a TAB bolt. GT4.0 TREADMILL...
-
Page 8: Moving Treadmill
ASSEMBLY INSTRUCTION STEP 5 Finally, check the machine screw is locked. After all the screws are fastened, the machine installati- on is completed. MOVING THE TREADMILL GT4.0 TREADMILL... -
Page 9: Important Electrical Information
2. NEVER operate the treadmill using a generator or UPS power supply. 3. NEVER remove any cover without first disconnecting power. 4. NEVER expose the treadmill to rain or moisture. This treadmill is not designed for use outdoors, near pools or in any other high humidity environment GT4.0 TREADMILL... -
Page 10: Console Operation Instructions
The speed decline key, in the state of stopping or measuring fat, is the key of setting the parameter decline, and in the running state, it is the key of the decline of the speed. GT4.0 TREADMILL... - Page 11 17. BODY FAT FUNCTION. When the treadmill is stopped, press the PROG key until select FAT and enter into body fat function, on the left side DISTANCE window display program number, press MODE key to select, on the right side, SPEED window display parameters, press to set up parameters. GT4.0 TREADMILL...
- Page 12 18. Speed of 1 km/h (0.6 mph), not less than 1 km/h (0.6 mph) during deceleration, eg: 1 km/h (0.6 mph) for treadmills, Running at 1.6 km/h (1.0 mph), the heart rate resulted in a deceleration of 1.0 (2.0) km/h, then decelerated to 1 km/h (0.6 mph). GT4.0 TREADMILL...
- Page 13 SPEED INCLINE SPEED 10.0 10.0 10.0 INCLINE SPEED 10.0 INCLINE SPEED 10.0 11.0 INCLINE SPEED 11.0 INCLINE SPEED 10.0 11.0 12.0 INCLINE SPEED 10.0 11.0 INCLINE SPEED 11.0 11.0 INCLINE SPEED 10.0 10.0 10.0 10.0 INCLINE SPEED INCLINE GT4.0 TREADMILL...
- Page 14 INCLINE SPEED 11.0 12.0 INCLINE SPEED 12.0 11.0 12.0 INCLINE SPEED 11.0 12.0 INCLINE SPEED 12.0 12.0 12.0 INCLINE SPEED 11.0 12.0 11.0 12.0 INCLINE SPEED 12.0 11.0 10.0 11.0 12.0 INCLINE SPEED 12.0 12.0 12.0 12.0 INCLINE GT4.0 TREADMILL...
-
Page 15: Maintenance And Care
• A loose Running Belt will result in the runner sliding off when running, while too tight of a Running Belt will result in decrease to the motors performance and also create more friction between the roller and running belts. The most suitable tightness for the belts is pulled out 50-75mm from the Running Board. GT4.0 TREADMILL... - Page 16 Continue this process until belt is at the correct tension. Make sure to adjust both sides equally to ensure correct belt alignment. Refer to figure C. GT4.0 TREADMILL...
-
Page 17: Lubricating The Treadmill
3-5 hours/week every three months Heavy user more than 5 hours/week every two months STORAGE Store you treadmill in a clean and dry environment. Ensure the master power switch is off and is un-plugged from the electrical wall outlet. GT4.0 TREADMILL... -
Page 18: Troubleshooting
1. Change the key board and wire; 2.Change the mainboard; The keys malfunction broken keys 3.Change the console a. Safety key drop out Replace the safety key Stop abruptly under normal state b. broken system Ask serviceman to repair it GT4.0 TREADMILL... - Page 19 LCD display didn’t plug well or no value of broken handle wire pulse B. Broken wire Change the console console Console A. Loose screw Tighten the screw incomplete display board display B. Broken system Change the console lack strokes GT4.0 TREADMILL...
-
Page 20: Exploded Drawing 1
EXPLODED DRAWING 1 GT4.0 TREADMILL... -
Page 21: Parts List
Philips C.K.S. full thread screwM5×10 Philips C.K.S. full thread screwM4×10 Philips C.K.S self-tapping screw ST4×16 Allen C.K.S.half thread screw M10×25×15 Philip self-tapping screw ST3×15 Philips self-tapping screw ST4×15 Allen socket full thread screw M6×25 8.8 Philips self-tapping screw ST4×35 GT4.0 TREADMILL... - Page 22 Handle pulse connection wire Controller Safety key Power connection wire Power connection wire Rocker switch Self-reset switch Power connection wire Cable guider Power cord Front roller Rear roller Arc opening plug Motor Running board Running belt Motor belt Motor cover GT4.0 TREADMILL...
- Page 23 Cylindrical cushion Taper cushion (conductive rubber) Wheel Pipe strap TAB bolt spring -1 Magnetic ring Incline motor Allen C.K.S.half thread screw M10×55×25 Lifting shaft sleeve Hex self-locking nut M10 Flat washerΦ10 Allen C.K.S.half thread screw 0×35×20 Square cushion GT4.0 TREADMILL...
-
Page 24: Implied Warranty
• Normal wear and tear of the wear parts The device is intended only for home use. Manufactured for: Gymstick International Oy Ratavartijankatu 11 15170 Lahti, FINLAND Devices marked with this symbol must be disposed of separately from your household waste, as they contain valuab- le materials which can be recycled.
Need help?
Do you have a question about the GT4.0 and is the answer not in the manual?
Questions and answers