Revopoint 3D Technologies POP 2 Quick Start Manual
Hide thumbs
Also See for POP 2:
- User manual (33 pages) ,
- User manual (27 pages) ,
- User manual (28 pages)
Table of Contents
Advertisement
Quick Links
Advertisement
Table of Contents

Related Manuals for Revopoint 3D Technologies POP 2


Summary of Contents for Revopoint 3D Technologies POP 2
- Page 1 POP 2 3D SCANNER Quick Start Guide V 1.0 2022.3...
- Page 2 POP 2 3D Scanner Visit our official website www.revopoint3d.com for the latest software and documents. The operating temperature range of this product is 0°C to 40°C (32°F to 104°F). It does not meet military, industrial or � � � even the full commercial operating temperature range. Operate the product appropriately and only in situations limited to this temperature range.
-
Page 3: Table Of Contents
Operation Workflow ..............................5 Mac: Connect to the POP 2 3D Scanner via Wi-Fi ......................13 Smartphone Connecting to POP 2 3D Scanner ( Wi-Fi & USB Mode) ................15 Android Smartphone Connects POP 2 Via Wi-Fi ......................15 Android Smartphone Connects POP 2 Via USB Mode ....................21 Hardware Connection .............................. -
Page 4: Product Overview
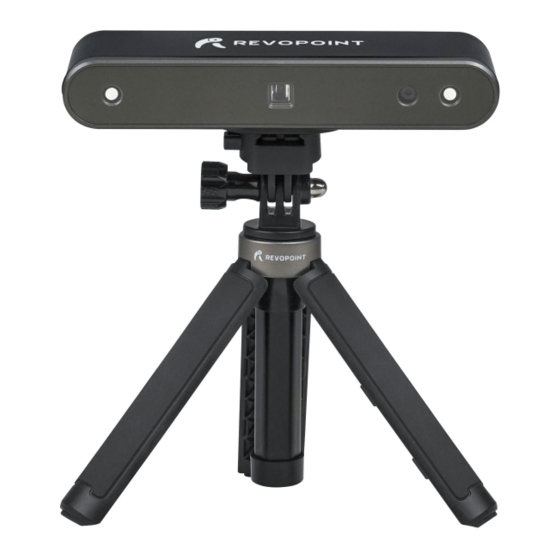
The core hardware of POP 2 applies the principle of binocular & Micro-structured light, and with the help of the proprietary micro projecting chip, POP 2 ensures fast acquiring high-accuracy (up to 0.05mm) 3D point cloud data. And it supports texture scanning to directly generate vivid 3D models for color 3D printing. -
Page 5: System Requirements
The Revo Scan is a scan software that assists in scanning objects and obtaining 3D models; the Revo Studio is a post- process software for postprocessing the scanned 3D models; the Revo Calibration is a Calibration Software that adjusts the parameters of POP 2 for ensuring good results. Download the software above at our website :... -
Page 6: Pc: Connect To Pop 2 3D Scanner
PC: Connect to POP 2 3D Scanner Both Mac and Windows PC can be connected to POP 2 3D scanner via USB cable and Wi-Fi. In the following chapter, we are going to introduce the USB mode and Wi-Fi mode connections: for USB mode, we will take the Windows device connection as the example, and for the Wi-Fi mode, take the Mac device connection as the example. - Page 7 If the device is connected successfully, the left end of the status bar displays: Device is connected. Otherwise, please check the connection. This happens typically 8-10 seconds after the POP/POP 2’s status LED on the rear panel turns blue. COPYRIGHT ©2022 REVOPOINT 3D ALL RIGHTS RESERVED...
- Page 8 After specifying the Accuracy, Scan Mode and Texture options, press “OK” to enter the scanning page. The top area of the 3D Model Preview window shows the distance. Position the POP 2 scanner or the object to confirm an "Excellent" distance and keep it during scanning.
- Page 9 POP 2 3D Scanner User Manual Start or Pause Scanning Click to Start/Pause scan. The number above the Start button is the countdown before scanning starts. During scanning, please make sure the point cloud in the lower-left window is adequate and the distance remains "Excellent".
- Page 10 After clicking Stop , it is possible to resume scanning (say, after repositioning either the POP/POP 2 or the object being scanned). If this is desired, then be sure to move the slider switch for “Fuse point cloud immediately?” to the right before clicking “Complete”.
- Page 11 POP 2 3D Scanner User Manual Inactive button in the Stop’s popup (so that Point Cloud Fusing is a manual operation, allowing changes in the preset): After clicking “Complete”, the next step is to fuse the point cloud data, as shown below:...
- Page 12 The pitch point is at a minimum of 0.15 mm for the POP 2. Smaller pitch points result in more resolution, but also more processing time.
- Page 13 POP 2 3D Scanner User Manual Export Click Export to export the 3D model. Select a file name and a file format (. PLY, .OBJ &. STL, are supported). Note: If you scan the model for 3D print, please mesh the model and save it as a STL. file.
-
Page 14: Mac: Connect To The Pop 2 3D Scanner Via Wi-Fi
Mac: Connect to the POP 2 3D Scanner via Wi-Fi 1. Power the POP 2 3D scanner with a power bank or an AC adapter. (Do not plug it into your Mac, or it will be USB mode by default.) 2. - Page 15 POP 2 3D Scanner User Manual 3. Open “Revo Scan” software and wait for a while for device connection after the Wi-Fi is connected successfully. 4. Click “New Scan” to scan the object. COPYRIGHT ©2022 REVOPOINT 3D ALL RIGHTS RESERVED...
-
Page 16: Smartphone Connecting To Pop 2 3D Scanner
1. Download the Software-Revo Scan at Revopoint official website: https://www.revopoint3d.com/download/pop-2/ 2. Power the POP 2 3D scanner on with a power bank or other power supply; Note: Don’t take your PC as the power supply when scanning via Wi-Fi. 3. Connect to the Wi-Fi Provided by the POP 2;... - Page 17 POP 2 3D Scanner User Manual If the Serial Number of one POP 2 3D scanner is: A21A0005206F00A54. The Default SSID and Password are: SSID: POP2-REVO-A21A0005 Password: Revopoint3d 4. Open Revo Scan to confirm Connection Mode and Scan Settings; Before scanning, select proper Accuracy, Scan Mode, Texture and Model Format according to your demand.
- Page 18 POP 2 3D Scanner User Manual 5. Back to Home and authorize the camera; 6. Adjust the brightness in RGB and depth camera; COPYRIGHT ©2022 REVOPOINT 3D ALL RIGHTS RESERVED...
- Page 19 POP 2 3D Scanner User Manual 7. Click “Start” to scan; 7. After completing scanning, perform Point cloud fusing and Meshing; COPYRIGHT ©2022 REVOPOINT 3D ALL RIGHTS RESERVED...
- Page 20 POP 2 3D Scanner User Manual 8. Check the 3D model scanned in the Project; COPYRIGHT ©2022 REVOPOINT 3D ALL RIGHTS RESERVED...
- Page 21 POP 2 3D Scanner User Manual 9. Export the 3D model to another device: COPYRIGHT ©2022 REVOPOINT 3D ALL RIGHTS RESERVED...
-
Page 22: Android Smartphone Connects Pop 2 Via Usb Mode
POP 2 3D Scanner User Manual Android Smartphone Connects POP 2 Via USB Mode Part List: POP 2, Power Bank, Phone Holder, 2-in-1 Mobile Cable, Sample Statue and Portable Turntable. Hardware Connection Part List: An Android Smartphone, a 2-in-1 Mobile Cable, A Phone Holder, a Power Bank... -
Page 23: Connection Of The Portable Turntable
POP 2 3D Scanner User Manual 3)Connect the 2-in-1mobile cable on the rear of the POP 2 3D scanner, and tighten screws at both sides; 4) Fix the Android smartphone in the phone holder; 5) Connect the 2-in-1 mobile cable to the power bank (Type A) and the smartphone (Type C) separately;... -
Page 24: Scan With Android Device Via Usb Cable
POP 2 3D Scanner User Manual Scan with Android Device via USB Cable 1. Open Revo Scan and confirm Settings; Before scanning, confirm the Connect Mode to be USB Mode; and select proper Accuracy, Scan Mode, Texture and Model Format according to your demand. - Page 25 POP 2 3D Scanner User Manual 3. Adjust the brightness in RGB and depth camera; Note: Auto first, then Manual; 4. Click “Start” to scan; COPYRIGHT ©2022 REVOPOINT 3D ALL RIGHTS RESERVED...
- Page 26 POP 2 3D Scanner User Manual 5. After completing scanning, perform Point Cloud Fusing and Meshing; 6. Check the 3D mode scanned in Project; COPYRIGHT ©2022 REVOPOINT 3D ALL RIGHTS RESERVED...
- Page 27 POP 2 3D Scanner User Manual 7. Export the 3D model to another device: COPYRIGHT ©2022 REVOPOINT 3D ALL RIGHTS RESERVED...
-
Page 28: Iphone Connecting To Pop 2 Via Wi-Fi
Connecting to POP 2 via Wi-Fi Notice: Plug the POP 2 into a power bank or AC adapter. (Do not plug it into your phone) 1. Download the Software-Revo Scan at APP Store; 2. Find the Wi-Fi provided by the POP 2, which is POP2-REVO_A21AXXXX. - Page 29 POP 2 3D Scanner User Manual 3. Type in the password: Revopoint3d and Confirm it connected successfully ; 4. Open “Revo Scan” and confirm Settings; Before scanning, select proper Accuracy, Scan Mode, Texture and Model Format according to your scan demand.
- Page 30 POP 2 3D Scanner User Manual 6. Adjust the brightness in the RGB camera and depth camera. Note : Anto first, then Manual; If necessary, turn on the “Remove Plane” to eliminate the excessive pointclouds. 7. Start to scan. COPYRIGHT ©2022 REVOPOINT 3D ALL RIGHTS RESERVED...
-
Page 31: Warning
Warning The product cannot be returned if the "Warranty Void If Seal Is Broken" label is damaged or removed. Follow Revopoint 3D Technologies This content is subject to change. Download the latest version from https://www.revopoint3d.com/download/pop-2/ If you have any questions about this document, please contact support@revopoint3d.com... -
Page 32: Support & Help
POP 2 3D Scanner User Manual Support & Help If you need any help, please visit our official website or official Forum: www.revopoint3d.com/support/ https://forum.revopoint3d.com/ Contact Us Tel (US): Toll-free +1 (888) 807-3339 Tel (China): +86 18124196779 Live Chat: https://www.revopoint3d.com Email: customer@revopoint3d.com...
Need help?
Do you have a question about the POP 2 and is the answer not in the manual?
Questions and answers