Revopoint 3D Technologies POP 2 User Manual
Hide thumbs
Also See for POP 2:
- Quick start manual (32 pages) ,
- User manual (28 pages) ,
- User manual (27 pages)
Table of Contents
Advertisement
Available languages
Available languages
Quick Links
Advertisement
Table of Contents

Related Manuals for Revopoint 3D Technologies POP 2


Summary of Contents for Revopoint 3D Technologies POP 2
- Page 1 POP 2 3D SCANNER Guide de Dé marrage Rapide V 3.0.1 2022.8...
- Page 2 POP 2 3D Scanner Visitez notre site internet officiel www.revopoint3d.com Vous y trouverez les derniè res mises à jour de logiciels et documents. ⚠ La plage de tempé rature de fonctionnement de ce produit est de 0° C à 40° C (32° F à 104° F). Elle ne correspond pas à la plage de tempé...
-
Page 3: Table Of Contents
Signification des LEDs ..............................4 PC: Connection du scanner 3D POP 2 ............................4 Windows: Connexion du scanner 3D POP 2 via la prise USB ..................5 Connexion du maté riel............................... 5 Sché ma des Étapes à suivre ............................5 Mac: Connect to the POP 2 3D Scanner via Wi-Fi ...................... -
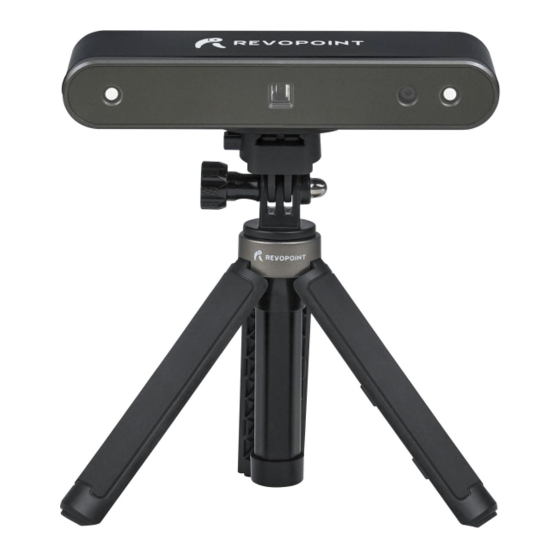
Page 4: Profile Du Produit
Le maté riel de base du POP 2 applique le principe de la lumiè re binoculaire et micro-structuré e et, avec l'aide de notre puce de microprojection exclusive, le POP 2 assure une acquisition rapide des donné es de nuages de points 3D avec une grande pré... -
Page 5: System Requirements
PC: Connection du scanner 3D POP 2 Le POP 2 peut se connecter à un Mac ou Windows PC via une prise USB et WIFI . Dans le chapitre qui suit, nous allons montrer les connexions via USB et WIFI. Pour le mode USB nous utiliserons l'exemple d’un ordinateur Windows et pour le mode WIFI celui d’un MAC. -
Page 6: Windows: Connexion Du Scanner 3D Pop 2 Via La Prise Usb
POP 2 3D Scanner User Manual Windows: Connexion du scanner 3D POP 2 via la prise USB Connexion du maté riel Il est important de s’assurer que le Scanner POP 2 est connecté à l’ordinateur sur un port USB 3.0 ou supé... - Page 7 : "L'appareil est connecté ". Sinon, veuillez vé rifier la connexion. Une connexion est gé né ralement dé tecté e 8 à 10 secondes aprè s que l'indicateur d'é tat du POP/POP 2 sur le panneau arriè re devient bleu.
- Page 8 Aprè s avoir spé cifié les options Pré cision, Mode de numé risation et Texture, appuyez sur "OK" pour accé der à la page de scan. La zone supé rieure de la fenê tre d'aperç u du modè le 3D indique les plages de distance. Positionnez le scanner POP 2 ou l'objet pour confirmer une distance "Excellente"...
- Page 9 POP 2 3D Scanner User Manual Ré gler la luminosité de la camé ra et la profondeur de champ Ajustez l'icô ne soleil sur les deux petits é crans (pour les smartphones Android et iPhone, cliquez sur l'icô ne de la roue denté...
- Page 10 POP 2 3D Scanner User Manual Pendant la numé risation, veuillez vous assurer que le nuage de points dans la fenê tre infé rieure gauche est adé quat et que la distance reste "excellente". Dé placez le scanner lentement et avec dé termination pendant la numé risation tout en gardant une distance relativement fixe.
- Page 11 , il est possible de reprendre la numé risation (par exemple, aprè s avoir repositionné le POP/POP 2 ou l'objet à numé riser). Si vous le souhaitez, veillez à dé placer le curseur de l'option "Fusionner le nuage de points immé diatement" vers la droite avant de cliquer sur "Terminer". Les donné es de numé risation seront fusionné es en un nuage de points.
- Page 12 The pitch point is at a minimum of 0.02 mm for the POP 2. Smaller pitch points result in more resolution, but also more processing time.
- Page 13 POP 2 3D Scanner User Manual Maillage Cliquez Maillage pour commencer à convertir les donné es du nuage de points numé risé s en un maillage. Dans la boî te dé roulante, les paramè tres de qualité de maillage et de dé bruitage sont fournis : Plus le paramè tre Qualité de Maillage est é...
- Page 14 POP 2 3D Scanner User Manual Exportez le projet Cliquez Exporter le projet pour exporter le modè le 3D. Sé lectionnez un nom de fichier et un format de fichier (.PLY, .OBJ & .STL, sont supporté s). Remarque : Si vous modé liser un objet pour l'imprimer en 3D, il faut alors mailler votre modè le puis le sauvegarder au format .STL)
-
Page 15: Mac: Connect To The Pop 2 3D Scanner Via Wi-Fi
(Ne pas le brancher directement sur votre MAC, le mode USB sera activé par dé faut) 2. Trouvez le ré seau WIFI cré é par votre POP 2 dans la liste des ré seau disponible sur votre MAC Habituellement, vous trouverez le nom de ré seau suivant : POP2-REVO-XXXXXXXX. - Page 16 POP 2 3D Scanner User Manual 3. Open “Revo Scan” software and wait for a while for device connection after the Wi-Fi is connected successfully. 4. Click “New Scan” to scan the object. COPYRIGHT ©2022 REVOPOINT 3D ALL RIGHTS RESERVED...
-
Page 17: Smartphone:connecting To Pop 2 3D Scanner
1. Download the Software-Revo Scan at Revopoint official website: https://www.revopoint3d.com/download-2/ 2. Power the POP 2 3D scanner on with a power bank or other power supply; Note: Don’t take your PC as the power supply when scanning via Wi-Fi. 3. Connect to the Wi-Fi Provided by the POP 2;... - Page 18 POP 2 3D Scanner User Manual 4. Open Revo Scan to confirm Connection Mode and Scan Settings; Before scanning, select proper Accuracy, Scan Mode, Texture and Model Format according to your demand. 5. Back to Home and authorize the camera;...
- Page 19 POP 2 3D Scanner User Manual 6. Adjust the brightness in RGB and depth camera; COPYRIGHT ©2022 REVOPOINT 3D ALL RIGHTS RESERVED...
- Page 20 POP 2 3D Scanner User Manual Note: Underexposure ( in Blue) Perfect Overexposure ( in Red) 7. Click “Start” to scan; COPYRIGHT ©2022 REVOPOINT 3D ALL RIGHTS RESERVED...
- Page 21 POP 2 3D Scanner User Manual 7. After completing scanning, perform Point cloud fusing and Meshing; 8. Check the 3D model scanned in the Project; COPYRIGHT ©2022 REVOPOINT 3D ALL RIGHTS RESERVED...
- Page 22 POP 2 3D Scanner User Manual 9. Export the 3D model to another device: COPYRIGHT ©2022 REVOPOINT 3D ALL RIGHTS RESERVED...
-
Page 23: Android Smartphone Connects Pop 2 Via Usb Mode
Android Smartphone Connects POP 2 Via USB Mode Hardware Connection Part List: An Android Smartphone, a 2-in-1 Mobile Cable, A Phone Holder, a Power Bank and A POP 2 3D Scanner Connection 1)Screw the phone holder on the power bank;... -
Page 24: Scan With Android Device Via Usb Cable
POP 2 3D Scanner User Manual Scan with Android Device via USB Cable 1. Open Revo Scan and confirm Settings; Before scanning, confirm the Connect Mode to be USB Mode; and select proper Accuracy, Scan Mode, Texture and Model Format according to your demand. - Page 25 POP 2 3D Scanner User Manual 3. Adjust the brightness in RGB and depth camera; Note: Auto first, then Manual; Note: Underexposure ( in Blue) Perfect Overexposure ( in Red) 4. Click “Start” to scan; COPYRIGHT ©2022 REVOPOINT 3D ALL RIGHTS RESERVED...
- Page 26 POP 2 3D Scanner User Manual 5. After completing scanning, perform Point Cloud Fusing and Meshing; COPYRIGHT ©2022 REVOPOINT 3D ALL RIGHTS RESERVED...
- Page 27 POP 2 3D Scanner User Manual 6. Check the 3D mode scanned in Project; COPYRIGHT ©2022 REVOPOINT 3D ALL RIGHTS RESERVED...
-
Page 28: Iphone Connecting To Pop 2 Via Wi-Fi
Connecting to POP 2 via Wi-Fi Notice: Plug the POP 2 into a power bank or AC adapter. (Do not plug it into your phone) 1. Download the Software-Revo Scan at APP Store; COPYRIGHT ©2022 REVOPOINT 3D ALL RIGHTS RESERVED... - Page 29 2. Find the Wi-Fi provided by the POP 2, which is POP2-REVO-XXXXXXXX. Note: The default SSID is: POP2-REVO-XXXXXXXX The default Password is: Revopoint3d For example: If the Serial Number of one POP 2 3D scanner is: A2237452206F00A54. The Default SSID and Password are: SSID: POP2-REVO-A2237452 Password: Revopoint3d 3.
- Page 30 POP 2 3D Scanner User Manual 4. Open “Revo Scan” and confirm Settings; Before scanning, select proper Accuracy, Scan Mode, Texture and Model Format according to your scan demand. 5. Back to Home and authorize the camera; 6. Adjust the brightness in the RGB camera and depth camera.
- Page 31 POP 2 3D Scanner User Manual Note: Underexposure ( in Blue) Perfect Overexposure ( in Red) 7. Start to scan. COPYRIGHT ©2022 REVOPOINT 3D ALL RIGHTS RESERVED...
-
Page 32: Warning
Warning The product cannot be returned if the "Warranty Void If Seal Is Broken" label is damaged or removed. Follow Revopoint 3D Technologies This content is subject to change. Download the latest version from https://www.revopoint3d.com/download-2/ If you have any questions about this document, please contact support@revopoint3d.com... -
Page 33: Support & Help
POP 2 3D Scanner User Manual Support & Help If you need any help, please visit our official website or official Forum: https://forum.revopoint3d.com/ www.revopoint3d.com/support/ Contact Us Tel (US): Toll-free +1 (888) 807-3339 Tel (China): +86 18124196779 Live Chat: https://www.revopoint3d.com Email: customer@revopoint3d.com...
Need help?
Do you have a question about the POP 2 and is the answer not in the manual?
Questions and answers