Advertisement
Quick Links
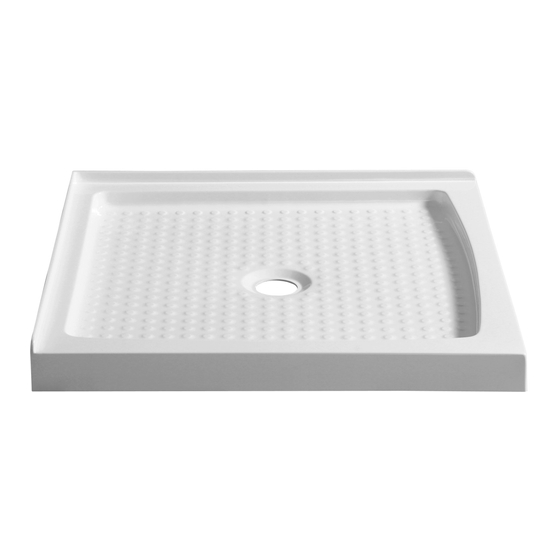
ANZZI SHOWER BASE
INSTALL & OPERATION MANUAL
V1.0
DON'T WAIT!
REGISTER NOW!
Register your product within 90 days to ensure your product is
recognized as an of cial purchase and is eligible for warranly
coverage.
Mail in the completed registry card (Pg. 2) or register online
at www.swcorp.com/register.
Advertisement

Related Manuals for Anzzi Titan SB-AZ009WC


Summary of Contents for Anzzi Titan SB-AZ009WC
- Page 1 ANZZI SHOWER BASE INSTALL & OPERATION MANUAL V1.0 DON’T WAIT! REGISTER NOW! Register your product within 90 days to ensure your product is recognized as an of cial purchase and is eligible for warranly coverage. Mail in the completed registry card (Pg. 2) or register online...
-
Page 2: Product Registration
I have read the Owner’s Manual carefully and understand and agree that any installation, operation or maintenance of the product must be done strictly in accordance with instructions and guidelines contained in the owner’s manual and installation guide. Signature____________________________________________________________Date ______________________________________________ Need assistance? Call our technical support line at 305-614-4070 or visit us at www.ANZZI.com... - Page 3 INSTALLATION GUIDE BEFORE YOU BEGIN Prior to installation, examine all boxes and packages for shipping damage. If the unit has been ● damaged, has a finishing defect, or has missing parts, please contact our customer support department within 5 business days of the delivery date. Please note that we will not replace any damaged products or missing parts free of charge after 10 business days or if the product has been installed.
-
Page 4: Tools And Materials Required
TOOLS AND MATERIALS REQUIRED Mortar Gloves 1/4” Square Notched Drill Safety Glasses Caulk Gun Trowel Extension Bit Holder Drill Bit 3/16” (5 mm) Screws #8 x 1 1/2” (zinc Driver Bit (for use with Tape Measure Pencil or stainless; panhead or extension bit holder) roundhead) Level... -
Page 5: Installation Instructions
INSTALLATION INSTRUCTIONS ATTENTION The following steps are for the corner ● shower tray. STEP 1 Ensure that the floor and the studs ● 5" (12.7 cm) are at right angles.Provide a 5”×5” opening in the subfloor for the drain. The 2” PVC waste pipe should extend above the surface of the sub-floor according to the drain installation instructions and the height of the Shower Tray. - Page 6 STEP 3 Drill 3/16” holes at all stud locations on top ● flanges. (Fig 3) IMPORTANT: Drill 3/16” clearance holes into flanges only. Do not drill 3/16” holes directly into studs. Drill chuck can damage base. Use an extended bit holder to reduce risk of drill chuck hitting base.
- Page 7 STEP 5 Apply a generous amount of mortar that ● has been mixed to a thick consistency. Place the base in the wet mortar, adjust until it is level, and let mortar cure for 24 hours. Proceed to the next step. (Fig 5) Mortar Fig.
- Page 8 STEP 7 Allow the mortar to completely harden before applying weight to the bottom of the shower ● tray. Install the Drywall above the tile flanges and secure it to the studs. ● Put the tiles (or other finishing wall material) over the drywall leaving 1/8” gap between the ●...
- Page 9 ATTENTION The following steps are for the rectangle ● shower tray. STEP 1 Ensure that the floor and the studs are at right angles.Provide a 5”×5” opening in the subfloor ● for the drain. The 2” PVC waste pipe should extend above the surface of the sub-floor according to the drain installation instructions and the height of the Shower Tray.
- Page 10 STEP 2 Place the tray into the designated position ● so that the Drain Body drops around the Drain Pipe and put the Shower Base up against the studs. Level the tray and place marks on the studs ● above the upper edge of the tile flange. If the subfloor is not flat and level, use ●...
- Page 11 STEP 4 Install the shower drain (NOT INCLUDED) ● according to the drain installation manual (supplied with the drain). (Fig 4) ATTENTION Plumber’s putty will degrade base material, ● causing cracks and potential property damage. DO NOT use plumber’s putty to Fig.
- Page 12 STEP 6 It is recommended not to stand in base ● Shim Shim while securing to wall. Set base in corner and press it into mortar. Secure flanges to all studs with #8(1-1/2”) screws through previously drilled holes. (Fig 6) IMPORTANT: Gaps between flanges and studs must be less than 1/8”.
- Page 13 STEP 8 Apply a bead of sealant between the apron and finished floor and wait for 24 hours before ● using the shower. (Fig 8) 24 Hours Wait 24 hours before using the sh ower Fig. 8 Care & Maintenance To ensure long lasting life for your acrylic shower tray, wipe them off after each use with a soft cloth.To clean the acrylic shower tray use non-abrasive sprays or cream based cleaners.
Need help?
Do you have a question about the Titan SB-AZ009WC and is the answer not in the manual?
Questions and answers