
Related Manuals for GRAUPNER Falcon 12 plus


Summary of Contents for GRAUPNER Falcon 12 plus
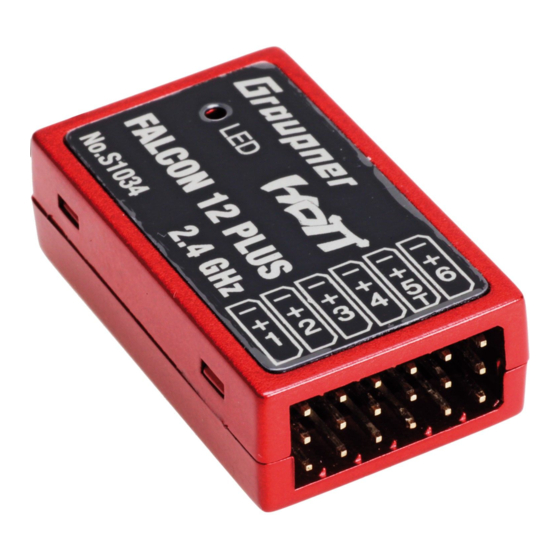
- Page 1 Manual Falcon 12 plus Falcon 12 plus with copter-firmware Q06 No. S1034 with altitude sensor, with magnetometer...
- Page 2 2 / 34 S1038_Q06_V1.0pn_en...
-
Page 3: Table Of Contents
Safety notes ..................6 For your safety by handling the transmitter and the receiver ..7 For your safety by handling the batteries ........8 Installing the Graupner S1034 Falcon 12 plus ........9 Connecting the RC components of the copter .......9 Optional accessories ..............9 Binding .....................10... -
Page 4: Introduction
Introduction Thank you very much for purchasing a Graupner S1034 Falcon 12 plus. Read this manual carefully to achieve the best results with your HoTT system and first of all to safely control your models. If you experience any trouble during operation, take the instructions to help or ask your dealer or Graupner Service Centre. -
Page 5: Intended Use
Intended use The Graupner S1034 Falcon 12 plus should only be used for the pur- pose specified by the manufacturer for operation of UAVs (unmanned aerial vehicles) or remote controlled models. Any other type of use is impermissible and may cause significant property damage and/or personal injury. -
Page 6: Technical Data
Technical data 2x 145 m m, Antenna of which the last 30 mm a ctive Operating voltage 3.6 ... 12.6 V Frequency range 2400 ... 2483.5 MHz Modulation 2.4 G Hz FHSS Current consumption 70 m A approx. Temperature range -15 …... -
Page 7: For Your Safety By Handling The Transmitter And The Receiver
• Only use the components and spare parts that we recommend. Always use matching, original Graupner plug-in connections of the same design and material. • Make sure that all of the plug-in connections are tight. When dis- connecting the plug-in connections, do not pull the cables. -
Page 8: For Your Safety By Handling The Batteries
For your safety by handling the batteries CAUTION • Protect the batteries from dust, dirt, moisture, heat and vibra- tions. Only use in dry locations. • Do not use any damaged battery. • Batteries may not be heated, burned, short-circuited. •... -
Page 9: Installing The Graupner S1034 Falcon 12 Plus
The Graupner S1034 Falcon 12 plus must be protected against dust, splash water, etc. in the model. When you install your Falcon 12 plus, make sure that it is not excessively airtight to prevent it from over- heating during operation. -
Page 10: Binding
S1034 Falcon 12 plus to any transmitter: Binding step-by-step • If the Graupner S1034 Falcon 12 plus is already bound to a spe- cific transmitter and this binding should be maintained, the transmitter should ideally be switched on before the receiver. At... -
Page 11: Transmitter Presettings
Transmitter presettings Depending on the bandwidth of the model type selection of the transmitter used, either the model type "Copter" or alternatively a "Fixed-wing model" should be selected. Some of the current HoTT transmitters are even shipped with preconfigured model memory. According to the transmitter instructions, the appropriate control mode and, if necessary, "motor front / rear"... - Page 12 Fail-Safe settings We recommend to set Channel 1 and Channel 5 to "Pos" according FAIL SAFE to the transmitter instructions and to put the pitch control stick in the motor OFF position before storing the fail-safe settings and to Hold set the attitude / rate mode switch to the "Attitude mode"...
-
Page 13: Auto-Flip Function On Channel 6
Auto-flip function on channel 6 If the copter is in attitude mode, the automatic flip function can eas- SW4/5 +100% +100% ily trigger a flip of the copter. SW6/7 +100% +125% free +100% +100% The auto-flip function is activated via a key switch assigned to chan- free +100% +100% nel 6. - Page 14 Come-back-home mode The combination of a -100% control signal on channel 5 and -100% on channel 6 switches to the "Come back to start point" mode. Flying on preset waypoints The combination of a -100% control signal on channel 5 and +100% on channel 6 switches to the "Fly on pre-programmed way-points"...
-
Page 15: Telemetry" Menu
VOICE TRIGGER RX DATA These instructions also provide information on how to access this ALARM SETTING menu. Change accordingly to the first setting page of the Graupner S1038 AIO FC. Notes • The setting values shown in the following display illustrations always show the standard values. - Page 16 Servo/Sensor/Voltage S1035 Falcon 12 S1034 Falcon 12 plus (with vario) An SBUS signal on C5 is automatically detected at power up so that the receiver can be operated directly with a receiver using SBUS instead of HoTT.
- Page 17 • VOLTAGE After switching through this connection port as described before, a DC voltage of max. 25,5 V can be displayed instead of the receiver voltage. This way it is possible to monitor the main bat- tery voltage without using external sensors. Note For safety reason the "C5"...
-
Page 18: Roll/Nick Display
100. If, because of its gravity centre, the Copter is more agile on the Roll axis than on the Nick axis, then you can change here the roll factor. In the Graupner ALPHA RACE 250 Q this value is set about 65%. -
Page 19: Yaw Display
R/N DYNAMIC Higher dynamic values provide a more direct feel for the flight (3D flight 50 ... 100), lower dynamic values for smoother flight record- ings, rounder freestyle flying and races (30 ... 50). Note If a channel is selected in the "R / N DYNAMIC" line, but no encoder is assigned to it on the transmitter side, the value in brackets is specified. - Page 20 RATE For beginners we recommend a rate of about 50. For racers and free- style pilots we recommend a value between 50 and 70. YAW DYNAMIC Higher dynamic values provide a more direct feel for the flight (3D flight 80 ... 100), lower dynamic values for smoother flight record- ings, rounder freestyle flying and races (30 ...
-
Page 21: Multic. Autopilot
MULTIC. AUTOPILOT Note This menu page is only visible after connecting the optional GPS module, No. 33602. YES: GPS functions activated. Motors start from 6 satellites. MULTIC. AUTOPILOT NO: GPS functions Autopilot, Come back home and Way-point are ALT HOLD P deactivated. -
Page 22: Basic Display
otherwise the value must be reduced or the compass calibration and voltage calibration have to be repeated. Pos hold D The POS HOLD D value compensates the acceleration (wind gusts) of the GOS position and it must be adjusted so that it is compensated as well as possible. - Page 23 MODE CONTROLLER SETTING (Not necessary with DSHOT) To initialize the controller, the signal of the motor / pitch control stick of the transmitter is transmitted directly to the speed controller of the copter. Setting the speed controllers step-by-step 1. Remove rotors for safety reasons 2.
- Page 24 propellers immediately before starting the flight operation and start and land exclusively in "attitude mode". During prolonged extreme aerobatics of the copter in Acro 3D mode (e.g. , sequence> 1min), the receiver may lose its attitude information and, as a result, the copter may move to an undesired position when switching to attitude mode.
- Page 25 If the copter has turned back to the normal position <90 degrees tilt, then switch the motor switch back to off. The next time the motors are switched on, the normal flight mode is active again and the direc- tion of rotation of the motors is back to normal. If the direction of rotation of the motors does not reverse when the copter is upside down, then the BL Heli S controllers have to be updated to version 16.7.
- Page 26 VIBRATION FILTER, VIBRATION FILTER2 MULTICOPTER BASE If you hear , for example, "clicking" noises in the motors by widely T YPE QUADRO XI MODE NORMAL fluctuating speeds or vibrations during the flight, such as in low DSHOT MINPOWER % throttle or under hover conditions, these vibrations can be filtered FREEST YLE out with the options "damping"...
- Page 27 • If the autopilot and come back home function is used, the HD camera may also have to be switched on, as its power require- ment influences the compass calibration. • Avoid calibrating the compass near magnetic fields, powered-on cell phones, or other objects that may be interfering with the natural magnetic field.
- Page 28 No. 33602. Logging 0 displays the Euler angles in the Copter telemetry display and also allows the position display using the Graupner HoTT OSD No. 33641 on the FPV screen or in the FPV video goggles. 28 / 34...
- Page 29 The default "10" indicates the compass direction in degrees in the 11.6V Alt: bottom line of the copter display to the right of the " " so that it can 0:00 Dir: 0° 10mAh be checked, for example, after recalibrating the compass. The char- acters 2 ...
-
Page 30: Axis Assignment
AXIS ASSIGNMENT Note The gyroscope calibration, required each time the copter is switched on, takes place as soon as the copter or its receiver is absolutely quiet. The motors will not start until the calibration is completed. After approx. 3 seconds in the rest position, several beeps can be heard from all motors. - Page 31 9. Turn the copter clockwise by more than 45 degrees to the right. As soon as the detected axis with the required sign is displayed in "normal" representation, the axis assignation is completed. The gyros and their operating directions have now been assigned. Attention To be on the safe side, the directions of action of the gyroscope set- tings must be checked.
-
Page 32: Firmware Update
SIMPLIFIED DECLARATION OF CONFORMITY Graupner/SJ hereby declares that the S1034 Falcon 12 plus complies with the Directive 2014/53/ The full text of the EU Declaration of Conformity is available at the following Internet address: www.graupner.deNotes on environ-... -
Page 33: Notes On Environmental Protection
These operating instruction are exclusively for information purposes and are subject to change without prior notification. The current version can be found on the Internet at www.graupner.de on the relevant product page. In addition, the company Graupner/SJ has no responsibility or liability for any errors or inaccuracies that may appear in construction or operation manuals.
Need help?
Do you have a question about the Falcon 12 plus and is the answer not in the manual?
Questions and answers