Advertisement
Quick Links
Advertisement

Subscribe to Our Youtube Channel
Related Manuals for Hay FIFTY-FIFTY WALL


Summary of Contents for Hay FIFTY-FIFTY WALL
- Page 1 – INSTRUCTION MANUAL – FIFTY-FIFTY WALL DESIGN BY SAM WELLER...
-
Page 3: General Information
The product must not be modified in any way. HAY accepts no responsibility for any products that have been modified or tampered with. The external flexible cable or cord of this luminaire cannot be replaced. - Page 4 – PARTS – Lamp Wall plugs Screws Allen key Handle Adapter Power supply...
- Page 5 Unpack all the parts and check that you have received all the parts listed. The arm has three different settings allowing for different degrees of freedom in a vertical direction. Choose the setting most suitable for your needs. Setting 1 30°...
- Page 6 If you would like to change between the three different settings for the arm - simply loosen the screw on the adjustment slider (step 1), change the slider’s position (step 2) to the setting you require (step 3) and aligning the screw with the pre-defined hole and tighten the screw.
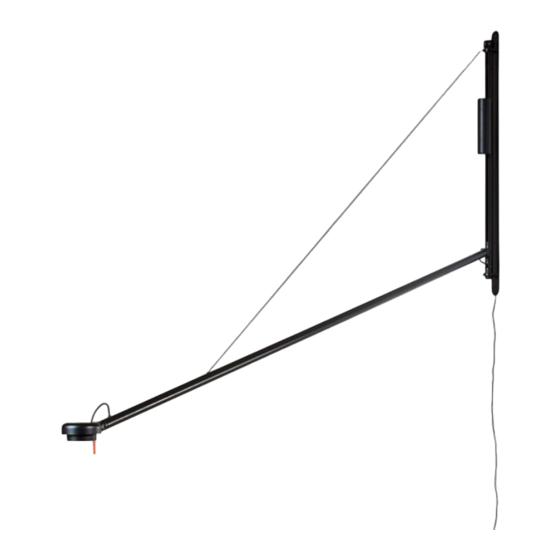
- Page 7 The head of Fifty-Fifty Wall is flexible and can be moved sideways and up and down. The arm also allows for a 180 degree horizontal movement. 50° 50° 90° 90° Side view Front view 90° 90° Top view...
- Page 8 Using the lamp’s wall bracket as a guide, mark the position of the holes to be drilled (640 mm apart). Use a spirit level to ensure that the wall bracket is level.
- Page 9 Drill the holes using the correct type of drill for the wall you are drilling into.
- Page 10 Insert the wall plugs. Ensure you use the correct type of plugs for the type of wall.
- Page 11 Fix the wall bracket onto the wall using the provided screws, starting from the top.
- Page 12 Screw the handle into the head, ensuring it is tight before using it to adjust the lamp’s position. The lamp can be freely moved and will hold in any position. A touch sensitive step dimming switch is located on the backside of the lamp’s head.
- Page 13 Plug the trailing cable into the power supply. Attach the correct adapter for your region. The lamp is now ready for use.
-
Page 14: Care And Maintenance
– CARE & MAINTENANCE – Our Care & Maintenance offers guidance for optimal maintenance of your HAY product. It includes advice and instructions on cleaning and caring for specific materials to prolong the life of your lighting. Please find our Care & Maintenance... - Page 16 Havnen 1 8700 Horsens Denmark +45 4282 0282 / hay@hay.com www.hay.com 14/10/2021...
Need help?
Do you have a question about the FIFTY-FIFTY WALL and is the answer not in the manual?
Questions and answers