Advertisement
Quick Links
Advertisement

Related Manuals for Hay SLANT


Summary of Contents for Hay SLANT
- Page 1 – INSTRUCTION MANUAL – SLANT DESIGN BY BRANCH...
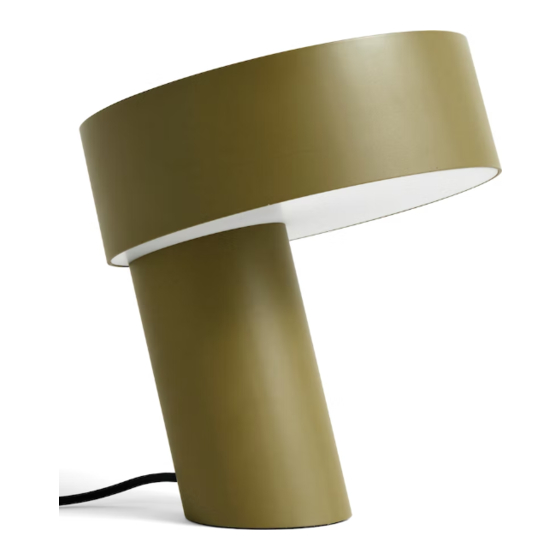
- Page 3 Inspired by the power of shapes and how they impact their surroundings, Japanese design team Branch’s Slant Lamp features a bold graphic aesthetic that takes possession of the space it occupies. Comprising a simple, slanted cylindrical form with a weighted base...
-
Page 4: Care And Maintenance
This lamp is designed for indoor use only. The Slant table lamp is designed to be used with LED based light sources only. Halogen or incandescent light sources should never be used, as it may cause... - Page 5 – PARTS – Shade Diffuser Base Allen key Screws x3...
- Page 6 Place the diffuser on the base and insert and fasten the supplied screws, as shown below. The base has a small ridge, with a corresponding groove on the diffuser, ensuring that the two parts are correctly assembled.
- Page 7 Screw an E27 bulb into the bulb fitting. It is advised that a dimmable LED bulb, no more than 15W is used in this lamp. Please note that larger globe-style bulbs will not fit in the lamp.
- Page 8 Place the shade on top of the diffuser, as shown below, aligning the small pin on the inside of the shade with the corresponding slot on the rim of the diffuser.
- Page 9 Once the shade is in place, it can be secured to the base. Insert the supplied Allen key into the two holes in the bottom and tighten the two screws that secure the shade to the base. Take care not to overtighten the screws, as this may damage some of the internal components.
- Page 10 For UK customers, insert the EU plug into the converter provided. Close the converter over the EU plug with the pins secured in the internal spring clip contacts. Screw the converter together to ensure the UK plug is secured. The lamp is now ready for use.
- Page 12 Havnen 1 8700 Horsens Denmark +45 4282 0282 / hay@hay.com 03/03/2021...
Need help?
Do you have a question about the SLANT and is the answer not in the manual?
Questions and answers