Advertisement
Quick Links
Advertisement

Subscribe to Our Youtube Channel
Related Manuals for Hay Matin Floor


Summary of Contents for Hay Matin Floor
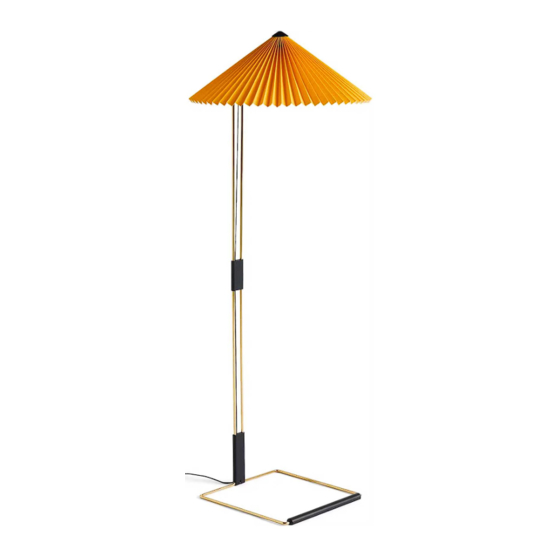
- Page 1 – INSTRUCTION MANUAL – MATIN FLOOR DESIGN BY INGA SEMPÉ...
-
Page 3: General Information
Ensure that the power COLOUR TEMPERATURE | Warm white supply has been turned OFF before cleaning the product. HAY will not accept any responsibility for any accidents, injuries or damages that occur due to the use of incorrect bulbs. ATTENTION In some countries, electrical installation must be carried out by authorised electricians/contractors;... - Page 4 – PARTS – Top screw Shade Allen key Top stem Set screws Bottom stem Inline switch Base Power supply adapter...
- Page 5 Unpack all the parts and check that you have received all the parts listed. Slide the bottom stem onto the base, as shown below. Insert one of the set screws into the back of the bottom connecting piece and screw it firmly in place, using the supplied tool. You will find the set screws and tool in the small fitting bag.
- Page 6 Slide the top stem onto the bottom stem, as shown below.
- Page 7 Insert the set screw into the back of the central connecting piece and screw it firmly in place, using the supplied tool.
- Page 8 Screw the top screw into the top cap, as shown below. Do not fully screw it in place yet.
- Page 9 Clip the cable into the cable clip, which is located on the stem, and in the groove on the back of the central connecting piece and the bottom connecting piece.
- Page 10 Remove the shade from its packaging and spread out the bottom while simultaneously pushing it down over the top screw, so that it rests on top of the top cap. Gently push the top of the pleated shade underneath the top screw, so that it is wedged between the top screw and top cap.
- Page 11 Once the shade is in place, gently adjust the pleats at the top so they are evenly spread out, as shown below. Once the shade is as illustrated, the top screw can be fully tightened.
- Page 12 Plug the trailing cable into the power supply. Attach the correct adapter for your region. The lamp is now ready to use.
- Page 13 The lamp’s inline switch has a three-step dimmable feature. The first push sets the lamp to maximum brightness, the second push to medium brightness and the third push to lowest brightness. The fourth push turns the lamp off. 100%...
-
Page 14: Care And Maintenance
Please find our Care & Maintenance guide by scanning the QR code You can find more relevant information on Matin Floor by scanning the QR code You can also find the same information here hay.dk/downloads... - Page 16 Havnen 1 8700 Horsens Denmark +45 4282 0282 / hay@hay.com www.hay.com 13/09/2022...
Need help?
Do you have a question about the Matin Floor and is the answer not in the manual?
Questions and answers
Why does the set screw seem too big for the hole?