Advertisement
Quick Links
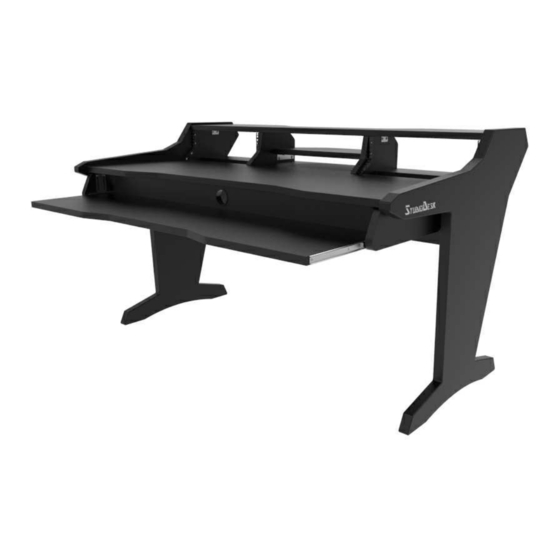
The Desk You Deserve
ASSEMBLY MANUAL
HARMONY Series
Video Assembly manual is also available.
Search for Harmony Assembly Video manual on the YouTube
or scan code.
!
NOTE: In order to avoid injury or damages,
please do not try to assemble your desk alone.
Our furniture is massive and heavy and requires
at least two people to carry out assembly.
Please assemble on soft surface to avoid
scratches to the lacquer.
www.studiodesk.net
Advertisement

Related Manuals for StudioDesk HARMONY Series


Summary of Contents for StudioDesk HARMONY Series
- Page 1 The Desk You Deserve www.studiodesk.net ASSEMBLY MANUAL HARMONY Series Video Assembly manual is also available. Search for Harmony Assembly Video manual on the YouTube or scan code. NOTE: In order to avoid injury or damages, please do not try to assemble your desk alone.
- Page 2 The Desk You Deserve Thank you for making StudioDesk your desk of choice! Before beginning assembly of your desk, let’s get familiar with the parts you have received in your package. Please match the corresponding numbers on this page with the drawings.
- Page 3 Step One Insert the Dowels into the legs as shown on the illustration Step Two Place Main desk surface on the dowels Step Three Fix main desk board with Brackets and M6 scres...
- Page 4 Step Four Install strengthening boards as shown on the illustration. Fix it with brackets and M6 screws Step Five Add second strengthening board to the structure Step Six Fix it with Brackets and M6 Screws...
- Page 5 Step Seven Install Rack dividers to the structure with dowels. Step Eight Carefully add top shelf to the structure as shown on the illustration. Step Eight Fix Rack dividers with Confirmat screws from the bottom.
- Page 6 Step Nine Fix all the boards to the leg with Brackets and M6 screws. Step Ten Insert dowels to the leg and close the structure with the second leg. Step Eleven Fix boards to the leg with Brackets and M6 Screws...
- Page 7 Step Twelfe If you purchased Cable management tray, this step is optional. Install cable management tray using Washers and M6 screws. Step Thirteen Install Pull out brackets (17) and fix pull out holders to it. During this step you have to Determine height of your keyboard If your keyboard is higher then initial Pull out holders, you are able to...
- Page 8 Step Fifteen Insert Pull out to the rails carefully evenly from the both sides. Two people are needed for this step. We recommend watching video Assembly manual on our Youtube Channel. Step Sixteen Install shelf brackets (15) to the monitor Shelf with M6 screws.
Need help?
Do you have a question about the HARMONY Series and is the answer not in the manual?
Questions and answers