Table of Contents
Advertisement
Advertisement
Table of Contents

Related Manuals for Casio KL-100E


Summary of Contents for Casio KL-100E
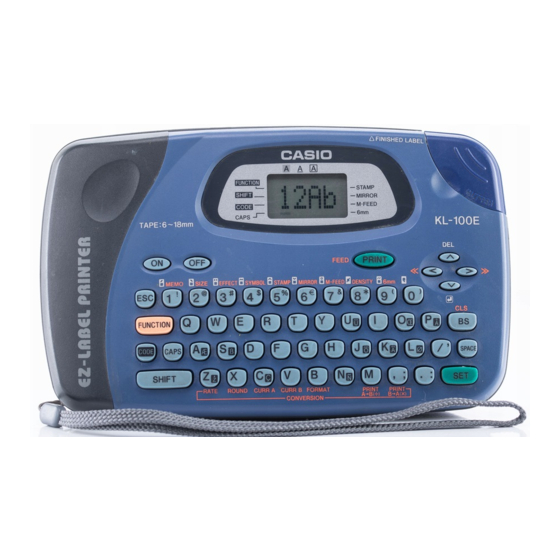
- Page 1 KL-100E User’s Guide...
-
Page 2: Important Safety Precautions
Power supply and voltage • Use only a power source whose output matches the rating marked on the plate on the bottom of the label printer. Also, avoid plugging too many appliances into the same extension cord. The wrong voltage or overloading of an AC outlet creates the danger of fire and electrical shock. - Page 3 • Never mix batteries of different types. • Never mix new batteries and dead batteries. • Remove the batteries if you do not plan to use KL-100E for a long time. • Use only the battery type specified for this label printer in this manual.
-
Page 4: Table Of Contents
• Text memory You can even use tapes with optionally available holders to create your own stamps. All of this makes the CASIO label Printer the perfect tool for just about all of your labeling needs! Important! • Contact a nearby dealer whenever you require servicing. -
Page 5: Part 1 Getting Acquainted
This part of the manual provides you with important information you need to know in order to use the Label Printer to its full potential. Be sure to read it carefully before using the Label Printer for the first time. -
Page 6: General Guide
7 Tape outlet 3 Letter keys Using the Strap Attach the strap to the Label Printer as shown in the illustration, and pull it tight. To remove the strap, reverse the procedure shown in the illustration. • Be sure to always hold on to the Label Printer itself when carrying it. -
Page 7: Replacing Batteries
• Never mix batteries of different types • Never leave dead batteries in the Label Printer. • Remove the batteries if you do not plan to use the Label Printer for a long time. • Replace the batteries in accordance with the battery life marked on the side of the battery. -
Page 8: Ac Adaptor
Note the following important precautions when using an AC adaptor to power your Label Printer. • Use only a genuine CASIO AD-A95100 AC adaptor with the same voltage rating as the household current in your area. Using a wrong adaptor can damage your Label Printer. -
Page 9: To Load A Tape Cartridge
Trying to do so can cause opera- tional problems with the Label Printer. • The following are the tape widths that can be used with this printer: 6mm, 9mm, 12mm, 18mm. -
Page 10: Part 3 Inputting Characters And Symbols
All letters you input in the caps mode are upper-case. When the caps mode indicator is not shown on the display, all letters are input as lower-case. Mirror image Note that the Label Printer stays in the caps mode until you press the CAPS printing STAMP key again. -
Page 11: Basic Alpha-Numeric Input
• Manual feed indicator This indicator appears when you are using manual feed instead of auto feed. Auto feed is in effect when this indicator is not on the display. Important! • After you finish printing when using manual feed, be sure to always press FUNCTION and then PRINT (FEED) to feed the tape before cutting it. -
Page 12: Part 4 Deleting And Inserting Characters
2. Use the H, J, K and L cursor keys to move the underlining to the sym- bol you want. • Not all of the available symbols fit on the display. The menu will scroll when you press the cursor keys. •... -
Page 13: To Change Existing Characters To Different Ones
• Any character size specification you make is applied to all the characters on the display. You cannot make multiple specifications for specific characters. • The Label Printer automatically adjusts the character size whenever you in- put a B symbol to create a 2-line label as shown below. -
Page 14: Text Effects
• During printing at very high density, printing of very long text, or repeat print- ing of the same text a number of times, the Label Printer may stop printing for about five seconds. This is not a malfunction, and normal printing should resume shortly (indicated by the message “P R N T”... -
Page 15: Printing A Tape
3. Press SET to print the stamp tape or ESC to abort the print operation and return to the text input display in step 1. • After the printing is complete, the Label Printer returns to the input display in Tape step 1. -
Page 16: Other Printing Features And Operations
Auto Feed You can turn the Label Printer’s auto feed feature on and off. When auto feed is on, the Label Printer automatically feeds the tape about 17.1mm at the begin- ning and end of each print operation. This creates identical margins on both sides of your text. -
Page 17: To Recall Text From Memory
Example: To recall the contents of Area 2 while memory contains the following text. Area 1: ABCDEFG Area 2: CASIO 1. While the input screen is on the display, press FUNCTION and then 1 (MEMO). • Note that text recalled from memory will replace any text currently on the display. -
Page 18: Part 8 Currency Conversion
Part 8 Currency Conversion Your Label Printer can perform currency conversion calculations according to a rate preset by you, and print the results on a label. Label Formats Important! • You can input text (and specify its style, attributes and size), which is printed to the left of the conversion result (“SALE!”... -
Page 19: To Select A Label Format
Cleaning the Printer Head and Roller A dirty printer head and roller can result in poor printing quality. If you have problems with print quality, use the following procedure to clean the printer head and roller. -
Page 20: Initial Power On Settings
ON key only. • This prompt confirms whether or not you want to initialize the Label Printer. 4. Press SET to initialize the Label Printer or ESC to abort the reset operation. • The following table shows the initial settings. Roller Power On JUST (2×2) - Page 21 Be sure to press the FEED key before perform- ing the tape cut operation. Important! When the printer is set up for manual tape feed, the tape is not fed automatically after printing is complete. Replace the tape cartridge with a new one.
-
Page 22: Error Messages
• • • • • Using Labels Label will not adhere to a surface. Possible Causes The backing paper is still Peel the backing paper from the back of the on the back of the tape. tape to expose the adhesive. Surface is unsuitable for Labels do not adhere well to surfaces that are affixing a tape. -
Page 23: Alpha Characters
BATT • Memory data has become ERR! corrupted for some reason. Alpha Characters E-22 Action • Delete text from one of the text memory areas and then store the new text. • Replace batteries. • Initialize the Label Printer. Symbols... -
Page 24: Specifications
Specifications Model: KL-100E Input Keyboard Layout: Typewriter (QWERTY) Character Types Alpha (English and other languages): 151 Numbers: 10 Symbols: 41 Display Type: Liquid crystal display Columns: 4 Character matrix: 5×7-dot Printing Type: Thermal transfer Speed: Approximately 6.76mm/second Width: 4mm (6mm tape) or 8mm (9mm, 12mm and 18mm tapes) Character Matrix: 24×24-dot... - Page 25 CASIO COMPUTER CO., LTD. 6-2, Hon-machi 1-chome Shibuya-ku, Tokyo 151-8543, Japan...
Need help?
Do you have a question about the KL-100E and is the answer not in the manual?
Questions and answers