
Subscribe to Our Youtube Channel
Related Manuals for HOMCOM A91-108


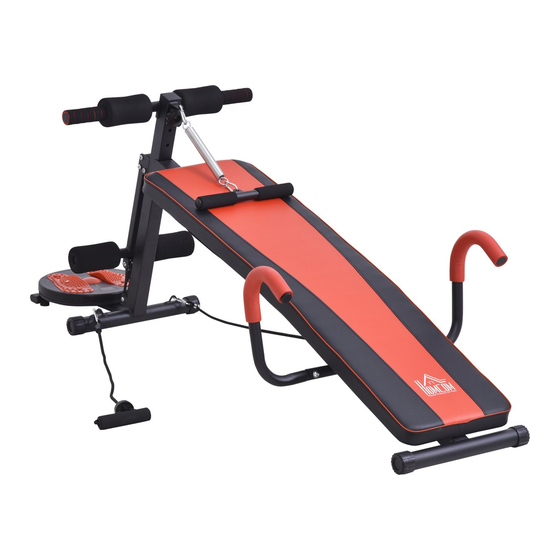
Summary of Contents for HOMCOM A91-108
- Page 1 INade077V01_UK A91-108 Sit-up Bench Installation Instruction READ AND SAVE THIS INSTRUCTION FOR FUTURE USE ASSEMBLY INSTRUCTION...
-
Page 2: Accessory List
Accessory List: (1)Main body support (1pcs include back cushion) (2) Handrail (1pcs) (3)Push-ups(one left and right)(2pcs) (4) Spring booster (1pcs) (5) Twisted disk (1pcs) (A) Plastic handle nutM8 (1pcs) (B) Blot (2pcs) (C) Anti-loose nut M8 (3pcs) (D)Semicircular head socket cap screws M8*35 (2pcs) (E)Semicircular head socket cap screws M8*55 (1pcs) - Page 3 Step 1. Install Handrail and hook rail First expand (1) the main body support, then the holes correspond, and finally fix the holes through the (B)bolt. When this laser is in a fixed state, the hook is in a rigid state, and the hook is in flexible rotation.
- Page 4 Step 3. Install Push-ups The first (3) is pinched into the fixed tube (note that the hole and the hole), and then passed through the (D) M8 * 35 in Semicircular head socket cap screws, and finally (C) M8 Anti-loose nut fastened. Step 4.
- Page 5 Step 5. Install Spring booster Press the (4) spring booster snap to place the snap opening (1) body support tab (Note: the snap opening must be closed after insertion). Step installation is complete: as shown...
- Page 6 Disassembly diagram:...
Need help?
Do you have a question about the A91-108 and is the answer not in the manual?
Questions and answers