Table of Contents
Advertisement
Quick Links
Advertisement
Table of Contents

Subscribe to Our Youtube Channel
Related Manuals for KaVo In eXam 3510


Summary of Contents for KaVo In eXam 3510
- Page 1 Technician's instructions KaVo In eXam 3510 Always be on the safe side.
- Page 2 Sales: Manufacturer: KaVo Dental GmbH Kaltenbach & Voigt GmbH Bismarckring 39 Bismarckring 39 D-88400 Biberach D-88400 Biberach Tel. +49 7351 56-0 www.kavo.com Fax +49 7351 56-1488...
-
Page 3: Table Of Contents
Technician's instructions KaVo In eXam 3510 Contents Contents Contents ................................1 1 Product description ............................2 1.1 Description of electronics .........................2 1.1.1 System overview ..........................2 1.1.2 Control unit ............................2 1.1.3 HF Mainboard ...........................6 1.2 Functioning of In eXam electronics ......................15 1.2.1 Basic mode (idling) .........................15 1.2.2 Switch between 4/7mA ........................15... -
Page 4: Product Description
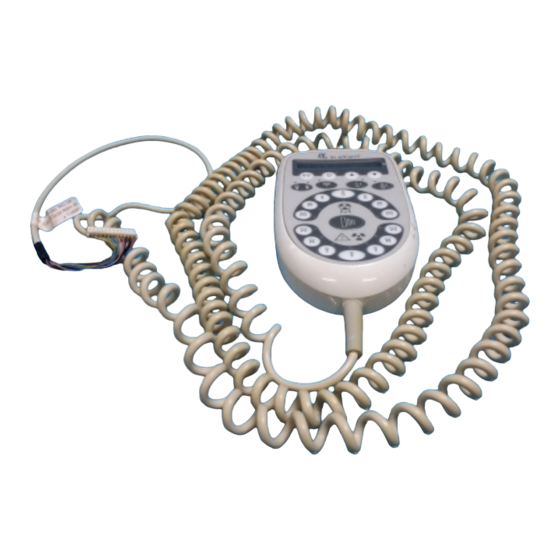
Technician's instructions KaVo In eXam 3510 1 Product description 1.1 Description of electronics 1 Product description 1.1 Description of electronics 1.1.1 System overview 1.1.2 Control unit Layout 2/32... - Page 5 Technician's instructions KaVo In eXam 3510 1 Product description 1.1 Description of electronics DIP switch Default Only the In eXam control unit is connected and active. Dig eXam-Mode blocked The tube current cannot be switched to 4 mA. 7 mA is permanently selected.
- Page 6 Technician's instructions KaVo In eXam 3510 1 Product description 1.1 Description of electronics Only film types 0-8 can be selected when the required combination of keys is pres‐ sed. External exposure switch or control unit When there is an external exposure switch, the exposure can be independently triggered by the In eXam control unit or the external switch.
- Page 7 Technician's instructions KaVo In eXam 3510 1 Product description 1.1 Description of electronics ▶ Once the display no longer shows anything, release the key. ▶ «EEPROM test» appears on the display. ▶ After the test is successful, «EEPROM passed» appears.
-
Page 8: Hf Mainboard
Technician's instructions KaVo In eXam 3510 1 Product description 1.1 Description of electronics 1.1.3 HF Mainboard Block diagram of mainboard In eXam HF mainboard Measure mains voltage ▶ Set the voltmeter to the 300VAC measuring range ▶ Set the voltmeter to the 300VAC measuring range ▶... - Page 9 Technician's instructions KaVo In eXam 3510 1 Product description 1.1 Description of electronics ▶ Turn on the In eXam ▶ Turn on the In eXam ▶ Note the no-load voltage: U = 230 V (+6%/-10%) ▶ Note the no-load voltage: U = 230 V (+6%/-10%) ▶...
- Page 10 Technician's instructions KaVo In eXam 3510 1 Product description 1.1 Description of electronics + 12 V, isolated 8/32...
- Page 11 Technician's instructions KaVo In eXam 3510 1 Product description 1.1 Description of electronics + 5 V, isolated 9/32...
- Page 12 Technician's instructions KaVo In eXam 3510 1 Product description 1.1 Description of electronics + 15 V 10/32...
- Page 13 Technician's instructions KaVo In eXam 3510 1 Product description 1.1 Description of electronics + 5 V 11/32...
- Page 14 Technician's instructions KaVo In eXam 3510 1 Product description 1.1 Description of electronics Heating voltage 12/32...
- Page 15 Technician's instructions KaVo In eXam 3510 1 Product description 1.1 Description of electronics Anode current 13/32...
- Page 16 Technician's instructions KaVo In eXam 3510 1 Product description 1.1 Description of electronics 14/32...
-
Page 17: Functioning Of In Exam Electronics
Technician's instructions KaVo In eXam 3510 1 Product description 1.2 Functioning of In eXam electronics 1.2 Functioning of In eXam electronics 1.2.1 Basic mode (idling) ▪ Turn on the mains voltage ▪ The mains voltage is applied via F2 (main fuse) and F4 (control circuit fuse) to the transformer T1, is transformed to 36 VDC, rectified and filtered. -
Page 18: Exposure
Technician's instructions KaVo In eXam 3510 1 Product description 1.2 Functioning of In eXam electronics ▪ Switching to 4 mA causes the relay to be energised, and the resistor is again series-connected >> R > I . LD 5 shines. - Page 19 Technician's instructions KaVo In eXam 3510 1 Product description 1.2 Functioning of In eXam electronics voltage so that a high voltage is applied to the anode of the x-ray that has almost no residual ripple (DC). ▪ Parallel to the tube is voltage divider by means of which the anode voltage is returned directly as a feedback signal to the comparator.
-
Page 20: Complete Exchange Of The X-Ray Head
Technician's instructions KaVo In eXam 3510 2 Complete exchange of the x-ray head 2.1 Remove the x-ray head 2 Complete exchange of the x-ray head 2.1 Remove the x-ray head Note Disconnect the In eXam from the mains, and make sure that it cannot be turned ▶... - Page 21 Technician's instructions KaVo In eXam 3510 2 Complete exchange of the x-ray head 2.1 Remove the x-ray head CAUTION If the scissor arm is not secured, the arm may shoot up once the x-ray head is removed. Risk of injury ▶...
-
Page 22: Install The X-Ray Head
Technician's instructions KaVo In eXam 3510 2 Complete exchange of the x-ray head 2.2 Install the x-ray head 2.2 Install the x-ray head ▶ Position the x-ray head on the mounting points ▶ Screw back in the 4 hex socket screws ⑤... -
Page 23: Final Tasks
Technician's instructions KaVo In eXam 3510 2 Complete exchange of the x-ray head 2.3 Final tasks 2.3 Final tasks ▶ Cut the provided rating plate to size, and affix it on the original rating plate on the x-ray head. ▶ Check the voltages and functions as described in the section 9 of the installation instructions, starting the In eXam ▶... -
Page 24: Exchanging The Scissor Arm
Technician's instructions KaVo In eXam 3510 3 Exchanging the scissor arm 3.1 Remove the x-ray head 3 Exchanging the scissor arm 3.1 Remove the x-ray head Note Disconnect the In eXam from the mains, and make sure that it cannot be turned ▶... - Page 25 Technician's instructions KaVo In eXam 3510 3 Exchanging the scissor arm 3.1 Remove the x-ray head CAUTION If the scissor arm is not secured, the arm may shoot up once the x-ray head is removed. Risk of injury ▶ Before disassembly, attach the safety strap or an equivalent type of retention before the arm system is lifted out of the bearing.
-
Page 26: Disassembling The Scissor Arm
Technician's instructions KaVo In eXam 3510 3 Exchanging the scissor arm 3.2 Disassembling the scissor arm 3.2 Disassembling the scissor arm Note The puller will help later to pull the new arm line into the support arm. When the old arm line is pulled out, the puller is pulled into the support arm and left there. -
Page 27: Assembling The Scissor Arm
Technician's instructions KaVo In eXam 3510 3 Exchanging the scissor arm 3.3 Assembling the scissor arm 3.3 Assembling the scissor arm ▪ Disassemble it as described in Installation Instructions, sections 6.4 & 6.5. ▪ Connect the arm cable as described in Installation Instructions, section 7.1.2 3.3.1 Prepare the arm system... - Page 28 Technician's instructions KaVo In eXam 3510 3 Exchanging the scissor arm 3.3 Assembling the scissor arm ▶ Carefully feed the cable into the extension arm. ▶ Completely attach the extension arm with the bearing bushing onto the scissor arm pivot pin, making sure that the nylon ring is in the correct position.
-
Page 29: Mount The Arm System
Technician's instructions KaVo In eXam 3510 3 Exchanging the scissor arm 3.3 Assembling the scissor arm 3.3.2 Mount the arm system ▶ Check that brake ⑪ at the bearing block has been released. ▶ Attach extension arm cover ⑫ of the wall box onto the bearing stud ▶... -
Page 30: Final Tasks
Technician's instructions KaVo In eXam 3510 3 Exchanging the scissor arm 3.4 Final tasks 3.4 Final tasks ▶ Check the adjustment of the arm system and adjust it if necessary according to installation instructions ▶ Check the voltages and functions (as described in the section, "Starting the In eXam"... -
Page 31: Troubleshooting For Service
Technician's instructions KaVo In eXam 3510 4 Troubleshooting for service 4.1 Error messages on the display 4 Troubleshooting for service 4.1 Error messages on the display Error message Reason Display Solution Error: Cooling The x-ray head is too hot The display appears upon Turn on the In eXam and The message also ap‐... -
Page 32: Measurements
Technician's instructions KaVo In eXam 3510 4 Troubleshooting for service 4.2 Measurements 4.2 Measurements 4.2.1 Voltage measurement on the mainboard Test point Test point [name] Range [name] 23 [GND] 15 [+ 36 V] 30 VDC < ...< 41 VDC 23 [GND] 16 [+ 12 V (LD 2)] 11.4 VDC <... -
Page 33: Measure Resistance On The Main Board
Technician's instructions KaVo In eXam 3510 4 Troubleshooting for service 4.2 Measurements 4.2.2 Measure resistance on the main board Test point [name] Test point [name] Range 27 [0 kV] 28 [+ kV] 10.6 < ...< 12.6 Ω 20 [0 mA] 21 [RTN mA] 1 kΩ... -
Page 34: Identifying Errors
Technician's instructions KaVo In eXam 3510 4 Troubleshooting for service 4.3 Identifying errors 4.3 Identifying errors Malfunction Cause Remedy Nothing works. The device is not directly connec‐ ▶ Check the connections. ted. The fuse on the main board is de‐...
Need help?
Do you have a question about the In eXam 3510 and is the answer not in the manual?
Questions and answers